Mastering the Art of Sharpening Kitchen Knives With a Rod
Many home cooks know the frustration of dull knives—they make prep work harder and can even be dangerous. You’re not alone; sharpening your kitchen knives is a skill many people struggle with.
Mastering this art with a rod can really make a difference in your cooking experience.
Mastering the art of sharpening your kitchen knives with a rod is about proper technique and choosing the right steel. Hold the steel vertically or at a comfortable angle, then position your knife at about 20 degrees.
Draw the blade across the rod, from heel to tip, repeating several times on each side. Avoid common mistakes like applying uneven pressure or cutting on hard surfaces.
Continue exploring these steps to guarantee your knives stay sharp and safe.
Key Takeaways
- Choose a high-quality honing rod that matches your knife’s material and size for the best results.
- Hold the rod vertically or at a slight angle, making sure it’s stable while you hone.
- Keep a consistent 20-degree angle between the blade and the rod to realign the edge effectively.
- Draw the blade down and across the rod from heel to tip. Repeat this 5-10 times on each side.
- After honing, wipe the blade regularly to remove metal particles and help maintain the sharp edge.
Why Honing Your Knife With a Steel Matters for Safety and Precision
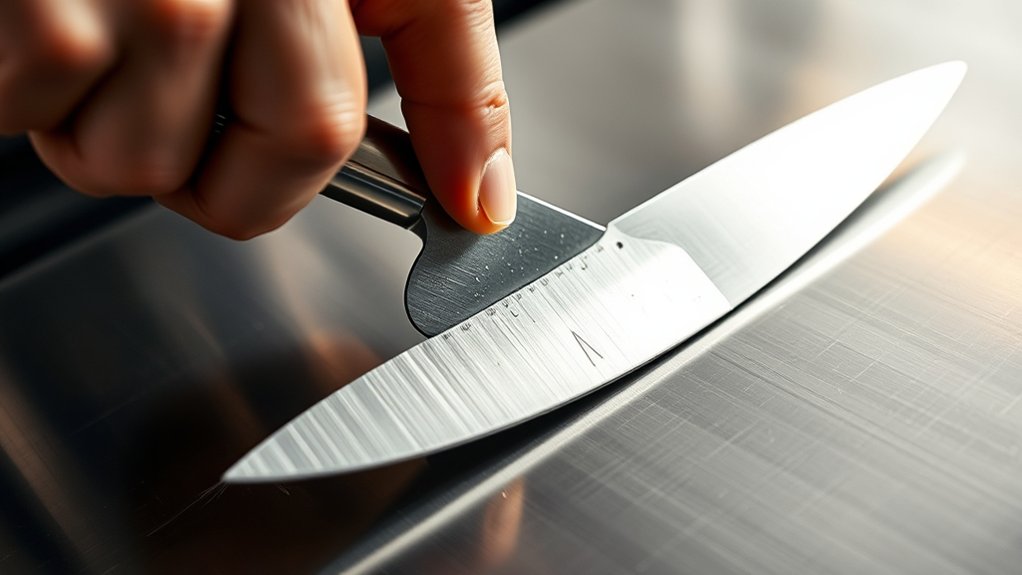
Honing your knife with a steel is essential because it keeps the edge aligned and in excellent condition, which directly impacts safety and cutting accuracy. When you hone regularly, you prevent the blade from becoming dull or bent, making each cut safer and more controlled.
A well-honed knife glides smoothly through ingredients, reducing the risk of slips that could cause injuries. It also guarantees precise cuts, which is especially important for presentation and even cooking.
Honing with a steel realigns the microscopic teeth of the blade, maintaining its sharpness over time. This process doesn’t remove metal like sharpening does; instead, it refreshes the edge, keeping it ideal for everyday use.
Consistent honing boosts your kitchen safety and helps you achieve professional-level results.
How to Choose the Best Sharpening Steel for Your Kitchen
How do you choose the right sharpening steel for your kitchen? First, think about the steel’s material. Look for high-carbon steel or ceramic, which are durable and work well.
Next, check the grit. A medium grit around 600 is great for regular maintenance, while finer grits like 1200+ are better for polishing your blades.
Finally, consider the size. Your steel should be long enough to match or be slightly longer than your knife. This makes sharpening easier and more comfortable.
To sum up:
- Material: High-carbon steel for durability, ceramic for precision.
- Grit: Medium (600) for everyday use, fine (1200+) for polishing.
- Size: Match or slightly longer than your knife for easier sharpening.
Choosing the right steel helps make sharpening safer and more effective, keeping your knives in top shape.
Step-By-Step: How to Properly Hone Your Knife With a Steel
To properly hone your knife with a steel, start by holding the steel vertically on a stable surface or at a comfortable angle against your hand. Position the knife at about a 20-degree angle to the steel’s surface.
Draw the blade down and across the steel from heel to tip, applying gentle, consistent pressure. Make sure the entire length of the blade contacts the steel. Repeat this motion 5-10 times on each side of the blade.
Draw the blade from heel to tip across the steel with gentle, consistent pressure on each side.
Maintain a steady angle and smooth motion throughout. Avoid pressing too hard—gentle honing realigns the edge without removing metal. After honing, wipe the blade clean with a damp cloth to remove any metal particles.
This routine keeps your knife sharp and ready for precise cuts.
Common Mistakes That Dull Your Knife and How to Avoid Them
One of the most common ways people dull their knives is by using improper cutting techniques or applying uneven pressure. Over time, this can chip or bend the blade. To keep your knives sharp, pay attention to how you handle them.
Here are three mistakes to watch out for:
- Cutting on hard surfaces – Using glass or stone countertops can dull blades faster. Always opt for a proper cutting board instead.
- Using a dull or damaged knife – Trying to cut with a dull blade puts extra force on the edge, which can cause damage. Keep your knives sharp for better performance.
- Applying uneven pressure while cutting – Inconsistent force can misalign or chip the blade. Maintain steady, controlled pressure for safer, cleaner cuts.
How Often Should You Hone or Sharpen Your Knives?
You might wonder when it’s time to hone or sharpen your knives to keep them working their best. Generally, honing should be done more often—about every 4-6 uses or when you notice a slight dullness. It realigns the edge without removing any metal, helping your knife stay sharp longer.
Sharpening, on the other hand, is needed less frequently—every few months or when honing no longer improves the edge. If your knife still feels dull after honing, it’s probably time to sharpen it. Pay attention to how your knife performs: if slicing becomes difficult or requires extra force, that’s a sign to sharpen.
Regular honing keeps your blade in good shape, while periodic sharpening makes sure it’s truly sharp. Adjust your routine based on how often you use your knives and what types you have.
Troubleshooting: How to Fix a Dull or Damaged Knife Edge
When your knife stops cutting smoothly, it’s a good idea to check for blade damage or a dull edge. You can often spot damage by visible nicks or bends, while a dull edge feels less sharp when you use it.
Fixing these issues involves specific sharpening techniques to restore a clean, effective cutting edge. With a little effort, your knife can cut like new again.
Identifying Blade Damage
A dull or damaged knife edge can be hard to spot at first glance, but catching the signs early can save you time and effort later on. Here are three main signs to look out for:
1. Uneven Cutting: If your knife pulls or tears through food instead of slicing smoothly, the edge might be chipped or bent.
2. Impossible Sharpness: When sharpening doesn’t bring the knife back to a sharp edge, or it still feels dull after honing, there could be damage.
3. Visual Chips or Nicks: Take a close look at the blade’s edge. Any dents, chips, or irregularities mean the blade needs attention.
Repairing a Dull Edge
Even a dull or damaged knife can often be revived with the right technique, saving you the hassle of replacing it. Start by inspecting the edge for nicks or chips. If you notice damage, use a diamond rod to carefully straighten and remove imperfections.
For dull blades, a few passes on a sharpening rod can restore sharpness. The key is maintaining a consistent angle and applying steady pressure.
| Damage Type | Repair Method | Tips |
|---|---|---|
| Nicks or Chips | Use diamond or ceramic rod | Work slowly to avoid further damage |
| Dull Edge | Regular honing with rod | Maintain proper angle consistently |
| Bent Blade | Gentle realignment | Apply light pressure, check frequently |
| Rust or Stains | Clean with abrasive rod | Follow with polishing to restore shine |
Frequently Asked Questions
Can Honing With a Steel Permanently Sharpen My Knife?
Honing with a steel doesn’t permanently sharpen your knife. It realigns the blade’s edge, helping it stay sharp longer.
Regular honing keeps the edge in good shape but won’t fix a dull or damaged knife. To restore a dull blade, you’ll need to sharpen it with a stone or grinder.
Think of honing as routine upkeep, while sharpening is more like a full restoration. Both are important for a razor-sharp knife, but they serve different purposes.
What Materials Are Best for Sharpening Steels?
You should choose sharpening steels made from high-quality materials like diamond, ceramic, or hardened steel.
Diamond steels are incredibly durable and effective for restoring dull blades quickly. Ceramic steels are gentle yet effective for maintaining sharpness, especially on delicate knives.
Hardened steel steels are versatile and long-lasting, making them suitable for most kitchen knives. Avoid low-quality steels, as they can wear out quickly and won’t give you the best sharpening results.
How Do I Know if My Knife Needs Honing or Sharpening?
You can tell if your knife needs honing if it starts to drag or tear through food, feeling less smooth than usual. If it doesn’t cut cleanly or requires more pressure, it’s time to sharpen.
Honing realigns the edge, while sharpening actually removes metal to restore sharpness. Regular honing keeps your knife performing well, but when that no longer helps, sharpening is the next step.
Is It Safe to Sharpen Knives at Home Without Professional Help?
Yes, it’s generally safe to sharpen knives at home if you follow proper techniques and safety precautions.
Always use a stable surface, keep your fingers clear of the blade, and work slowly.
Use a sharpening rod or stone designed for kitchen knives, and avoid rushing.
If you’re unsure, watch tutorials or consider taking a class.
With patience and care, you can sharpen your knives safely and effectively at home.
How Do Different Steel Grits Affect Honing Effectiveness?
Think of steel grit as the brushstrokes on a canvas. Finer grits craft a smoother, more refined edge, like a whisper of silk. Coarser grits remove roughness, like a sculptor chiseling away excess.
Using a high grit sharpens your knife with precision, giving you a razor-sharp cut. Lower grits quickly reshape dull blades and get the job done faster.
Mixing grits wisely helps you achieve a sharp, durable edge that’s tailored to your cutting needs. Each grit has a role, depending on what kind of finish or sharpness you’re aiming for.
Conclusion
So, next time your knife feels dull, remember honing isn’t just about keeping it sharp; it’s your secret weapon for safety and precision.
Ironically, neglecting this easy step might lead you to replace your knives sooner rather than later.
But don’t worry—using a trusty steel and a little practice, you’ll master the art of keeping your blades razor-sharp.
No fancy gadgets needed—just your steel and some patience.
Happy honing, and enjoy slicing like a pro with well-maintained knives!