7 Simple Steps to Unclog Your Kitchen Drain
Dealing with a clogged kitchen drain is a common headache that many of us face. You’re not alone—slow drainage, foul odors, and stubborn blockages can be frustrating and disruptive.
Luckily, fixing it doesn’t have to be complicated or expensive.
If your kitchen drain is clogged, start by recognizing signs like slow drainage or odors. Gather tools like a plunger, baking soda, and vinegar.
Begin with hot water and baking soda to break down the buildup. Use the plunger to dislodge stubborn blockages.
Make a vinegar and salt mixture for extra cleaning, then remove and clean the drain trap if necessary.
Follow these simple steps, and you’ll uncover more tips to keep your drain clear and free-flowing.
Key Takeaways
– Identify signs of a clog, like slow drainage, bad odors, or water pooling around the drain.
It’s usually pretty obvious when your kitchen drain is backed up. Keep an eye out for these signs so you can tackle the problem early.
– Use a plunger to create pressure and dislodge the blockage.
Grab a plunger and give it a good few pushes. This can often loosen whatever’s blocking the pipe.
– Pour boiling water mixed with baking soda into the drain to break down buildup.
Boil some water and mix it with baking soda. Pour this mixture down the drain to help break up grease and gunk.
– Remove and clean the drain trap to clear accumulated debris.
If things still aren’t flowing, try taking out the drain trap underneath. Give it a thorough clean to remove any debris that’s causing the clog.
– Implement preventive measures like drain strainers and proper grease disposal to avoid future clogs.
To keep clogs at bay, use drain strainers to catch food particles. And remember, don’t pour grease down the drain—it’s a common culprit.
How to Recognize If Your Kitchen Drain Is Clogged
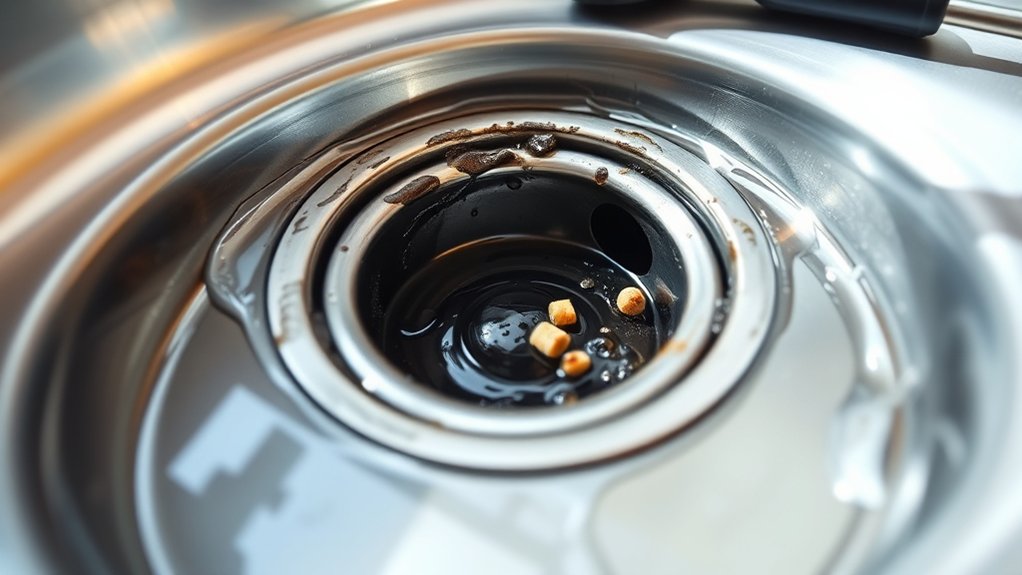
One of the easiest ways to tell if your kitchen drain is clogged is by noticing slow drainage. If water takes longer than usual to go down the sink, it’s a clear sign something’s blocking the pipe.
You might also see water pooling around the drain or hear gurgling sounds when you run the tap. Sometimes, a foul odor wafts up from the sink, indicating buildup or trapped debris.
If you notice water backing up or not draining at all, that’s a strong indicator of a clog. Keep an eye on these signs; they help you catch the problem early before it worsens.
Recognizing these symptoms allows you to take action quickly, preventing potential damage or more complicated repairs down the line.
Gather Your Tools: Plunger, Baking Soda, Vinegar, and More
Before you start clearing the clog, gather the essential tools: a plunger, baking soda, vinegar, and possibly a drain snake or gloves. The plunger helps create pressure to loosen debris, so have it ready. Baking soda and vinegar work together to break down buildup naturally—keep these on hand.
A drain snake can help dislodge stubborn blockages if needed. Gloves protect your hands from grime and harsh chemicals. Make sure your tools are clean and in good condition.
Having everything prepared saves time and prevents interruptions once you begin. Check that the plunger has a good seal over the drain opening. With your tools ready, you’re all set to start the unclogging process confidently and efficiently.
Try Hot Water and Baking Soda First to Clear the Blockage
Start by boiling a kettle of water and carefully pouring it directly into the drain. This helps loosen grease and debris that might be causing the clog.
Next, sprinkle about half a cup of baking soda into the drain opening. Follow this with another cup of hot water to help the baking soda move down and start breaking up the blockage.
The fizzing reaction between the baking soda and hot water can help dislodge minor obstructions. Let the mixture sit for 15-30 minutes. During this time, avoid running more water.
Afterward, pour another round of hot water into the drain to flush away loosened debris. This simple combination often clears minor clogs without harsh chemicals or tools.
Use a Plunger to Dislodge the Clog Effectively
Place the plunger firmly over the drain opening, making sure there’s a tight seal. Ensure enough water is in the sink to cover the rubber part of the plunger—that helps create better suction.
Hold the handle tightly and push down with steady pressure, then pull up quickly without breaking the seal. Repeat this up-and-down motion several times, keeping the pressure and seal consistent.
The goal is to generate enough force to dislodge the clog. If you feel resistance, keep trying; sometimes it takes a few minutes. Just avoid using excessive force that could damage the pipes.
Once the blockage loosens, water should drain smoothly. Carefully remove the plunger, then run water to check if the drain is clear. This simple method often clears stubborn clogs effectively.
Make and Use a Vinegar and Salt Drain Cleaner
To make a vinegar and salt drain cleaner, gather equal parts of white vinegar and salt. Mix them together until the salt dissolves, then pour the solution directly into your drain.
Let it sit for about 30 minutes, then flush with hot water to clear minor clogs. It’s a simple, natural way to keep your drains clean!
Ingredients Needed
You’ll need just two simple ingredients to make a natural drain cleaner: vinegar and salt. Vinegar acts as a natural disinfectant and helps break down grime, while salt provides abrasive grains that scrub away buildup. Use regular white vinegar for the best results since it’s cheap and effective.
For salt, plain table salt or coarse sea salt works well. Keep these ingredients handy in your kitchen for quick cleaning. No special tools are necessary—just your chosen vinegar and salt.
Once you have them, you’re ready to prepare the mixture. These ingredients are safe, inexpensive, and eco-friendly, making them a great alternative to harsh chemical drain cleaners.
With just vinegar and salt, you can tackle minor clogs efficiently and naturally.
Preparing the Mixture
Mixing your vinegar and salt is simple and quick. First, measure about half a cup of salt and pour it directly into your drain. Then, add half a cup of vinegar over the salt.
The mixture will fizz and bubble, helping to break down the grime and grease clogging your pipes. To get the best results, consider these tips:
- Use coarse salt for better scrubbing power.
- Warm the vinegar slightly for a stronger reaction.
- Mix the salt and vinegar in a bowl first if you prefer.
- Let the mixture sit in the drain for 15-30 minutes to do its thing.
This simple combo creates a natural, effective cleaner to loosen debris and clear out your drain.
Applying and Flushing
Once the salt and vinegar mixture has had enough time to sit and loosen debris, it’s time to flush your drain. Boil a kettle of water and carefully pour it down the drain in stages, letting each pour work through the buildup. This hot water helps carry away loosened grime and residue.
If your drain is still slow, repeat the process or add a bit more salt and vinegar, then let it sit again before flushing. Avoid using harsh chemicals afterward, as they can react with the natural cleaner. Regular flushing keeps your drain clear and prevents future clogs.
Remove and Clean the Drain Trap If Needed
First, find the drain trap under your sink. Carefully remove it and take out any debris or buildup inside.
Make sure to reassemble it correctly so your drain works smoothly again.
Locate the Drain Trap
To find the drain trap, look under your sink where the pipes connect. You’ll see a curved or S-shaped pipe that holds water and keeps odors from coming up.
The trap is usually screwed into the drain pipe and connected to the wall or floor drain.
Here are some tips to help you spot it quickly:
- Look for a U-shaped or S-shaped pipe right beneath the sink drain.
- Follow the pipe from the sink drain opening down to where it curves.
- Check for a slip joint or nut that secures the trap in place.
- If you see water or debris at the bend, that’s probably your trap.
Knowing where it is helps you decide if it needs cleaning or if you should take further steps to unclog.
Remove the Trap Carefully
Before attempting to remove the drain trap, make sure to place a bucket or pan underneath it to catch any water or debris that may spill out. Loosen the slip nuts on both ends of the trap using pliers or your hands. Turn them counterclockwise until they come loose.
Carefully lower the trap, being mindful of any remaining water or debris inside. If the trap is stuck, gently wiggle it to loosen it without forcing. Once removed, check for buildup or obstructions inside the trap.
Clean out any debris with a brush or cloth. If the trap is damaged or heavily clogged, consider replacing it. Handle the trap gently to avoid damaging the pipes or fittings. Now you’re ready to proceed with cleaning or further troubleshooting.
Clean and Reassemble Properly
Once you’ve removed the trap and inspected it for blockages, it’s time to thoroughly clean it to confirm proper drainage. Use a brush or an old toothbrush to scrub away any grease, soap scum, or debris inside the trap. Rinse it with hot water to remove loosened grime. Make sure to check the trap for cracks or damage, replacing it if necessary.
Before reassembling, dry all parts completely to prevent mold. When putting everything back together, verify all connections are tight but not overly tightened to avoid leaks. Double-check that the trap is properly aligned and secure.
This step helps prevent future clogs and keeps your drain flowing smoothly. Use a brush to scrub the trap thoroughly, then rinse with hot water to remove residue. Check for cracks or damage before reassembling, and tighten connections without overdoing it.
Simple Tips to Prevent Kitchen Sink Clogs in the Future
Preventing kitchen sink clogs starts with simple, proactive habits that keep your drain flowing smoothly. First, avoid pouring grease or oil down the drain because they solidify and cause blockages.
Use a drain strainer to catch food scraps and debris before they go down. Regularly flush the drain with hot water or a mixture of baking soda and vinegar to clear buildup.
Be mindful of what you dispose of and don’t overload the sink with too much waste at once. Here’s a quick guide:
| Tip | Why it helps |
|---|---|
| Use a drain strainer | Stops debris from entering drain |
| Avoid pouring grease | Prevents solid buildup |
| Regular hot water flush | Keeps pipes clear |
Consistent habits save you time and money on repairs.
Frequently Asked Questions
How Often Should I Clean My Kitchen Drain to Prevent Clogs?
You should clean your kitchen drain at least once a month to prevent clogs. Regular maintenance helps remove grease, soap scum, and food particles that build up over time.
After cooking or cleaning, run hot water down the drain for a few minutes. It’s a simple step that can make a big difference.
Consider using a natural drain cleaner or baking soda and vinegar monthly for extra prevention. Staying consistent keeps your drain flowing smoothly and avoids costly repairs.
Are There Any Household Items That Can Damage My Pipes?
Did you know that pouring the wrong household items down your sink can cause significant pipe damage?
You should avoid dropping grease, coffee grounds, or harsh chemicals like bleach or drain cleaners.
These substances can corrode pipes or cause buildup over time. Instead, use natural remedies or call a professional for clogs.
Protect your plumbing by being mindful of what you dispose of.
This simple step can save you money and prevent costly repairs.
Can Food Scraps Be Safely Disposed of Down the Drain?
No, food scraps shouldn’t go down the drain. They can cause clogs and attract pests, which can lead to plumbing problems.
Instead, scrape leftovers into the trash or compost bin. Small food particles might wash away, but larger scraps like rice, pasta, or grease can quickly cause blockages.
Always use a strainer to catch debris and dispose of food waste properly. This helps keep your pipes clear and working well.
What Are Signs of a Slow-Draining Sink Indicating a Larger Problem?
You’ll notice your sink draining slowly, with water taking longer to clear or pooling around the drain.
You might also hear gurgling sounds or smell foul odors lingering.
These signs point to a blockage or buildup deeper in your pipes.
If you ignore it, the problem could get worse and lead to backups or damage.
It’s a good idea to investigate further or call a plumber before things escalate.
When Should I Call a Professional Plumber Instead of DIY Solutions?
You should call a professional plumber when DIY solutions don’t clear the clog or if your drain keeps clogging after multiple tries.
It’s also a good idea if you notice multiple drains backing up, foul odors, or leaks around your pipes.
Don’t risk making the problem worse or causing water damage.
Trust a plumber to diagnose and fix complex issues safely and efficiently.
Conclusion
Remember, a stitch in time saves nine. Addressing small drain issues early can prevent bigger problems later on.
By following these simple steps, you can keep your kitchen sink flowing smoothly without needing to call a plumber. Regular maintenance and mindful use really do make a difference.
Keep your drain clear, and your kitchen will run happily. A well-maintained sink is the heart of a happy home. Stay proactive, and enjoy a clog-free kitchen!