10 Essential Steps to Plumb Your Kitchen Sink Like a Pro
Many homeowners find plumbing their kitchen sink to be a daunting task, especially if you’re not sure where to start or worry about making mistakes. You’re not alone—plumbing can seem complicated, but with the right guidance, you can do it yourself and save money.
To plumb your kitchen sink like a pro, start by gathering all necessary tools and materials. Then turn off the water supply and prepare your workspace. Remove the old sink and install the new faucet, connecting water lines securely.
Next, attach the drain assembly and P-trap, making sure all fittings are tight. Regular maintenance helps prevent leaks and keeps everything running smoothly.
If problems happen or you’re unsure, knowing when to call a professional is key.
Keep going to uncover detailed steps and tips for success.
Key Takeaways
- Turn off the water supply and clear your workspace before you start any plumbing work.
- Remove the old sink and disconnect the drain pipes carefully. It’s a good idea to use a bucket to catch any leftover water.
- Install the new faucet and connect the water supply lines securely. Just be careful not to over-tighten, as that could cause damage.
- Reconnect the drain pipes and secure the mounting hardware. Make sure everything is properly aligned and sealed so there are no leaks.
- Now, turn the water back on and check all your connections. Run some water and look for any leaks, tightening fittings if needed.
Gather the Right Tools and Materials for Your Kitchen Sink Project
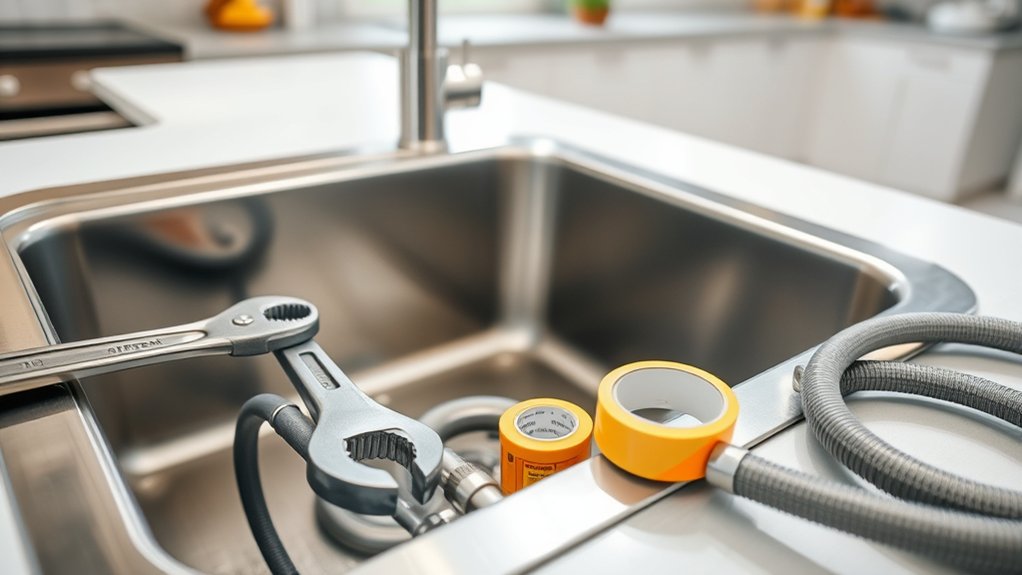
Before you start your kitchen sink project, it’s important to gather all the tools and materials you’ll need. You’ll want adjustable wrenches, pliers, a bucket, and some plumber’s putty or silicone sealant.
Make sure you have replacement pipes, fittings, and a drain assembly that fit your sink. It’s also handy to have a flashlight for better visibility and some towels or rags for cleanup.
Check your local hardware store for the right-sized pipes and fittings, and double-check your faucet’s specifications before you buy. Having everything ready will save you time and prevent interruptions once you begin.
Double-check your list so you don’t forget anything essential. Working without the right tools can lead to frustration and mistakes. Proper preparation is key to a smooth plumbing process.
Turn Off Water and Set Up Your Workspace
Turning off the water supply is an important first step to avoid leaks and water damage while working on your sink. Find the shut-off valves under your sink—usually one for hot water and one for cold. Turn each valve clockwise until they’re fully closed.
If you don’t have valves under the sink, you’ll need to shut off the main water supply for your home. Next, clear out the area around your sink to create a safe workspace. Remove any stored items underneath and cover nearby surfaces with a drop cloth to catch debris.
Gather all your tools and materials nearby so you can access them easily. Make sure your workspace is well-lit and ventilated. Setting up a tidy, organized area will make the whole process smoother and help prevent accidents or damage.
Remove the Old Sink and Clear the Plumbing Area
With the water supply shut off and the workspace prepared, it’s time to remove the old sink. Start by disconnecting the drain pipes and any mounting brackets or clips holding the sink in place.
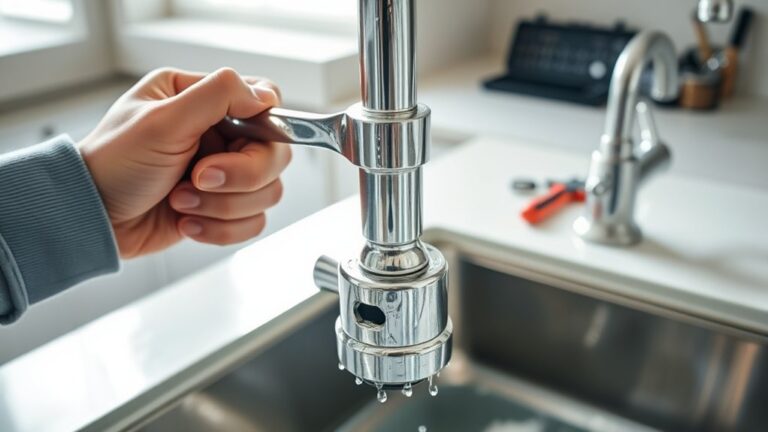
Use a wrench to loosen and detach the drain and P-trap, keeping a bucket nearby to catch any residual water. Carefully cut through any sealant or caulk around the sink’s edge with a utility knife.
Loosen drain pipes with a wrench and carefully cut sealant around the sink’s edge.
Once loosened, gently lift the sink out of the countertop. Ask for help if needed. Clear the surrounding area of debris, old sealant, and leftover parts.
This creates a clean workspace for the new sink installation and helps prevent obstructions or damage during the process.
Install the Faucet and Connect the Water Supply Lines
Begin by attaching the faucet to the sink or countertop according to the manufacturer’s instructions. Confirm the mounting hardware is secure and the faucet sits level. Once in place, tighten any nuts or screws to prevent leaks.
Next, connect the water supply lines to the faucet’s inlets, making sure hot and cold lines are matched correctly. Use an adjustable wrench to tighten fittings, but avoid over-tightening, which could damage components.
Turn on the water supply valves slowly to check for leaks. If you notice drips or leaks, tighten connections slightly until they stop. Make sure the hoses aren’t kinked or pinched.
Once everything is secure and leak-free, test the faucet by turning it on and off to confirm proper water flow.
Connect the Drain Assembly and P-Trap Securely
To make sure your drain assembly and P-trap are secure, focus on proper alignment techniques.
Make sure all parts are lined up correctly before tightening so the connections are snug and leak-free. Use the right tools to tighten everything well without over-tightening and damaging the fittings.
Proper Alignment Techniques
Making sure the drain assembly and P-trap are properly aligned is essential for a leak-free connection. First, position the drain assembly so it lines up smoothly with the P-trap, avoiding any twisting or bending of the pipes.
Check that the pipes sit flush against each other, with no gaps or misalignments. Use your hands to gently adjust the fittings until everything lines up correctly.
Keep the assembly straight and level to prevent stress on the connections. If needed, loosen and reposition fittings slightly to achieve perfect alignment.
Proper alignment guarantees that the seal will be tight and secure, reducing the risk of leaks down the line. Take your time to double-check the positioning before moving on to tightening the connections.
Tightening Connections Effectively
Once the drain assembly and P-trap are properly aligned, focus on tightening the connections securely to prevent leaks. Use adjustable pliers or a wrench to tighten the slip nuts by hand first, then give them an extra quarter turn.
Avoid over-tightening, which can crack fittings or strip threads. Make sure the connections are snug but not forced, so you get a good seal. As you tighten, run water periodically to check for leaks and tighten further if needed.
Pay close attention to joints where pipes connect, since these are common leak points. Confirm all nuts are evenly tightened to keep everything aligned properly. Remember, proper torque is key—tight enough to prevent leaks but not so tight you damage the parts.
Test for Leaks and Fix Common Plumbing Problems
The first step in diagnosing plumbing issues is to carefully check for leaks around your sink and pipes. Turn on the faucet and run water to see if any drips or puddles form underneath. Look for wet spots, corrosion, or mineral buildup on fittings and joints.
If you notice leaks, tighten the connections gently with a wrench. Avoid overtightening, which can cause damage. For persistent leaks, replace worn-out washers or seals.
Check for clogs or slow drainage by observing how quickly water drains. If you encounter frequent clogs or dripping, inspect the pipes for cracks or corrosion. Address minor issues promptly to prevent bigger plumbing problems down the line.
Regularly testing your sink helps keep your plumbing in top shape.
Maintain Your Sink Plumbing to Prevent Future Issues
Regularly inspecting your sink plumbing helps catch problems early before they turn into costly repairs. If you notice leaks, fix them quickly to prevent water damage and mold growth.
Staying proactive keeps your sink working smoothly and helps it last longer. Taking a little time now can save you from bigger headaches later.
Regular Inspection Practices
Inspecting your sink plumbing regularly helps catch small problems before they turn into costly repairs. Keeping an eye on things ensures your system runs smoothly and prevents water damage. To stay ahead, try these simple practices:
- Check for leaks: Look under the sink for drips or damp spots around fittings and pipes.
- Look for corrosion: Examine metal parts for rust or mineral buildup that could weaken connections.
- Test water flow: Run the tap and watch how quickly the water drains; slow drainage might mean a clog or blockage.
Doing these checks weekly helps you spot potential issues early. Fix small problems right away to avoid bigger repairs down the line. Staying vigilant saves you time, money, and stress, keeping your kitchen sink leak-free and working well.
Timely Leak Repairs
When you notice a leak early and fix it promptly, you can prevent small issues from turning into costly repairs or water damage. Acting fast also helps reduce water waste and protects your cabinets and flooring from rot.
First, find where the leak is coming from—whether it’s a loose connection, a cracked pipe, or a faulty seal. Tighten fittings or swap out worn washers to stop the drip.
For bigger problems, turn off the water supply before you start repairs. Don’t wait if you see a persistent leak; it can get worse over time and cause mold or structural damage.
Keep a basic plumbing toolkit nearby for quick fixes. Regularly inspecting and fixing leaks keeps your sink plumbing in good shape, saving you money and hassle later on.
Know When to Call a Professional Plumber
Sometimes, plumbing issues can be more complicated than they seem, and trying to fix them yourself might cause more damage. Knowing when to call a professional is key to avoiding costly repairs.
Attempting DIY fixes can worsen plumbing problems; know when to call a professional to prevent costly damage.
You should contact a plumber if you’ve tried basic fixes with no success, and the problem keeps getting worse or doesn’t go away.
If the clog is severe, affecting multiple drains or causing water backup, it’s time to get professional help.
Also, if you notice leaks that are hard to find or stop, especially behind walls or under floors, call a plumber.
If you’re unsure about how serious the problem is or lack the right tools and experience, it’s smarter to hire a pro.
This way, you prevent further damage, save time, and ensure the job gets done right and safely.
Safety Tips for DIY Sink Plumbing Projects
Before you start your sink plumbing project, make sure to prioritize safety. It’s important to wear protective gear like gloves and goggles to keep yourself safe.
Next, turn off the water supply to avoid any accidental leaks or flooding. Also, use the right tools for the job to make things easier and prevent accidents.
Taking these steps will help you work safely and ensure your project turns out well without any issues.
Wear Protective Gear
Wearing protective gear is essential to stay safe during any DIY sink plumbing project. It shields you from potential hazards like sharp tools, chemical splashes, and debris.
To guarantee maximum safety, consider these items:
- Safety goggles to protect your eyes from debris and splashes.
- Work gloves to guard your hands against sharp edges and hot surfaces.
- A dust mask or respirator if you’re working with dust, mold, or chemical cleaners.
Proper gear minimizes injury risk and keeps you focused on the task. Always inspect your protective equipment before starting and replace any damaged items.
Turn Off Water Supply
Turning off the water supply is an important step to prevent leaks and water damage while working on your sink.
First, find the shutoff valves under the sink — usually, there’s one for hot water and one for cold.
Turn both valves clockwise to close them completely. If your home has a main water shutoff valve, you might want to turn that off too to stop water flow to the whole house.
Double-check that the water has stopped by opening the faucet to release any remaining pressure.
It’s a good idea to keep a bucket or towel nearby to catch any residual water.
Once the water supply is safely off, you’re ready to proceed with your plumbing tasks confidently.
Use Proper Tools
Using the right tools is essential for safely and effectively completing your sink plumbing project. Having the proper equipment prevents damage and reduces injury risks.
First, make sure you have an adjustable wrench to loosen or tighten fittings securely. Second, a pipe wrench is great for gripping larger pipes firmly without slipping.
Keep a bucket nearby to catch water when disconnecting pipes. This helps prevent messes and keeps things tidy. Using the correct tools helps you work efficiently and minimizes the chance of damaging components.
Always double-check that your tools are in good condition before you start. Wear safety gloves and goggles to protect yourself. Proper tools make your task safer and help you achieve a professional-looking installation.
Frequently Asked Questions About Kitchen Sink Plumbing
Have questions about kitchen sink plumbing? You’re not alone. Common concerns include leaks, clogs, and water flow issues.
If your sink drains slowly, you might need to clear out a clog or check for blockages in the pipes. Leaks often happen at connections or seals, so inspecting and tightening fittings can fix the problem.
Uncertain about replacing parts? It’s usually straightforward if you turn off the water supply first. Remember, using the right tools makes all the difference.
If you’re still uncertain, consulting a professional guarantees you avoid causing further damage. Regular maintenance and inspections can prevent most issues.
If something seems beyond your skill level, don’t hesitate to call a plumber. Quick fixes save time and money in the long run.
Frequently Asked Questions
How Do I Identify the Correct Pipe Sizes for My Sink?
You identify the correct pipe sizes by measuring your current pipes with a ruler or tape measure, focusing on the diameter.
Check the manufacturer’s specifications or labeling on existing pipes if available. If you’re replacing parts, match the size to the old pipes.
For new installations, it’s best to consult local plumbing codes or visit a hardware store with your sink’s specifications.
Proper sizing guarantees smooth drainage and helps prevent leaks.
What Are the Signs of a Hidden Leak Behind the Wall?
Think of a hidden leak behind your wall as a silent predator. You might notice a musty smell, unexplained water stains, or paint that’s bubbling or peeling.
Mold growth or an increase in your water bill also signals trouble. Listen carefully for the faint sound of dripping or running water when no fixtures are in use.
Catching these signs early helps prevent costly damage and keeps your home safe.
How Long Should I Wait Before Turning the Water Back On?
You should wait at least 15 to 30 minutes before turning the water back on. This gives the sealant or joint compound enough time to set properly and helps prevent leaks.
During this wait, make sure all connections are tight and secure. If you’ve installed new fixtures or repaired pipes, double-check everything just to be safe.
Once the waiting period is over, slowly turn the water on. Watch for any leaks or drips before restoring full water flow.
Can I Replace a Double Sink With a Single Sink Easily?
Yes, you can replace a double sink with a single sink, but it’s not always straightforward. You’ll need to check if the existing plumbing lines and countertop can fit the new sink’s size and shape.
Measure carefully and be ready to make adjustments or reroute the plumbing if necessary. Turning off the water supply and removing the old sink carefully will help ensure the process goes smoothly.
What Are Common Mistakes to Avoid During Installation?
During installation, don’t rush the process. Rushing can cause leaks or improper fitting. Take your time to get everything right.
Double-check all connections to make sure they’re tight and sealed properly. Pay special attention to the drain and water supply lines. It’s also important to turn off the water before you start.
Avoid cutting corners with cheap materials or skipping the testing for leaks once everything is in place. Taking your time and double-checking helps prevent common mistakes.
Conclusion
Now that you know the essential steps, you’re almost ready to tackle your kitchen sink project. Just remember, skipping even one detail can cause leaks or costly repairs later on.
Are you prepared to handle unexpected surprises? With the right tools and knowledge, you can plumb like a pro in no time.
Stay vigilant, follow each step carefully, and keep an eye out for signs of trouble. You never know what might happen next, but with these tips, you’ll be ready to handle it.