Unclog Your Kitchen Sink With Garbage Disposal: a Step-By-Step Guide
Dealing with a clogged kitchen sink can be super frustrating, especially when you’re trying to get dinner on the table or clean up quickly.
You’re not alone—many people struggle with stubborn blockages that seem impossible to clear. Luckily, there are simple, effective ways to unclog your kitchen sink with a garbage disposal, so you can get back to your routine without hassle.
To unclog your kitchen sink with a garbage disposal, start by turning off the power and clearing the area.
Use a plunger to remove the blockage, then try a natural remedy with baking soda and vinegar, letting it sit before flushing with hot water.
If the clog persists, consider using a drain snake or calling a plumber.
Keep exploring these steps to learn more tips for effectively clearing your sink.
Key Takeaways
- Turn off the power and remove any debris before trying to clear the clog manually or using natural remedies.
- You can use baking soda and vinegar to safely and effectively dissolve the buildup in your drain.
- After that, flush the drain with hot water to help loosen grease and debris.
- If natural remedies don’t do the trick, try using a plunger or a drain snake.
- If the clog still persists or gets worse, it’s best to contact a professional plumber.
How Does a Garbage Disposal Help Unclog Your Sink?
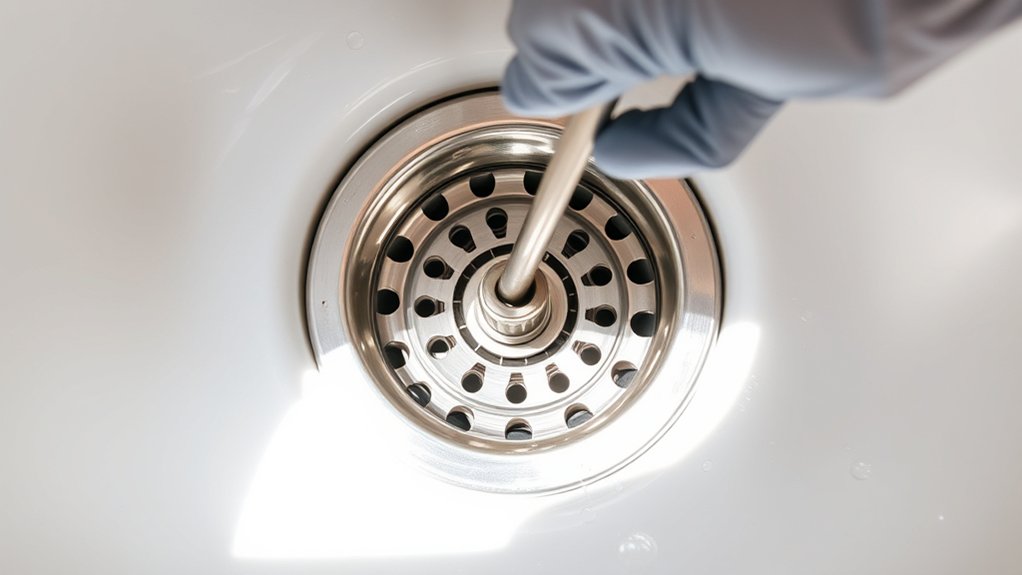
A garbage disposal can be a helpful tool in preventing sink clogs by breaking down food waste before it builds up in the pipes. When you turn it on, it grinds food particles into tiny pieces, making them easier to wash away with water.
This process stops large chunks from sticking to the pipes’ sides or forming blockages. By shredding waste as you wash dishes, it keeps your drain clear and reduces the chances of clogs over time.
Regular use of the disposal helps maintain a steady flow, preventing buildup that could lead to stubborn clogs. It’s a simple yet effective way to keep your sink functioning smoothly and avoid major drain issues.
How Can You Tell if Your Kitchen Sink Is Clogged?
Even with a garbage disposal helping to prevent clogs, you might notice signs that your sink is starting to clog. Watch for slow drainage, which indicates water isn’t flowing smoothly.
You could also see water pooling in the sink, even after running the disposal. Foul odors may creep up, signaling trapped debris.
Gurgling sounds or bubbling when you run water are also warning signs. Finally, if water backs up into the sink from the drain, it’s a clear sign of a clog.
Recognizing these signs early can save you from a bigger mess later. Stay alert to these signals so you can act before the clog worsens and causes more frustration or damage.
Addressing issues promptly keeps your sink working efficiently and prevents costly repairs.
How to Prepare Your Kitchen and Garbage Disposal for Unclogging
Before starting, clear the area around your sink to prevent accidents and make working easier.
Next, remove any debris or objects from the drain and disposal so you don’t push debris further down.
Finally, turn off the power supply to your garbage disposal to stay safe while working on the clog.
Clear Surrounding Area
To effectively unclog your sink, start by clearing the area around the disposal and removing any items stored nearby. This creates a safe, clutter-free space, making your work easier and preventing accidents.
As you clear the area, you’ll feel more confident and in control, which helps reduce frustration. Keep these in mind:
- Gain peace of mind knowing you’re prepared for any surprises.
- Create a safer workspace free of tripping hazards.
- Reduce stress by having everything you need within reach.
- Feel empowered by taking control of the situation.
- Enjoy a sense of accomplishment as you prepare to fix the clog.
Clearing the area sets the stage for a quick, effective unclogging process, making everything smoother and less stressful.
Remove Debris Safely
Once you’ve cleared the surrounding area, the next step is to remove any debris that could hinder your efforts. Carefully inspect the sink and disposal for loose food, grease, or objects lodged inside. Use gloves to avoid contact with bacteria or sharp debris.
If you see large chunks or tangled debris, gently pull or loosen them with tongs or a disposal tool. Avoid using your hands directly, especially if the debris is greasy or sticky. Clear the area around the opening to make sure nothing falls in or causes further blockage.
Removing debris safely prevents pushing waste deeper into the pipes or damaging your disposal. Taking this step helps ensure a smoother unclogging process and reduces the risk of injury or mess during the repair.
Turn Off Power Supply
Turning off the power supply is a crucial step to guarantee safety while unclogging your garbage disposal. Without cutting the power, you risk electrocution or accidental activation.
Before you start, make sure the disposal is completely off and unplugged. Take a moment to:
- Feel confident knowing you’re protected from electrical shock
- Avoid panic if the disposal suddenly activates during work
- Protect your loved ones from potential electrical hazards
- Work safely with peace of mind and focus on fixing the clog
- Prevent damage to your disposal or injury to yourself
Always double-check that the unit is unplugged or the circuit breaker is switched off before proceeding. Safety should always come first to make your repair smooth and worry-free.
Turn Off Power and Prioritize Safety
Before you start working on your clogged kitchen sink, make sure to turn off the power supply. Safety always comes first to prevent electrical shocks or damage to your garbage disposal.
Find your circuit breaker and switch off the power to the disposal unit. Double-check that it’s not running by trying to turn it on briefly; if it doesn’t activate, the power is off.
Never attempt repairs with the power on. Water and electricity don’t mix, and it’s dangerous. Wear protective gloves and eye goggles to shield yourself from debris or splashes.
Keep your workspace dry and free of obstacles. Following these safety steps helps you work confidently and reduces the risk of accidents while unclogging.
Use a Plunger to Clear the Blockage
Choosing the right plunger is key. Make sure it has a rubber cup that fits your sink opening snugly.
When plunging, use steady, controlled pushes to create enough pressure without splashing. Keep your technique consistent until the blockage clears, and you’ll have the job done quickly.
Proper Plunger Selection
Selecting the right plunger is key to effectively clearing a clogged kitchen sink. The right tool helps create a good seal around the drain and applies the right amount of pressure.
A cup plunger with a flat rubber cup is perfect for sinks because it guarantees a tight seal around the drain opening. Avoid using a toilet plunger, as it’s made for different fixtures.
When choosing a plunger, keep these points in mind: feel confident in your choice, knowing you have the right tool. It helps prevent frustration and saves time by using a tool designed specifically for sinks.
Using the correct plunger also protects your pipes from damage and gives you better control over the blockage. This helps restore your sink’s function more smoothly and with less stress.
Effective Plunging Technique
Start by making sure there’s enough water in the sink to cover the rubber cup of your plunger. This helps create a better seal and makes plunging more effective.
Place the plunger firmly over the drain, ensuring it’s fully sealed around the opening. Use steady, controlled pressure to push down and pull up, keeping the seal throughout.
Don’t be aggressive. Instead, focus on consistent, rhythmic plunges. Continue for about 15-20 seconds, then lift the plunger to see if the water starts to drain.
If it doesn’t, repeat the process a few more times. The key is to apply gentle but persistent pressure to loosen the clog and let water and debris flow freely again.
Manually Clear the Disposal if Needed
When your garbage disposal jams or isn’t running smoothly, manually clearing it can often fix the problem. First, turn off the power to avoid injury. Use an Allen wrench or the provided wrench to turn the disposal’s motor shaft manually. Insert the wrench into the bottom hole and rotate to free any stuck debris. Be cautious and patient during this process.
Remember, you’re taking control and solving the problem yourself. Feel empowered knowing you’re restoring function with your own hands. Keep these tips in mind:
Take control, fix the problem, and restore your disposal’s function with confidence and care.
- Stay calm and focused during the process.
- Verify the disposal is unplugged before starting.
- Use the wrench carefully to avoid damage.
- Clear stubborn debris from the blades.
- Test the disposal after clearing to verify smooth operation.
Try Baking Soda and Vinegar to Break Up Clogs
Using baking soda and vinegar is a simple, natural way to tackle kitchen sink clogs. Baking soda helps break down grease and buildup, while vinegar’s acidity boosts the cleaning power.
Together, they can often clear minor blockages without harsh chemicals. It’s an easy, eco-friendly method you can try before calling a plumber.
Benefits of Baking Soda
Baking soda is a powerful, natural remedy for breaking up stubborn kitchen sink clogs. It’s affordable, safe, and environmentally friendly, making it an ideal first step in your unclogging routine.
When you use baking soda, you’re tapping into its natural ability to neutralize odors and loosen debris without harsh chemicals. This simple ingredient can reduce the need for costly plumber visits and harsh cleaners.
Plus, it’s gentle on your pipes, preventing potential damage over time. Using baking soda gives you a sense of control and empowerment as you tackle the clog yourself.
Its benefits include:
- Restoring your sink’s functionality quickly
- Eliminating foul odors at the source
- Preventing future buildup and clogs
- Keeping your plumbing eco-friendly
- Saving you money and time
Effectiveness of Vinegar
Vinegar is a highly effective natural cleaner that works well when combined with baking soda to break up kitchen sink clogs. When poured into your drain, vinegar reacts with the baking soda, creating a fizzing action that helps loosen debris and buildup.
This bubbling reaction can dislodge small clogs caused by grease, soap scum, or food particles. Vinegar’s acidity also helps dissolve mineral deposits and disinfects the pipes, leaving them cleaner.
It’s a safe, eco-friendly alternative to harsh chemicals and often works quickly to clear minor blockages. For best results, combine a cup of baking soda with a cup of vinegar, let the mixture sit for 15-30 minutes, then flush with hot water.
This simple method can save you time and money without using toxic chemicals.
Flush the Drain With Hot Water
Start by boiling a pot of water and carefully pouring it directly into the clogged drain. Hot water helps loosen grease, soap scum, and debris that may be stuck. As you pour, feel confident that you’re actively clearing the blockage.
The heat works to melt and soften stubborn buildup, making it easier for the drain to flow freely again. Imagine the relief when your sink starts draining smoothly, restoring your kitchen’s efficiency.
You can feel confident knowing you’re taking control and experience the satisfaction of progress. This simple step can also help reduce lingering odors, prevent future clogs, and save you money on professional repairs.
Taking this small action can make a big difference. It gives you a sense of accomplishment and a clean, clear drain.
What If These Steps Don’t Unclog Your Sink?
If pouring hot water doesn’t clear the clog, it’s time to try other methods. You might want to use a sink-specific plunger, making sure it forms a good seal and pumping vigorously.
If that doesn’t do the trick, consider a drain snake or auger to break up stubborn blockages. Insert the tool carefully, rotate it to dislodge debris, and pull it out slowly.
Avoid chemical drain cleaners because they can damage your pipes and often don’t work on solid clogs.
If these steps still don’t work, check for any visible obstructions or buildup in the trap or pipes. Sometimes, the clog is deeper or more stubborn than it seems.
In such cases, calling a professional might be the best option to avoid damaging your plumbing.
When to Call a Professional Plumber
Sometimes, despite your best efforts, a stubborn clog needs professional help. If you’ve tried plunging, snaking, and using chemical cleaners without success, it’s time to call a plumber.
Don’t ignore persistent backups or slow drainage—these can be signs of bigger problems. Trying to fix a major clog yourself could cause more damage or lead to costly repairs.
You should also contact a professional if you notice water backing up into other fixtures, lingering unusual odors despite cleaning, or gurgling sounds when running water.
If multiple drains are slow or clogged at the same time, that’s another sign to get help.
And if your attempts to clear the clog seem ineffective, it’s best to call in the experts.
Knowing when to seek help ensures your plumbing issues are resolved safely and quickly. It saves you time, stress, and potential damage to your home.
Frequently Asked Questions
How Often Should I Clean My Garbage Disposal to Prevent Clogs?
You should clean your garbage disposal at least once a week to prevent clogs. Regular cleaning helps get rid of food debris, grease, and buildup that can cause blockages.
Run cold water while using the disposal, and periodically grind ice cubes or citrus peels to freshen and sanitize. This keeps it smelling fresh and working well.
Consistent maintenance keeps your disposal functioning smoothly, reducing the chances of backups and bad odors. Stay proactive to keep your sink clear and fresh.
Can Certain Foods Damage My Garbage Disposal or Cause Clogs?
Yes, some foods can harm your garbage disposal or lead to clogs. Hard, fibrous, or starchy foods like bones, celery, potato peels, and coffee grounds can jam the blades, dull the motor, or stick together.
These blockages can cause your disposal to stop working properly. Also, avoid pouring grease or oil down the drain because they solidify and coat the pipes, making clogs more likely.
Be careful with these foods and use your disposal wisely. Doing so will help keep it running smoothly and prevent costly repairs.
Is It Safe to Use Chemical Drain Cleaners With a Garbage Disposal?
It’s generally not safe to use chemical drain cleaners with a garbage disposal. These harsh chemicals can damage the disposal’s parts and pipes, especially if they sit too long.
Plus, they might not even clear the clog effectively and could pose health risks. Instead, try natural remedies like baking soda and vinegar or remove the clog manually.
Regular maintenance and being careful with what you put down the disposal can help prevent future blockages.
How Long Should I Run the Disposal After Clearing a Clog?
Think of your disposal as a swimmer—once the job’s done, you want to give it a good workout.
Run the disposal for about 30 seconds to a minute after clearing a clog.
This helps make sure all debris is flushed away and the blades stay sharp.
If the sink still feels slow, run it a bit longer or use cold water to help solidify grease and push it through the pipes.
What Are Signs That My Garbage Disposal Needs Repair or Replacement?
You’ll know your garbage disposal needs repair or replacement if it’s making unusual noises, like grinding or squealing, or if it’s running but not draining properly.
You might also notice persistent leaks or foul odors even after cleaning.
If resetting it doesn’t help or it keeps jamming, that’s a sign repairs might not be enough.
In those cases, it’s probably best to consider replacing it to get your sink working properly again.
Conclusion
Remember, tackling a clog with your garbage disposal is like going on a little adventure—you’re in control of your kitchen’s flow.
With patience and the right steps, you’ll have your sink running smoothly again in no time.
Don’t let a stubborn blockage ruin your day.
You’re the hero in this plumbing story, armed with simple tricks and a positive attitude.
So go ahead and conquer that clog with your garbage disposal.
Keep your kitchen humming happily and enjoy the satisfaction of fixing it yourself.