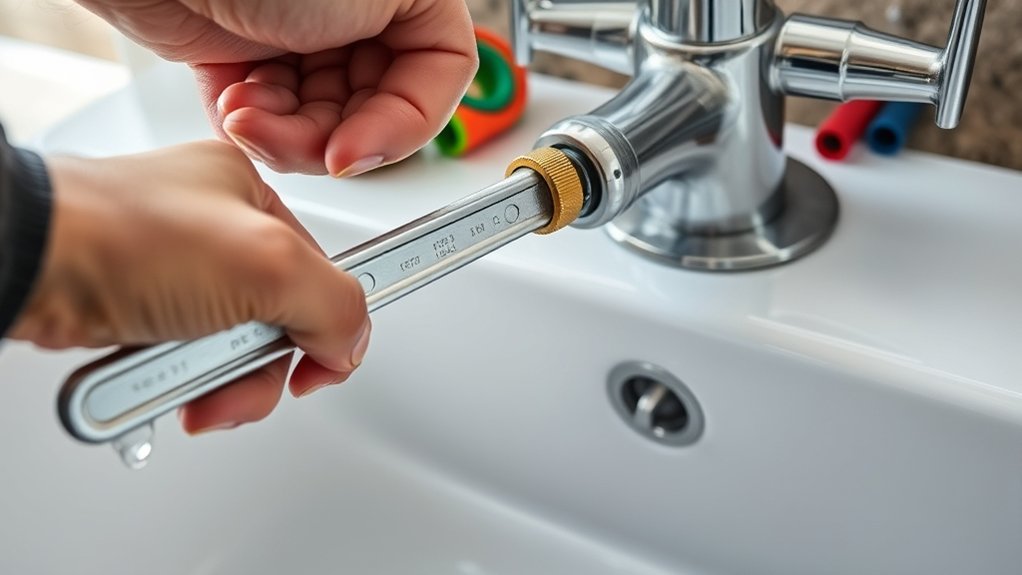
7 Steps to Fix a Leaky Kitchen Faucet
Dealing with a leaky kitchen faucet can be really frustrating. You’re not alone—many people struggle with drips that waste water and increase your bills.
Luckily, fixing it yourself isn’t as hard as you might think.
To fix a leaky kitchen faucet, start by diagnosing whether the leak comes from the spout or handle. Gather the necessary tools and replacement parts, then turn off the water supply and clear your workspace.
Disassemble the faucet carefully, inspect for worn or damaged components like O-rings or washers, and replace them.
Reassemble the faucet, turn the water back on, and test for any drips.
If you want step-by-step guidance, you’re in the right place to learn more.
Key Takeaways
- First, figure out if the leak is coming from the spout or the handle. This will help you identify which part needs fixing.
- Turn off the water supply and gather all the tools and replacement parts you’ll need. It’s always better to be prepared before you start.
- Carefully disassemble the faucet. As you do, inspect the internal parts for any damage or buildup that could be causing the leak.
- If you find damaged O-rings, washers, or cartridges, replace them. Once done, reassemble the faucet carefully.
- Turn the water back on and test the faucet for leaks. Tighten any connections if needed.
- Regular maintenance can help your faucet last longer. Keep an eye on it and address issues early to prevent bigger problems later on.
Diagnose Why Your Kitchen Faucet Is Leaking
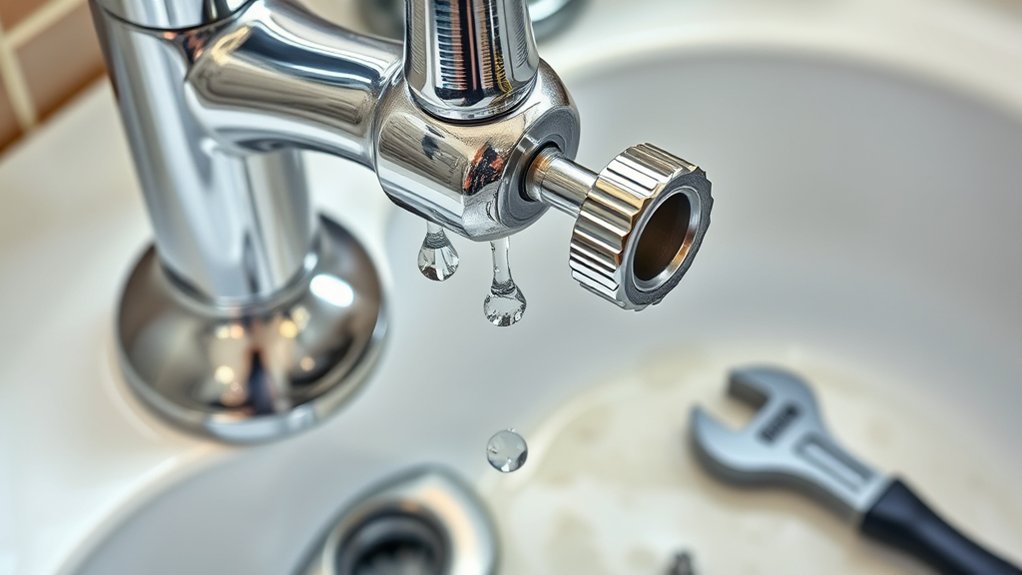
Have you ever wondered why your kitchen faucet keeps leaking? The first step is to figure out where the leak comes from. Turn on the faucet and watch carefully.
Is water dripping from the spout, or is it leaking around the handle? If water drips from the spout, it could be a worn-out cartridge or a faulty valve seat. If water leaks around the handle, the problem might be a damaged O-ring or washer.
Sometimes, mineral buildup or loose connections cause leaks. Check for water pooling under the sink, which indicates a leak in the supply line. Identifying the source helps you know exactly what part needs attention, saving you time and preventing unnecessary repairs.
Gather the Tools and Supplies You Need
Before you start, gather the essential tools like an adjustable wrench, screwdriver, and pliers. You’ll also need supplies such as replacement washers, O-rings, and plumber’s grease.
Having everything ready makes the repair smoother and quicker. This way, you won’t have to stop in the middle of the job to hunt for something.
Essential Tools List
To successfully fix a leaky kitchen faucet, you’ll need to gather a few essential tools and supplies. Having the right tools makes the job easier and helps prevent damage.
Here’s what you should have on hand: an adjustable wrench for loosening and tightening fittings, and Phillips and flathead screwdrivers to remove screws and covers.
Pliers are also useful for gripping and turning parts, and you’ll need replacement O-rings or washers specific to your faucet model.
Make sure you also have a towel or rag nearby to catch drips and protect surfaces. These tools will help you disassemble, inspect, and replace faulty components efficiently.
Having everything ready before you start saves time and cuts down on frustration. Prepare your workspace, and you’ll be ready to proceed with confidence.
Necessary Supplies Overview
Gathering the right supplies is key to making your faucet repair smooth and hassle-free. Before you start, make sure you have all the tools and materials you need on hand.
You’ll want adjustable pliers, a screwdriver, and a bucket to catch any water. Don’t forget to grab replacement parts like O-rings, washers, or a new cartridge if needed.
Having some plumber’s grease for sealing parts and a rag or towel for cleanup is also helpful. Check your faucet’s model to find the right replacement parts.
Getting everything ready beforehand saves time and stops you from making multiple trips to the store.
Having all supplies ready makes the repair easier and lets you work confidently without interruptions.
Turn Off the Water and Prepare Your Workspace
First, find the water shutoff valve under the sink and turn it off to stop the flow.
Then, clear the area around the faucet so you have enough space to work comfortably.
Finally, gather all the necessary tools to make the repair process smooth and efficient.
Locate Water Shutoff Valve
Before you start working on your faucet, you need to find the water shutoff valve to stop the water flow. This valve controls the water supply to your sink and helps prevent leaks from getting worse.
First, look under the sink for a valve attached to the water supply lines. If you don’t see it there, check nearby places like the basement, utility closet, or behind access panels.
Once you find it, make sure you know how to turn it off. Check if the valve is a knob or a lever.
To turn it off, turn the knob clockwise or move the lever so it’s perpendicular to the pipe.
After shutting off the valve, turn on the faucet to confirm that the water has stopped.
Keep the valve in the off position while you do your repairs.
Clear Workspace Area
To start working on your leaky faucet, turn off the water supply and clear your workspace. Remove any dishes, soap, or clutter from the sink area to create a clean, organized space.
This makes it easier to access the faucet components and prevents items from falling or getting lost. Keep a sponge or towel nearby to catch any drips or spills.
Make sure the area around the sink is dry and free of obstructions. Clearing your workspace helps you work more efficiently and reduces the risk of accidents.
Taking these steps ensures a safer, more manageable repair process and keeps your tools and parts within reach.
Gather Necessary Tools
Start by turning off the water supply valves connected to your sink. Once the water is shut off, gather the tools you’ll need. Having everything ready makes the repair smoother.
Here’s what you should collect: an adjustable wrench or pliers, screwdrivers (both flathead and Phillips), replacement parts like O-rings and washers, and towels or a small bucket for water drainage.
Make sure your workspace is clean and well-lit. Lay out the tools within easy reach so you don’t waste time searching during the repair. Double-check that the water valves are fully closed before you start.
Having your tools ready and workspace prepared helps you work efficiently and minimizes messes or water leaks during the fix.
Take Apart the Faucet to Access Its Inner Parts
Begin by turning off the water supply valves beneath the sink to prevent any leaks or water flow. Once the water is shut off, open the faucet handles to drain remaining water.
Next, remove the handle covers with a screwdriver or Allen wrench, depending on your faucet model. Use pliers to loosen and remove the packing nut or retaining clip holding the handle in place.
Carefully lift off the handle to expose the inner parts. If your faucet has a cartridge, stem, or valve assembly, gently pull these out for inspection.
Keep track of all small parts and screws as you disassemble. Take your time to ensure you don’t damage any components, setting everything aside in an organized manner.
Identify Worn or Damaged Components and Replace Them
Carefully examine the exposed components for signs of wear or damage, like cracks, corrosion, or mineral buildup. If you see any issues, it’s time to replace the damaged parts. Here’s what to look for:
Inspect exposed parts for cracks, corrosion, or buildup; replace damaged components to ensure proper, leak-free operation.
- O-rings: Check for cracks, tears, or flattening that can cause leaks.
- Cartridge: Look for corrosion or mineral deposits that might block movement.
- Valve seats: Inspect for pitting or erosion that can affect sealing.
- Springs and washers: Make sure they aren’t worn out or deformed.
Replace any damaged parts with new ones that match your faucet’s specifications. This ensures a tight seal and stops leaks, helping everything work properly again.
Reassemble the Faucet and Turn the Water Back On
Once you’ve replaced all the damaged components, it’s time to reassemble the faucet carefully. Start by fitting the parts back together in the reverse order of disassembly.
Make sure each piece lines up properly and that all screws are tightened securely. Before turning on the water, double-check that no tools or debris are left inside the sink.
Then, slowly open the shut-off valves to restore water flow. Watch for leaks around the base and handles. Use the table below to help visualize the process:
| Step | What to Do | Tips |
|---|---|---|
| Reassemble parts | Put components in order, tighten fittings | Avoid overtightening |
| Turn on water | Gradually open shut-off valves | Check for leaks |
| Final inspection | Test the faucet and look for drips | Adjust if necessary |
Following these steps ensures a smooth reassembly and a leak-free finish.
Test Your Faucet and Fix Any Remaining Drips
Turn on the water supply slowly and watch your faucet as it runs. Look for any drips or leaks. If you see dripping, don’t worry—just adjust or tighten the parts as needed.
Here’s what to do:
- Inspect around the handle and spout for leaks.
- Tighten any loose connections or fittings.
- Replace worn washers or O-rings if they look damaged.
- Test the faucet again by running water and checking for drips.
If leaks still happen, go back and check the parts you disassembled. Re-tighten connections or swap out worn components. Once the faucet runs smoothly without dripping, you’ve fixed it. Regularly testing will help keep your repair lasting and prevent future leaks.
Frequently Asked Questions
How Often Should I Inspect My Kitchen Faucet for Leaks?
You should check your kitchen faucet for leaks at least once a month. Doing regular inspections helps you catch small drips early, which can prevent water waste and damage.
Look for signs like drips, pooling water, or strange sounds coming from the faucet. If you notice anything unusual, fix it quickly to avoid bigger repairs later.
Staying on top of these checks keeps your faucet working smoothly and can save you money on water bills and repairs.
Can I Fix a Leaky Faucet Without Shutting off the Water?
You shouldn’t try fixing a leaky faucet without shutting off the water first. Doing so risks water spraying everywhere and causing a mess or even damage.
Always turn off the water supply to the faucet before starting any repairs. Once it’s off, you can safely disassemble and fix the leak.
If you’re unsure, it’s best to call a plumber rather than risk making the problem worse.
What Common Mistakes Should I Avoid During Repair?
You should avoid over-tightening fittings, as this can damage components or cause leaks.
Don’t forget to turn off the water supply before starting. Working without doing so can lead to water damage or injury.
Be careful not to strip screws or nuts—use the right tools and apply gentle pressure.
Rushing through the process increases mistakes, so take your time and double-check each step for proper installation.
Are There Specific Tools Recommended for Different Faucet Types?
Yes, different faucet types call for specific tools. For compression faucets, you’ll want an adjustable wrench, a screwdriver, and maybe some pliers.
If you’re dealing with a cartridge faucet, a cartridge puller can come in really handy.
For ball-type faucets, a specialized ball wrench might be needed.
Always check the manufacturer’s instructions for your particular faucet model. Using the right tools helps prevent damage and makes the repair much easier.
Having the correct tools ensures you fix the leak effectively and get the job done right.
When Should I Call a Professional Plumber Instead of DIY?
When the plumbing puzzle becomes too intricate, it’s wise to call in a professional. If you’re unsure about safely turning off the water supply, it’s a good idea to get help.
Encountering persistent leaks despite your efforts or noticing unusual noises are signals to seek expert help. Trying to fix complex issues without proper knowledge can lead to more damage.
Trust a licensed plumber to do the job right. This saves you time and potential costs down the road.
Conclusion
Fixing your leaky kitchen faucet isn’t just about stopping the drip; it’s about reclaiming your space and peace of mind. Follow these steps carefully, and you’ll likely find the problem right where you least expect it—hidden within a tiny worn part.
Sometimes, a simple fix is all it takes to prevent water waste and damage. After all, a well-maintained faucet is a small investment that keeps your kitchen running smoothly—just like you planned.
By addressing a leaky faucet promptly, you not only save water but also avoid costly repairs down the line. Remember, regular maintenance and quick fixes can make a big difference in keeping your kitchen functioning perfectly.