7 Simple Steps to Unclog Your Kitchen Sink With Disposal
Dealing with a clogged kitchen sink with disposal is a common frustration that many people struggle with. It can be messy, inconvenient, and just plain annoying when your sink refuses to drain properly.
Luckily, you’re not alone, and there are simple steps to fix it quickly.
Start by clearing the area and turning off the power to your disposal for safety. Check for debris or buildup causing the clog.
Use a plunger to loosen the blockage, then pour baking soda followed by vinegar to fizz away the debris. If needed, manually remove any obstructions from the disposal.
Flush with hot water, then test the unit’s operation. For more effective tips and troubleshooting, keep going to restore your sink’s flow quickly.
Key Takeaways
- Turn off the disposal and make sure the area is dry before you start.
- Next, remove any visible debris or blockages from the sink and disposal area.
- Use a plunger to create pressure and help dislodge the clog.
- You can also try natural cleaning with baking soda and vinegar to break down any buildup.
- Finally, run water and turn on the disposal to check if everything is flowing properly.
Get Your Workspace Ready and Stay Safe

Before you start unclogging your sink, it’s important to get your workspace ready and focus on safety. Clear the area around your sink, removing dishes, utensils, or fragile items.
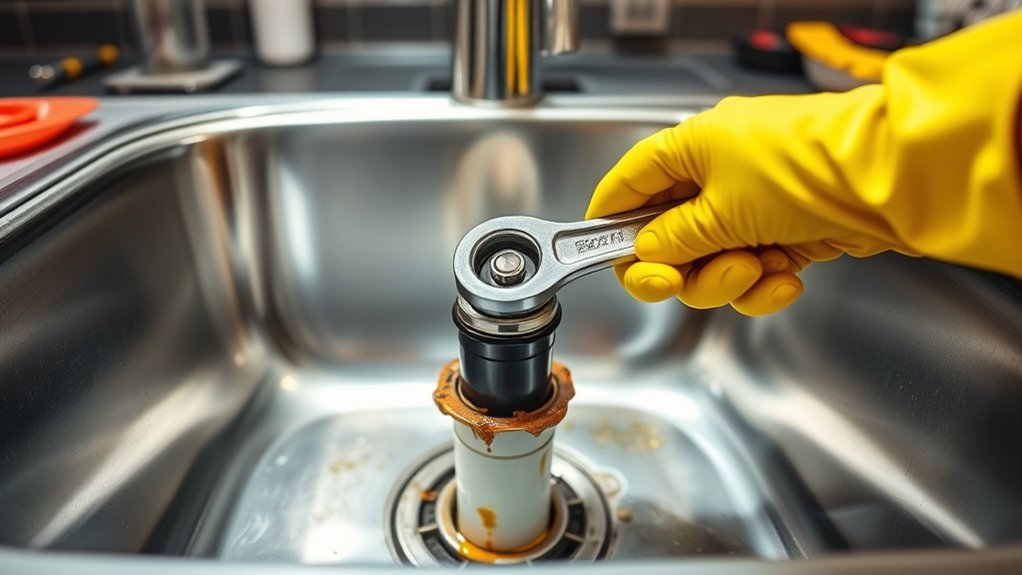
Wear protective gear like gloves and safety goggles to protect your skin and eyes from harsh chemicals or debris. Make sure you have tools like pliers, a bucket, and a plunger nearby.
Turn off the power to the garbage disposal to prevent it from turning on accidentally. If you’re using chemical drain cleaners, ventilate the area to avoid inhaling fumes.
Check that the area is dry to prevent slipping. Taking these safety steps helps you work efficiently and avoids injuries while fixing the clog.
Proper preparation keeps your workspace organized and safe, making the job easier and less risky.
Figure Out What’s Causing the Clog
First, check for common causes like food debris, grease, or soap buildup that might be blocking your drain.
Look for signs such as slow drainage, gurgling sounds, or bad odors, which can indicate a clog.
Finding out what’s causing it helps you pick the best way to clear the blockage.
Common Clog Causes
Clogs in your kitchen sink often happen because of common, everyday causes that you might not realize. One frequent culprit is food debris, especially fibrous or starchy foods like potato peels, rice, or coffee grounds, which can stick and build up over time.
Grease and oil are also major contributors; they harden inside pipes, trapping other particles and forming stubborn blockages. Another cause is soap scum, which can accumulate with regular use, creating a slimy barrier that catches debris.
Small objects like utensils, jewelry, or food wrappers accidentally fall in and can lodge in the pipes, causing blockages. Recognizing these common causes helps you prevent future clogs and addresses the issue efficiently when it happens.
Signs of Blockage
When your sink starts draining slowly or not at all, it’s a clear sign that a blockage is forming or getting worse. You might notice water pooling or backing up, which means debris is stuck somewhere down the pipe.
To figure out what’s causing the clog, pay attention to these signs:
| Symptom | Possible Cause |
|---|---|
| Slow drainage | Minor clog or buildup |
| Gurgling sounds | Air trapped behind the clog |
| Foul odors | Organic waste decomposing |
| Water backing up | Severe blockage or complete clog |
Recognizing these signs helps you understand what’s causing the clog so you can take effective steps to clear it.
Unclog Your Kitchen Sink With Plunger
A plunger is often your quickest fix for a stubborn kitchen sink clog. To use it effectively, make sure there’s enough water in the sink to cover the rubber cup.
A plunger can quickly clear stubborn kitchen sink clogs without chemicals.
Place the plunger over the drain, creating a tight seal. Pump the handle up and down with steady, firm pressure for about 15-20 seconds. This creates pressure and suction that can loosen the clog.
If the water drains slowly or stops, lift the plunger to see if the blockage clears. Repeat the process if needed, but avoid using excessive force to prevent damaging the pipes.
Once the clog breaks free, run hot water to flush out any remaining debris. Using a plunger is a simple, chemical-free way to clear minor sink blockages quickly.
Pour Baking Soda and Vinegar to Clear the Drain
Pour a generous cup of baking soda directly into the drain, then follow with a cup of vinegar. The mixture will fizz and bubble as the baking soda reacts with the vinegar, helping to break down grease, soap scum, and minor clogs.
Cover the drain with a plug or a cloth to contain the reaction, and let it sit for about 15 minutes. During this time, the fizzing action works to loosen debris and clear residues clogging the pipes.
After waiting, flush the drain with hot water to wash away the loosened buildup. This natural method is effective for minor clogs and doesn’t involve harsh chemicals.
Repeating this process periodically can help maintain a clear, odor-free drain without needing professional help.
Manually Remove Clogs From the Disposal Unit
Start by turning off the power to your garbage disposal to confirm safety. Never reach into the disposal while it’s powered on or connected to electricity. Use the switch to turn it off, then unplug it from the outlet.
If your disposal has a reset button, press it to verify it’s fully reset. Next, locate the disposal’s top opening. Use a flashlight if needed.
Use tongs or pliers to carefully remove any visible debris, food particles, or objects causing the clog. Avoid using your hands directly, even if the power is off.
Use tongs or pliers to safely remove debris, avoiding direct contact even with the power off.
Once you’ve cleared the obstruction, check for remaining debris and remove it. Afterward, you can proceed with testing the disposal to confirm the clog is gone.
Flush With Hot Water for a Fresh Start
When your sink is clear of major obstructions, flushing with hot water helps wash away residual debris and grease that might still be lingering in the pipes. Turn on your hot water tap and let the water flow steadily down the drain for about 30 seconds to a minute.
The high temperature helps melt away grease and loosen stubborn grime stuck inside. Just be cautious not to use boiling water, especially if your pipes are older or PVC, to avoid any damage.
This simple step flushes out leftover residues, keeping your pipes cleaner and odor-free. Regular hot water flushes can also prevent future clogs by moving debris smoothly and maintaining your plumbing’s overall health.
Test the Disposal and Keep Clogs Away
First, turn on your disposal to make sure it’s working properly.
It’s a good idea to run it regularly to prevent buildup.
Always dispose of food waste correctly to avoid clogs.
These simple steps help keep your sink clear and reduce future problems.
Check Disposal Functionality
Checking your disposal’s functionality is an essential step in preventing future clogs. First, confirm the disposal is plugged in and switch it on. Listen for any unusual noises or vibrations, which might indicate a problem.
If it’s silent and doesn’t activate, press the reset button on the unit’s bottom. Next, run cold water and activate the disposal again, observing whether it grinds smoothly. If it stalls or sounds strained, there could be a jam or mechanical issue.
Don’t force it. Instead, turn off the power and check for obstructions manually. Regularly testing the disposal helps you catch problems early, reducing the risk of clogs and damage.
A functioning disposal keeps your sink draining properly and maintains a clean, odor-free kitchen.
Run Disposal Regularly
Running your disposal regularly helps prevent buildup and clogs by keeping the blades and passages clear. When you run it often, food particles don’t have a chance to settle and cause blockages. This routine keeps everything flowing smoothly, saving you from messy, costly repairs later.
Remember, consistent use can boost your confidence in the disposal’s performance and extend its lifespan.
Feel empowered knowing you’re actively maintaining your sink.
Experience the peace of a clog-free, functional kitchen.
Enjoy the satisfaction of a quick, effortless cleaning routine.
Protect your plumbing from unnecessary damage and costly repairs.
Use Proper Waste Disposal
Proper waste disposal is essential for keeping your sink clear and preventing future clogs. Always dispose of food scraps responsibly. Avoid putting grease, coffee grounds, or fibrous vegetables down the drain because they can solidify or wrap around the disposal blades.
Before using the disposal, test it to make sure it’s working properly. Turn it on and listen for smooth operation. If it’s not functioning correctly, address any jams or leaks immediately.
Keep the disposal clean by running cold water during and after use. This helps flush debris through the pipes. Never overload the disposal with large quantities of waste at once.
Frequently Asked Questions
How Often Should I Perform Sink Maintenance to Prevent Clogs?
You should perform sink maintenance at least once a month to prevent clogs. Regularly running hot water down the drain helps dissolve grease and food particles.
Using a mixture of baking soda and vinegar can break down buildup too. Avoid pouring grease or large food scraps down the disposal.
These habits keep your drain clear, reduce odors, and ensure your disposal works smoothly over time.
Are There Any Substances I Should Avoid Putting in the Disposal?
You should avoid putting grease, oil, and fat down your disposal, as they can solidify and cause clogs.
Also, steer clear of fibrous foods like celery or corn husks, which can tangle and jam the blades.
Avoid putting hard items like bones or shells that can damage the unit.
Harsh chemicals, such as bleach or drain cleaners, can corrode the disposal parts.
Stick to safe, biodegradable waste for smooth operation.
Can I Use Chemical Drain Cleaners Safely in a Disposal?
Using chemical drain cleaners in your disposal isn’t safe; it’s like pouring acid on a delicate sculpture—damage is inevitable. I once saw a plumber hesitate before using harsh chemicals and choose a natural solution instead.
These cleaners can corrode parts and harm your pipes, which can lead to costly repairs. Stick to baking soda and vinegar or mechanical methods to clear clogs safely and effectively.
This way, you’ll protect your disposal’s lifespan and avoid unnecessary damage.
What Tools Are Best for Manual Removal of Disposal Clogs?
You should use a plunger or a drain snake to manually remove disposal clogs. A plunger creates pressure to help loosen the debris, while a drain snake can reach deeper into the pipe to clear stubborn blockages.
Make sure to wear gloves for safety and double-check that the disposal is turned off before you start. Carefully insert your chosen tool into the drain, applying gentle pressure or twisting to dislodge the clog.
These tools are effective and safe for clearing most disposal blockages, making the job easier and preventing damage.
How Do I Know if My Disposal Needs Professional Repair?
If your disposal smells like a sink full of yesterday’s leftovers or is making unusual noises, it probably needs professional repair. I once ignored a strange humming sound, and it eventually stopped working altogether.
Think of your disposal like a trusted friend. If it’s suddenly acting up, it’s time to call in an expert. Ignoring signs can lead to bigger, costlier problems down the line.
Conclusion
So, there you have it—seven simple steps to tackle that stubborn clog. Who knew fixing your kitchen sink could be so straightforward? Just a little effort, some common household items, and you’re back to a spotless sink.
Ironically, the more you try to avoid a clog, the more likely you are to face one. But now, you’re armed and ready with these tips to keep your drain clear.
So go ahead, give that drain a well-deserved break and enjoy a smoothly flowing kitchen sink once again.