Easy Guide to Paint Kitchen Cabinets Without Sanding
Feeling overwhelmed by the idea of painting your kitchen cabinets? You’re not alone—many people struggle with the thought of messy sanding jobs or complicated prep work.
Luckily, there’s a way to refresh your cabinets without all that hassle, and you can do it without sanding!
To paint your kitchen cabinets without sanding, start by thoroughly cleaning and degreasing the surfaces to guarantee good paint adhesion.
Use a high-quality primer and a durable semi-gloss or satin paint suitable for kitchens.
Apply paint with a brush or roller in thin, even coats, working in small sections and maintaining a wet edge.
Keep a dust-free environment for the best finish.
Stick with these steps, and you’ll master the no-sand cabinet makeover—more tips in store if you continue.
Key Takeaways
- Clean and degrease your cabinets thoroughly. This step is key to ensuring the paint sticks well, even without sanding.
- Next, use a deglosser or liquid sander to dull any shiny surfaces. This helps the paint grip better and gives you a smoother finish.
- Then, apply a high-quality bonding primer that’s designed for slick surfaces. It will make your paint last longer and look more professional.
- When painting, use smooth, even coats with a brush or roller. Work in small sections so the paint doesn’t dry too quickly.
- Be sure to allow enough drying time between coats. This helps you get a nice, sand-free finish that looks great.
How to Prepare Your Cabinets for Painting Without Sanding
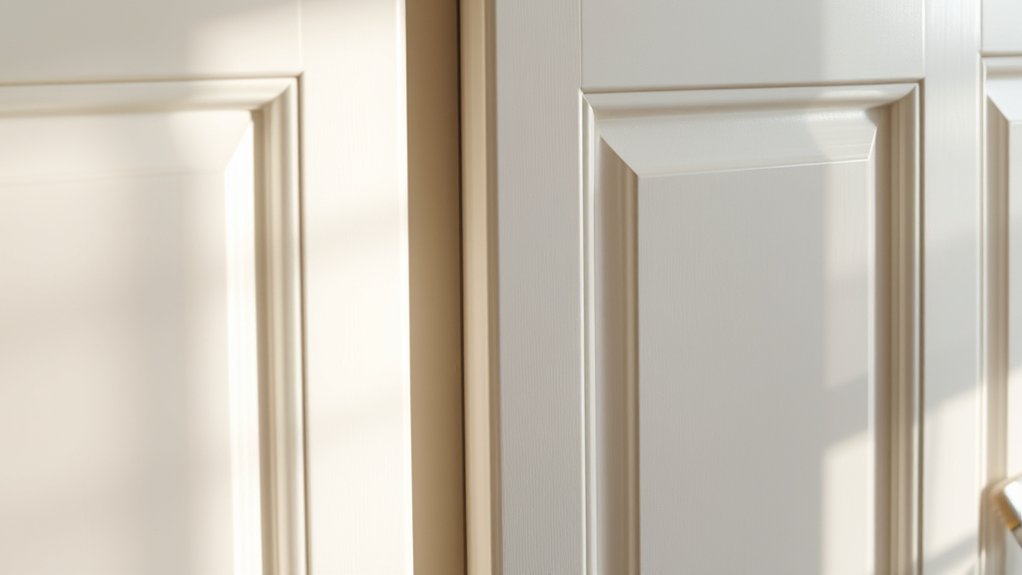
You can prepare your cabinets for painting without sanding by thoroughly cleaning them first. Remove all cabinet doors, drawers, and hardware to give yourself easy access.
Use a degreasing cleaner or a mixture of warm water and mild dish soap to wipe down every surface. Pay close attention to grease, grime, and fingerprints. Rinse with a damp cloth and dry completely to prevent moisture from interfering with the paint.
If you notice any sticky spots or residue, repeat the cleaning process. This step guarantees the surface is free of dirt and oils that can prevent paint adhesion.
Proper cleaning creates a clean, smooth surface, making your painting process smoother and helping your new finish last longer.
Choosing the Best Paint and Supplies for a No-Sand Kitchen Makeover
Choosing the right paint and supplies is key for a successful no-sand kitchen makeover. Start with a high-quality, bond-boosting primer made for kitchen cabinets. It helps the paint stick well and lasts longer.
Go for a durable semi-gloss or satin finish paint since these resist moisture and are easy to clean. Water-based acrylic or latex paints are great because they dry quickly and have low odor.
Use a good-quality brush or foam roller to avoid streaks and get a smooth finish. Be sure to pick paints designed specifically for cabinets or furniture for the best results.
Don’t forget painter’s tape to protect edges and a drop cloth to keep your workspace clean. Investing in the right supplies will help your transformation look professional and stand the test of time.
Cleaning and Priming Cabinets Without Sanding
Start by choosing a good cleaner to get rid of grease and dirt, no harsh scrubbing needed.
Next, make sure your surface is well prepared by wiping it down thoroughly and letting it dry completely.
Finally, apply a quality primer smoothly and evenly to create a solid base for your paint—no sanding required.
Choosing Effective Cleaners
Have you ever wondered how to clean your cabinets effectively without the hassle of sanding? Choosing the right cleaner makes all the difference.
First, go for a degreaser to break down grease and grime baked on from cooking. It’s perfect for removing stubborn stains.
Next, use a mild detergent or dish soap mixed with warm water for general cleaning and surface prep. It’s gentle but effective.
You might also try a vinegar solution—mix equal parts vinegar and water for a natural, effective degreaser that’s gentle on surfaces.
Always wear gloves and make sure your space is well-ventilated. Safety first!
Before applying any cleaner broadly, test it on a small, hidden area to avoid damage. This step helps prevent surprises.
Clear, effective cleaning without harsh chemicals or extra steps guarantees your cabinets are ready for priming and painting.
This way, you’ll achieve a smooth, lasting finish with ease.
Proper Surface Preparation
To prepare your cabinets effectively without sanding, focus on thorough cleaning and proper priming. Start by removing all cabinet doors and hardware, then clean every surface with a strong cleaner or a mixture of water and vinegar.
This will eliminate grease, grime, and residue that can affect paint adhesion. Use a clean cloth or sponge to scrub carefully, making sure you don’t miss any spots. After cleaning, let everything dry completely.
Next, apply a high-quality primer designed for non-sanded surfaces. This helps create a smooth, even base for your paint. Primer improves adhesion and durability, especially on glossy or slick surfaces.
Skipping this step can lead to peeling or uneven coverage, so don’t rush it. Proper surface preparation is key to getting a professional-looking finish.
Applying Primer Successfully
Applying primer successfully starts with choosing the right product for your cabinets’ surface. You want a primer that sticks well and matches your finish. Once you’ve picked it out, follow these simple steps:
First, thoroughly clean the cabinets to remove grease, dust, and grime. Use a gentle cleaner and a lint-free cloth to get rid of any dirt.
Next, apply the primer evenly with a brush or roller. Work in smooth, consistent strokes, and avoid overloading your brush or roller to prevent drips.
Finally, let the primer dry completely according to the manufacturer’s instructions before you start painting. Proper drying ensures better adhesion and a smooth, professional-looking finish.
Simple Techniques for Applying Paint Smoothly
Achieving a smooth, professional-looking finish starts with simple, steady techniques. Begin by using high-quality brushes or rollers designed for cabinets. Load your tool with just enough paint to avoid drips and uneven layers.
When applying, use long, even strokes and keep a consistent speed. Work in small sections, overlapping each stroke slightly to blend seamlessly. Keep a wet edge to prevent lap marks, and don’t press too hard.
Gentle, smooth movements produce the best results. If you notice drips or thick spots, lightly go over them with a clean brush or roller to smooth things out. Patience is key; applying thin coats and letting each layer dry properly will help you get a sleek, flawless finish.
Top Tips for a Flawless, Dust-Free Finish
Ensuring a dust-free finish requires careful preparation and attention to detail. To get flawless results, follow these top tips:
- Clean thoroughly before starting to remove all dust and grease from surfaces. Use a damp cloth and a mild cleaner, then let everything dry completely.
- Work in a dust-free environment by closing windows, turning off fans, and covering nearby objects with plastic sheeting. This helps keep airborne particles from settling on your paint.
- Use high-quality tools like a fine-bristle brush or foam roller, and always keep them clean. This helps avoid brush marks and uneven textures that can trap dust.
Sticking to these steps guarantees a smooth, professional-looking, dust-free finish on your cabinets.
Common Mistakes to Avoid When Painting Cabinets Without Sanding
Skipping the necessary prep work is one of the most common mistakes when painting cabinets without sanding. Without proper cleaning and surface preparation, your paint may not stick well, leading to peeling or uneven coverage. Always wipe down cabinets thoroughly to remove grease, dirt, and grime, especially in kitchens. Skipping this step can cause paint to bubble or chip prematurely.
Another mistake is applying paint too thickly or in just one coat. This can cause drips, streaks, and longer drying times. Also, don’t rush the process—make sure each coat is fully dry before adding the next one.
Using the wrong type of paint or skipping primer can also hurt your results. Paying attention to surface prep and following proper techniques helps ensure a smooth, durable finish even without sanding.
How to Maintain and Care for Your Newly Painted Cabinets
Once your cabinets are freshly painted, caring for them properly will keep them looking great for years to come. To maintain their appearance, follow these simple steps:
- Clean regularly with a soft cloth and mild soap to remove dust and grease. Avoid harsh chemicals that can damage the finish.
- Wipe up spills immediately to prevent stains or water damage, especially on handles and edges.
- Use gentle cleaning tools, like a sponge or microfiber cloth, to avoid scratches or peeling paint.
Stick to these routines, and your cabinets will stay vibrant and durable. Avoid abrasive scrubbers or excessive moisture, which can compromise the paint job. Proper care guarantees your investment looks fresh longer.
Frequently Asked Questions About No-Sand Cabinet Painting
Are you curious about no-sand cabinet painting and whether it’s right for your project? Many wonder if skipping sanding affects durability or finish quality. The truth is, no-sand methods can save time and still give you stunning results when done properly.
To help you decide, here’s a quick FAQ:
| Question | Answer | Confidence Level |
|---|---|---|
| Will it last long? | Yes, if you use quality products and prep well. | High |
| Is prep necessary? | Minimal prep is usually enough. | Medium |
| Can I use any paint? | Use specialized cabinet or durable paint. | High |
| Will it look professional? | Yes, if you follow the right techniques. | High |
No sanding isn’t for everyone, but it’s a convenient and effective option for many DIYers.
Frequently Asked Questions
Can I Paint Over Laminated Cabinet Surfaces Without Sanding?
Yes, you can paint over laminated cabinet surfaces without sanding if you prep the surface properly. Start by cleaning thoroughly to remove grease and dirt.
Next, lightly scuff the laminate with a fine-grit abrasive or use a deglosser. This helps the paint stick better and creates a better grip.
Finally, apply a high-quality primer designed for laminate surfaces, then follow with your paint. This ensures good adhesion and a smooth finish without the need for sanding.
How Long Does a No-Sand Cabinet Paint Job Typically Last?
A no-sand cabinet paint job usually lasts around 5 to 7 years. This can vary based on how much you use and clean your cabinets, plus the quality of the paint you choose.
If you prep properly, pick a high-quality paint, and keep up with regular maintenance, you can make your cabinets last even longer. Just remember, in high-traffic or damp areas, you might need touch-ups sooner to keep them looking fresh and sturdy.
Is It Necessary to Remove Cabinet Hardware Before Painting?
You should definitely remove cabinet hardware before painting; it’s like peeling away a mask to reveal a cleaner canvas. Removing knobs and handles prevents paint from seeping into crevices and keeps your hardware in pristine condition.
Plus, it makes the job easier and results in a smoother finish. So, take the time to carefully detach all hardware—your cabinets will thank you with a flawless, professional look.
Can I Change the Color of My Cabinets With This Method?
Yes, you can change the color of your cabinets with this method. Just pick a new paint color and follow the steps in the guide.
You’ll be able to transform your kitchen’s look without the hassle of sanding. Just prep the surface properly, apply primer if needed, and use quality paint for a smooth, durable finish.
It’s a cost-effective way to refresh your space and get the color you want.
What Is the Best Way to Prevent Paint Chipping Over Time?
To prevent paint chipping over time, make sure you prepare the surface properly and choose high-quality paint. Start by cleaning the cabinets thoroughly and then apply a primer that’s right for your surface.
Use a durable, semi-gloss, or satin finish paint that sticks well and can handle wear and tear. Apply several thin coats, letting each one dry completely before adding the next.
Finally, add a clear topcoat for extra protection. This helps extend the life of your paint job and keeps it looking fresh longer.
Conclusion
Now that you’ve uncovered the secrets to transforming your kitchen cabinets without a single sandpaper scratch, it’s time to get creative. Your cabinets are like a blank canvas ready for your personal touch.
With patience and the right techniques, you’ll turn your kitchen into a masterpiece—smooth, flawless, and uniquely yours. So grab your supplies and let your creativity shine through with your new skills to paint kitchen cabinets without sanding.