
How to Measure Your Kitchen Sink for Replacement
Thinking about replacing your kitchen sink? You’re not alone—many people find measuring for a new sink a bit tricky and frustrating.
Getting the right fit is crucial for a smooth installation, so it’s worth taking the time to do it right.
To measure your kitchen sink for replacement, start by clearing the area and removing any removable fixtures.
Use a tape measure to record the length, width, and depth, taking measurements at multiple points for accuracy.
Note the location of the drain hole and faucet holes, and double-check your measurements.
Ensuring your new sink matches these dimensions is key to a smooth install, and you’ll find more tips to get it just right as you investigate further.
Key Takeaways
- Measure the sink’s length from front to back at its widest point.
- Record the width from side to side at the widest section.
- Check the depth from the countertop surface to the bottom of the sink.
- Note where the drain and faucet holes are located relative to the edges.
- It’s a good idea to take measurements at multiple points to ensure accuracy and consistency.
Why Accurate Kitchen Sink Measurements Matter
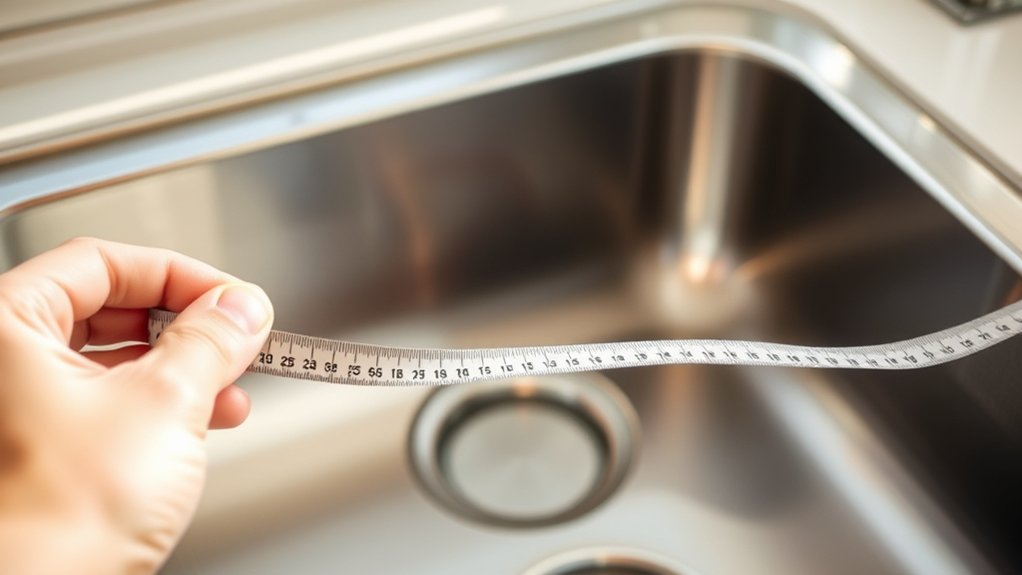
Accurate kitchen sink measurements are key because they make sure your sink fits perfectly and works well. If your measurements are off, you might end up with a sink that’s too big or too small, which can cause installation problems or uneven surfaces.
Getting precise measurements helps your sink match the countertop cutout and plumbing connections. This saves you time and money by avoiding the need for returns or modifications.
When you measure correctly, it’s easier to choose a sink that matches your kitchen’s layout and style. Overall, accurate measurements lead to a smoother install and a sink that looks great and functions properly.
Preparing Your Kitchen for Sink Measurement
Before measuring your sink, clear off your countertop to give yourself enough space.
Remove any objects or appliances that might get in the way of your measurements.
Also, make a note of where your existing plumbing is located to ensure accurate sizing.
Clear Countertop Space
Clear your countertop to create a clean, unobstructed workspace for measuring your sink. Remove dishes, utensils, and any small items that might interfere with your measurements.
Clear off soap bottles, sponges, and cleaning supplies to avoid clutter. If there are appliances or decorative items nearby, move them out of the way to give yourself enough room to work comfortably.
Ensuring a tidy surface helps you measure accurately and prevents accidental damage or miscalculations. A clear countertop also makes it easier to access all sides of the sink area, which is essential for precise measurements.
Take a few moments to tidy up the space so you can focus solely on getting the correct dimensions for your replacement sink.
Remove Obstructions Carefully
Carefully remove any obstructions around the sink area to ensure you can measure without interference. Clear away dishes, soap bottles, or cleaning supplies that might block your view or access. This helps you get accurate measurements and avoid mistakes.
To make things easier, follow these steps:
- Detach any removable items like soap dispensers or faucet attachments.
- Pull out stored items underneath or around the sink.
- Check for and remove debris, sponges, or cloths that could hide the edges or interfere with measuring.
Taking these precautions makes sure you’re working with a clean, unobstructed space. This leads to precise measurements for your new sink.
Identify Existing Plumbing
To accurately measure your sink, you need to understand the existing plumbing setup. Start by inspecting the pipes connected beneath your current sink. Look for the drain pipe, water supply lines, and shut-off valves.
Note their positions, sizes, and types, as this helps determine compatibility with your new sink. Turn off the water supply before touching any plumbing to avoid leaks.
Check if the drain pipe is a standard size or if it requires adapters. If your plumbing uses flexible hoses or rigid pipes, note their lengths and fittings.
Understanding your current plumbing guarantees you can plan for any necessary modifications and prevents surprises during installation. Taking these steps makes the measurement process smoother and helps guarantee your new sink fits perfectly.
Gather the Tools You Need for Precise Measurements
Start by gathering essential measurement tools like a tape measure, a ruler, and a level.
Make sure each tool works properly to guarantee accurate readings. Proper tools are key for precise measurements and a successful sink fit.
Essential Measurement Tools
Having the right measurement tools is key to getting accurate dimensions of your kitchen sink. You’ll want to have these three tools handy:
- A tape measure for measuring length, width, and depth accurately. Make sure it’s flexible and easy to read.
- A ruler or straightedge, which is useful for smaller measurements and checking straight lines.
- A pencil to mark measurements directly on the sink or surrounding area for quick reference.
Keep these tools nearby to ensure your measurements are precise. Having everything ready will make your sink replacement smoother and more accurate.
Verify Proper Tool Function
Before you begin measuring your sink, take a moment to verify that all your tools are working properly. Check your tape measure to make sure it retracts smoothly and has clear markings; replace it if it’s sticking or worn out.
Next, confirm your level is accurate by testing it on a flat surface with known true levelness. Also, make sure your ruler or straightedge is straight and undamaged.
Test your marking pencil or marker to ensure it writes smoothly and produces clear lines. If you’re using a caliper, check its accuracy by measuring an object with a known size.
Having properly functioning tools helps prevent measurement errors and guarantees your sink fits precisely. Doing this quick check saves you time and avoids the hassle of re-measuring or buying a new sink later.
Measure the Sink Length and Width
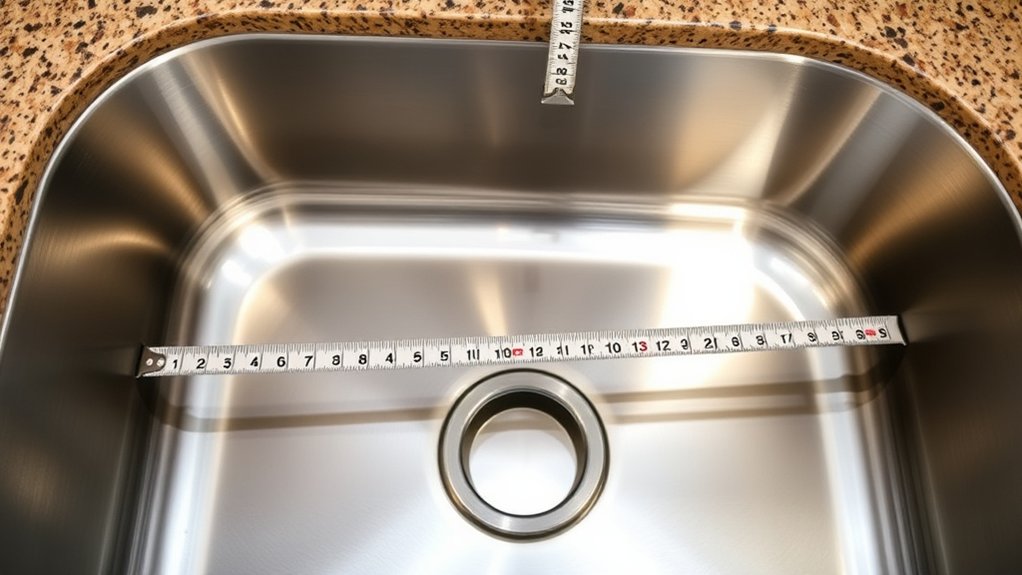
To accurately measure your sink’s length and width, place a tape measure across the interior corners of the basin. Make sure the tape is straight and snug against the edges. This helps ensure you get precise measurements.
Measure the basin’s interior corners with a straight, snug tape for precise length and width.
Next, follow these steps:
- Measure the length from the front to the back at the widest point.
- Measure the width from side to side at the widest point.
- Record both measurements carefully, noting any irregularities or curves.
Double-check your measurements to avoid mistakes. Keep the tape measure level and steady, and avoid pulling it too tight. Accurate measurements are key for choosing a replacement sink that fits perfectly and prevents installation issues.
Determine the Sink’s Depth and Height
Measuring your sink’s depth and height is important to make sure everything fits correctly and is easy to install.
To find the depth, place a ruler or tape measure inside the sink, from the bottom to the top edge. Write down this measurement.
Next, measure the height from the bottom of the sink to the top rim. If your sink has a lip or rim that sticks out beyond the basin, include this in your measurement.
It’s best to take these measurements with the sink empty and dry for accuracy. Confirm your measurements are consistent by measuring at multiple points, especially if your sink isn’t perfectly shaped.
Getting precise depth and height measurements helps you choose a replacement that fits well without gaps or extra adjustments.
Assess Countertop Thickness and Material
Start by measuring your countertop’s thickness to make sure your sink will fit properly.
Next, figure out what material your countertop is made of—whether it’s granite, laminate, or quartz—so you can pick mounting options that work with it.
Finally, check if your sink’s mounting style matches your countertop’s material for a secure and easy installation.
Measure Countertop Thickness
Determining your countertop thickness is key to choosing the right mounting hardware and making sure your sink is secure. To get an accurate measurement:
- Use a ruler or caliper to measure the thickness at the sink cutout area.
- Check a few spots around the cutout to see if there are any differences.
- If your countertop isn’t uniform, take all the measurements and find the average.
Make sure your measuring tool stays straight and steady for the best results. If your countertop is laminate or tile, remove any trim or edging that could interfere with the measurement. Keep in mind that thicker countertops might need different clips or supports. Accurate measurement helps you pick the right hardware and ensures a smooth, secure fit for your new sink.
Identify Material Type
After measuring your countertop thickness, the next step is to identify the material type, since it affects the choice of mounting hardware and installation method. Different materials like laminate, granite, quartz, or tile have unique properties that influence how your sink is secured.
For example, heavy granite or quartz countertops need sturdy clips and strong supports, while laminate surfaces might require adhesive-mounted options. Examine your countertop closely: feel its texture, check for seams or edges, and note its weight.
If you’re unsure, it’s a good idea to consult manufacturer specifications or ask a professional. Correctly identifying your countertop material ensures you select compatible hardware and helps prevent potential damage during installation.
Knowing your countertop material also helps you choose the right tools and techniques for a smooth, secure sink replacement.
Check Mounting Compatibility
To check your mounting compatibility, start by assessing your countertop’s thickness and material.
Use a ruler or caliper to measure the thickness at multiple points to ensure accuracy.
Next, identify the material—whether it’s laminate, granite, or tile—as this affects how you’ll mount the sink.
Then, review your sink’s mounting instructions to see if it’s designed for your specific countertop thickness and material.
If your countertop is thicker or made of a different material than the sink’s specifications, you might need extra mounting hardware or modifications.
Confirming compatibility now helps prevent issues later and ensures a secure fit.
Always double-check measurements and manufacturer recommendations before buying your new sink.
Locate the Sink Center and Drain Position
Locating the sink center and drain position is a simple process that helps ensure your measurements are accurate. First, find the drain opening at the bottom of your sink.
Measure from one side to the center of the drain, then repeat from the opposite side. Mark the midpoint to identify the sink’s center.
To find the drain’s exact location, measure from the back wall to the drain’s center. Use a level or straight edge to verify your measurements are aligned.
Here’s a quick reference:
| Measurement Step | Tool Needed | Key Point |
|---|---|---|
| Find drain center | Tape measure | Mark the midpoint after measuring both sides |
| Measure from back wall | Tape measure | Confirm the drain’s position relative to the wall |
| Mark the center point | Pencil | Use for accurate placement in measurements |
| Verify with a level | Level | Ensure measurements are straight and aligned |
| Record measurements | Notebook | Keep track for future reference |
Record and Verify Your Measurements
Recording and verifying your measurements is crucial to ensure accuracy before making any cuts or installing the sink. Double-check your measurements to avoid costly mistakes.
First, measure the length and width of the sink opening at the top, bottom, and middle to account for any irregularities. Second, measure the depth from the countertop surface to the bottom of the sink to make sure it fits your cabinet space.
Third, confirm the location of the drain and faucet holes, noting their distance from the edges. Use a level to check for flatness and record all measurements carefully.
Re-measure each dimension at least twice to confirm accuracy. Clear, precise measurements help prevent fitting issues and ensure your new sink fits perfectly.
Understand Standard Kitchen Sink Sizes
Understanding standard kitchen sink sizes is key to choosing one that fits your space and needs. Most sinks come in common dimensions, making it easier to find a suitable replacement.
Standard widths range from 22 to 33 inches, with depths usually between 8 and 10 inches. The table below highlights some common sizes:
| Width (inches) | Depth (inches) | Bowl Configuration |
|---|---|---|
| 22 | 8 | Single or Double Bowl |
| 24 | 9 | Double Bowl |
| 30 | 10 | Double Bowl |
| 33 | 8 | Triple or Larger Sinks |
Knowing these standards helps you identify options that will fit and makes your selection process easier. Measure your current sink carefully to compare with these sizes and ensure a proper fit.
Consider Your New Sink’s Features and Fit Requirements
Once you have a clear idea of standard sink sizes, it’s important to evaluate the features that will meet your specific needs and how well the sink will fit into your space. Consider these key aspects:
- Number of Basins: Think about whether you want a single, double, or triple bowl. This helps with multitasking or handling different kitchen tasks more efficiently.
- Material: Choose from options like stainless steel, porcelain, or composite materials. Pick based on durability, look, and how much maintenance they require.
- Faucet and Accessories: Make sure your new sink can fit the faucet you prefer. Also, check if it can accommodate extra accessories like soap dispensers or sprayers for added convenience.
Next Steps After Measuring Your Kitchen Sink
After measuring your kitchen sink, the next step is to compare your measurements with available sink options to find the best fit. Look for sinks that closely match your length, width, and depth measurements.
Pay attention to the mounting style and drain location to ensure compatibility with your existing setup. Check product specifications and installation instructions to confirm the sink will fit your countertop and cabinetry.
If you’re choosing a new material or style, consider how it complements your kitchen’s overall design. Take note of faucet and accessory placements so you won’t encounter surprises during installation.
Once you find a suitable match, you can confidently move forward with purchasing and preparing for installation, knowing your measurements are accurate.
Frequently Asked Questions
How Do I Measure for Custom or Non-Standard Sink Sizes?
To measure for custom or non-standard sink sizes, start by removing the existing sink. Then, measure the width and length of the opening from edge to edge using a tape measure for accuracy.
Make sure to record these dimensions carefully. If needed, also note the depth of the opening.
If the sink has irregular shapes, sketch it out and measure each side separately. Share these measurements with your supplier to ensure a perfect fit.
What Should I Do if My Measurements Are Inconsistent?
If your measurements are inconsistent, double-check each one carefully with a reliable ruler or tape measure. Take multiple readings at different times to make sure they’re accurate.
If you still see discrepancies, measure the sink area directly and compare the results. It can also help to ask someone else to verify your measurements.
When you’re unsure, it’s best to consult a professional. This way, you’ll avoid buying a sink that doesn’t fit properly. Accurate measurements will save you time and money.
Can I Replace an Undermount Sink With a Top-Mount One?
Think of your sink as a puzzle piece. Can a top-mount fit into the space meant for an undermount? Usually, yes, but you’ll need to check the size, shape, and mounting area.
A top-mount sits on the counter, while an undermount is beneath. You might need to modify the countertop or support structure for a seamless fit.
Be prepared for some adjustments to guarantee it fits securely and looks great.
How Do I Account for Faucet and Accessory Placements?
You should measure the existing faucet and accessory placements before choosing a new sink. First, note the distance between the faucet holes and other accessories like soap dispensers or sprayers.
Then, measure from the edge of the countertop to these points to make sure your new sink will fit around them. It’s a good idea to double-check these measurements.
Compare them with the specifications of your new sink to ensure everything will fit and work properly.
What Are Common Mistakes to Avoid When Measuring?
You don’t want your measurements to be a shot in the dark or a puzzle missing pieces. Take your time—measure twice, cut once. Rushing can lead to mistakes that are hard to fix later.
Don’t forget to account for faucet and accessory placements. Otherwise, your new sink might clash or block. It’s important to plan ahead so everything fits just right.
Be precise with your width, depth, and height. Double-check your measurements against your cabinet opening to avoid surprises. Small mistakes can turn a perfect fit into a frustrating puzzle.
Conclusion
Now that you’ve mastered how to measure your kitchen sink, you’re all set to find the perfect fit—no more guesswork or kitchen nightmares! Accurate measurements are your secret weapon to avoid costly mistakes and make sure your new sink fits like a glove.
Think of it as the key to transforming your kitchen into a sleek, functional oasis. With these tips, you’re unstoppable—ready to make your sink replacement a smooth, stress-free victory!


