How Do You Cook Steak on a Non-Stick Pan?
Cooking the perfect steak on a non-stick pan can feel tricky, especially if you’re worried about sticking or uneven cooking. You’re not alone—many people struggle to get that ideal sear without ruining their pan or ending up with a dry, overcooked steak.
But with a few simple tips, you can master it easily and enjoy restaurant-quality results at home.
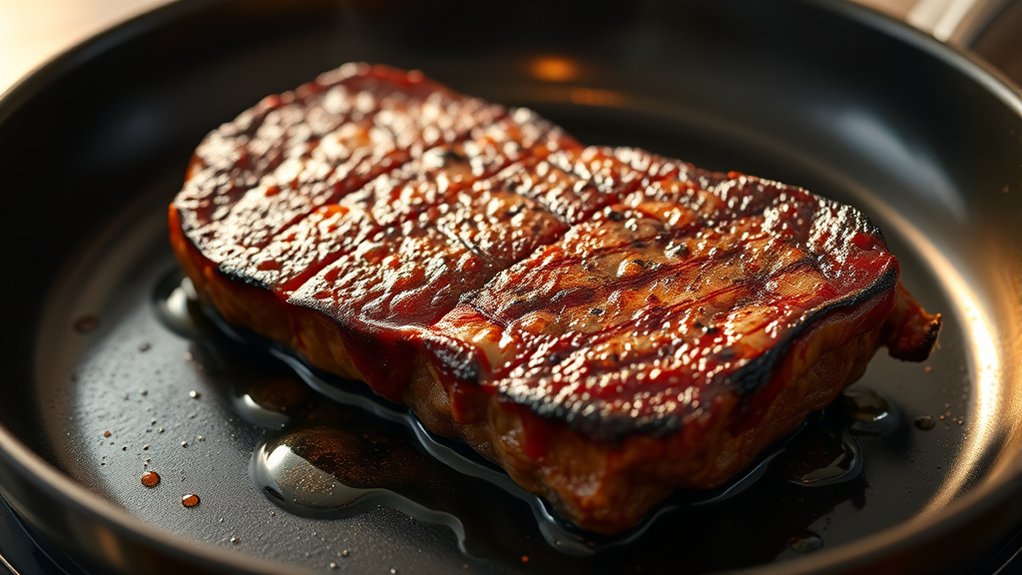
To cook steak on a non-stick pan, start by cleaning and drying the pan thoroughly, then heat it over medium-high and add a high-smoke point oil.
Season your steak generously and let it come to room temperature. Place the steak in the hot pan without moving it, searing each side for 2-4 minutes until a crust forms.
Use a thermometer to check doneness, then let it rest before serving. Keep following these tips for perfect results every time.
Key Takeaways
- Thoroughly clean and dry your non-stick pan, then preheat it on medium-high heat before adding some high-smoke point oil.
- Use a well-seasoned, room-temperature steak with plenty of salt and pepper. This will give you a nice, flavorful sear.
- Carefully place the steak into the hot pan without moving it around. Let it cook for about 2 to 4 minutes until you see a deep, caramelized crust forming.
- Flip the steak once, adjust the heat if needed, and cook to your preferred doneness. You can use a meat thermometer or watch for visual cues.
- Once done, let the steak rest for 5 to 10 minutes. This helps the juices redistribute, making each bite juicy and tender before you slice into it.
How to Prepare Your Non-Stick Pan for Perfect Steak Searing
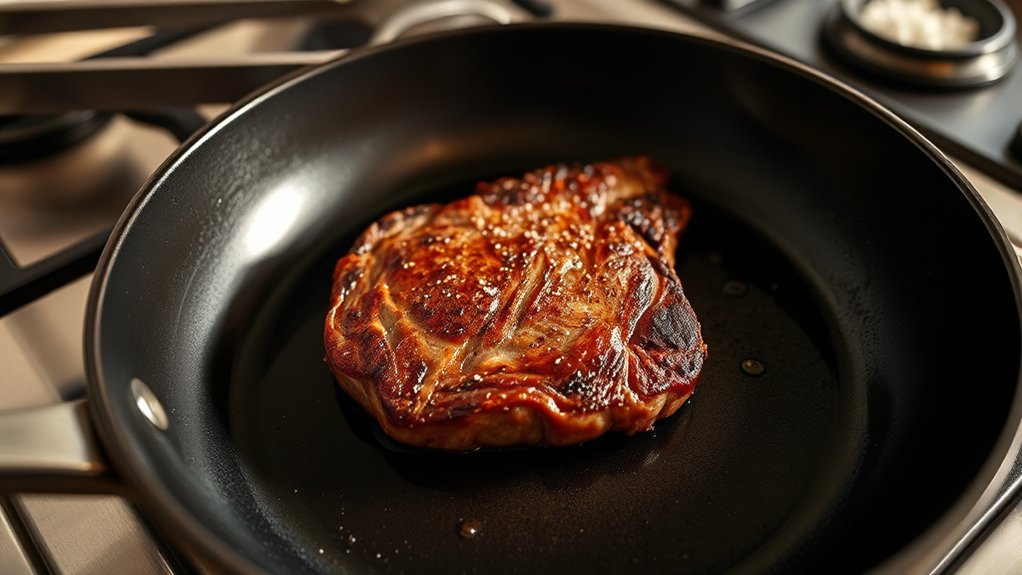
Before you start searing your steak, make sure your non-stick pan is ready. First, give it a thorough clean to remove any leftover food or residue.
Dry the pan completely with a paper towel or cloth—moisture can prevent that perfect sear you’re after. Check that the surface isn’t scratched or peeling so heat distributes evenly.
Dry the pan thoroughly to prevent sticking and ensure even heat distribution for a perfect sear.
Set your stove to medium-high and let the pan warm up for a few minutes. Don’t add oil right away; instead, wait until the pan is hot.
Add a high-smoke point oil like canola or avocado just before placing the steak in. This helps prevent sticking and creates a beautiful caramelized crust.
Getting your pan properly prepared makes all the difference. It ensures your steak sears evenly and gets that delicious, flavorful exterior.
Choosing the Best Cut of Steak for Pan Searing
Choosing the right cut of steak is key to getting that perfect sear and a juicy inside. Look for cuts with good marbling because the fat melts during cooking, adding flavor and moisture.
Thinner steaks cook faster, so if you want a quick sear, go for cuts like sirloin or flank. For more control over how cooked your steak is, thicker cuts like ribeye or filet mignon are better options.
| Cut Type | Thickness | Flavor Profile | Best for | Price Range |
|---|---|---|---|---|
| Ribeye | 1.5-2 inches | Rich, juicy | Searing & grilling | Moderate to high |
| Sirloin | 1 inch | Beefy, lean | Quick searing | Affordable |
| Filet Mignon | 1.5 inches | Mild, tender | Elegant meals | High |
| Flank Steak | 0.5-1 inch | Bold, lean | Quick sear | Affordable |
| New York Strip | 1-1.5 inches | Balanced flavor | Searing & grilling | Moderate to high |
How to Season and Bring Your Steak to Room Temperature
Bringing your steak to room temperature and seasoning it properly are key steps for even cooking and better flavor. Take the steak out of the fridge about 30 minutes before cooking so it can warm up.
This helps prevent cold spots and makes for a more even sear. Next, generously season both sides with salt and pepper, or your favorite spices. Salt really enhances the flavor and helps create a tasty crust, so don’t hold back.
You can also add other seasonings like garlic powder or herbs if you like. Before seasoning, pat the steak dry with a paper towel—excess moisture can prevent a good browning.
Once your steak is seasoned and at room temperature, it’s ready for that perfect cook on your non-stick pan.
How to Achieve a Perfect Sear on a Non-Stick Pan
To get a perfect sear on a non-stick pan, start by heating the pan over medium-high heat until it’s hot enough to sizzle when you add the steak. Make sure the surface heats evenly for consistent browning.
Next, pat your steak dry to remove excess moisture. This step is key because too much moisture can prevent proper searing and cause steaming instead.
Use a thin layer of oil with a high smoke point, like canola or grapeseed oil. Swirl it around to coat the surface evenly, which helps create that nice crust.
Gently place the steak in the pan, laying it away from you to avoid splatters. Don’t move the steak too soon — let it develop a crust before flipping.
After searing, let the steak rest for a few minutes. Resting helps the juices redistribute, making your steak more flavorful and tender.
How to Adjust Cooking Time for Different Steak Thicknesses
Thicker steaks need more time to cook to your preferred doneness, while thinner cuts cook faster and can easily become overdone. To adjust, start by estimating the thickness of your steak.
For thicker cuts, increase the cooking time slightly and consider lowering the heat to prevent burning the outside before the inside is cooked. Use a meat thermometer to check the internal temperature and aim for your preferred doneness.
For thinner steaks, reduce the cooking time and keep a close eye to avoid overcooking. Remember, thicker steaks may need a few extra minutes per side, while thinner ones might only need a quick sear.
Adjusting the cooking time based on thickness helps ensure your steak cooks evenly. This way, you maintain its juiciness and flavor without overdoing it.
When and How Should You Flip Your Steak for Even Cooking?
Timing is key when flipping your steak to guarantee even cooking and a perfect crust. Wait until you see a deep, caramelized sear on the first side, usually after about 2-4 minutes depending on thickness.
Use tongs to gently lift the edge. If it releases easily and has a golden-brown color, it’s ready to flip. Don’t flip too early, or you’ll tear the crust and interfere with browning.
Gently lift with tongs; if golden and easy to release, it’s time to flip.
Flip only once for the best results, as multiple flips can prevent a good crust from forming. When you do flip, do it smoothly to avoid puncturing the steak.
After flipping, reduce the heat slightly if necessary and continue cooking until your desired doneness is achieved. Proper timing and technique guarantee an evenly cooked, flavorful steak.
How to Use Oil and Butter to Prevent Sticking and Add Flavor
To prevent sticking and boost flavor, choosing the right fat is key—you want an oil or butter with a high smoke point.
Timing your addition and using proper technique guarantees the fat evenly coats the pan and steak.
With the right approach, your steak will cook beautifully without sticking, and you’ll add rich flavor every time.
Choosing the Right Fat
Choosing the right fat is key to preventing your steak from sticking and boosting its flavor. The type of fat you pick affects both the sear and the taste.
For high heat, go for oils with high smoke points like canola, grapeseed, or avocado oil. These won’t burn or turn bitter when heated.
Butter adds richness but burns easily, so it’s best mixed with a high smoke point oil.
Here’s a quick comparison:
| Fat Type | Smoke Point | Flavor Profile |
|---|---|---|
| Canola Oil | 400°F | Neutral |
| Ghee | 485°F | Nutty, rich |
| Butter | 350°F | Creamy, savory |
Choose wisely to make your steak taste better and keep it from sticking.
Timing and Technique
Preheat your pan over medium-high heat until it’s hot enough to shimmer slightly, then add your oil or butter. This helps prevent sticking and gives you a nice sear.
Once the fat melts or heats, place the steak in the pan, pressing gently to ensure even contact. Resist the urge to move it right away; let it develop a crust for 2-3 minutes.
Flip only when the surface releases easily and has a golden-brown color. Use tongs or a spatula to turn the steak, and add a pat of butter or a splash of oil during the last minute for extra flavor.
Keep an eye on the timing, adjusting for thickness and how cooked you want it. Proper timing and technique will prevent sticking and help you get a flavorful, perfectly cooked steak.
How to Tell When Your Steak Is Done (and Use a Meat Thermometer)
Knowing when your steak is done is key to getting it just right. You can rely on a meat thermometer to check the internal temperature or observe visual and touch cues.
Understanding these signs guarantees your steak reaches the perfect level of doneness. This way, you’ll avoid undercooking or overcooking, making every bite just right.
Ideal Internal Temperatures
To guarantee your steak reaches the perfect level of doneness, using a meat thermometer is the most reliable method. Different internal temperatures correspond to specific doneness levels.
For rare steak, aim for 125°F (52°C). The center will be cool and red. For medium-rare, target 135°F (57°C), with a warm, red center.
Medium reaches 145°F (63°C), with a warm pink center. Medium-well is about 150°F (66°C), with only a slight pink. Well-done steaks are cooked to 160°F (71°C) or higher and are uniformly brown.
Keep in mind, removing the steak from heat slightly before reaching these temperatures allows carryover cooking. Monitoring the temperature guarantees you get the perfect balance of tenderness and flavor.
Using a Meat Thermometer
A meat thermometer is the best way to tell when your steak is perfectly cooked. Just insert the probe into the thickest part of the meat, making sure it doesn’t touch the bone or pan. Then, check the temperature to see how done it is.
Here’s a quick guide:
| Doneness | Temperature (°F) | Description |
|---|---|---|
| Rare | 120–125 | Cool red center |
| Medium Rare | 130–135 | Warm red center |
| Medium | 140–145 | Hot pink center |
| Medium Well | 150–155 | Slightly pink center |
| Well Done | 160+ | Fully cooked, no pink |
Using a thermometer ensures you get your steak just right every time.
Visual and Touch Cues
Watching your steak’s appearance and feeling its texture are quick ways to gauge doneness without a thermometer. You’ll notice some visual cues and tactile signals that tell you when it’s just right.
For example, a rare steak is soft and feels squishy when pressed, with a cool, deep red center. Medium-rare has some resilience and a warm, pink interior.
Medium feels firmer, with a light pink center and a slight bounce. Well-done is firm and resists pressure, with little to no pink.
The surface may develop a slight crust, and the juices will run clear as it cooks through.
Why Resting Your Steak Is Important: and How to Do It Properly
Resting your steak after cooking is important because it helps the juices redistribute throughout the meat, making it juicier and more flavorful. If you cut into it right away, those tasty juices spill out, and the steak can end up dry.
To rest your steak properly, move it to a plate or cutting board and loosely tent it with foil. Let it sit for about 5 minutes for smaller steaks or up to 10 minutes for thicker cuts.
This extra time allows the muscle fibers to relax and reabsorb the juices, improving the overall flavor and tenderness.
Don’t skip this step if you want a perfectly cooked, juicy steak—resting makes all the difference!
Troubleshooting Steak-Sticking, Burning, or Uneven Cooking Problems
Even when you follow all the steps for resting your steak, issues like sticking, burning, or uneven cooking can still happen. To fix these problems, start by making sure your pan isn’t too hot—high heat can cause burning and sticking.
Use a thin layer of oil with a high smoke point, like avocado or grapeseed oil, to prevent sticking. Don’t move the steak around too much; let it develop a crust before flipping. Check your heat regularly to avoid hotspots that cause uneven cooking.
If sticking continues, lower the heat slightly or add a bit more oil. Also, make sure your pan is well-seasoned or clean to prevent residue buildup, which can lead to uneven browning or sticking.
Use the right oil at the right temperature. Preheat your pan gradually and don’t flip the steak too early. Maintaining consistent heat is key. Finally, clean and season your pan regularly to keep it in good shape.
How to Add Sauces, Herbs, and Butter for Extra Flavor
Adding sauces, herbs, and butter can really boost your steak by making it more flavorful and indulgent. After cooking, let your steak rest briefly to let the juices settle.
Then, add a pat of butter or a drizzle of sauce to the pan. Let it melt and coat the meat evenly for extra richness. Fresh herbs like rosemary, thyme, or parsley can be sprinkled on top for aroma and brightness.
For a fun twist, try mixing different flavors in a small bowl before adding them to your steak. Here’s a quick guide:
| Ingredient | Purpose | Tips |
|---|---|---|
| Butter | Adds richness | Use clarified butter for high heat |
| Herbs | Fresh aroma and flavor | Add near the end to preserve scent |
| Sauces | Extra moisture and flavor | Use sparingly to avoid overpowering |
This simple step makes your steak taste even better with little effort.
Frequently Asked Questions
Can I Cook Frozen Steak on a Non-Stick Pan?
Yes, you can cook frozen steak on a non-stick pan. Start by preheating the pan over medium heat. Place the frozen steak directly onto the pan without thawing.
Cook for a few minutes on each side to develop a sear, then lower the heat to finish cooking through. Use a meat thermometer to make sure it reaches your desired doneness.
Patience and proper heat control are key for a tasty result.
Is It Safe to Cook Steak Without Oil on a Non-Stick Surface?
Yes, you can cook steak without oil on a non-stick surface, but it’s not always the best idea. The non-stick coating helps prevent sticking, so oil isn’t strictly necessary.
However, adding a small amount of oil or butter can really improve the flavor and help the steak sear better. Without oil, your steak might stick a little or cook unevenly.
For the best results, it’s a good idea to use a little oil or butter, even on a non-stick pan. That way, you get a juicy, flavorful steak every time.
How Do I Clean a Non-Stick Pan After Cooking Steak?
To clean your non-stick pan after cooking steak, let it cool slightly. Then soak it in warm, soapy water for a few minutes.
Use a soft sponge or cloth to gently scrub away any residue. Avoid abrasive cleaners or steel wool to protect the surface.
Rinse thoroughly with water, and dry with a soft towel. This helps keep your non-stick surface in good shape for future cooking.
Can I Cook Multiple Steaks at Once in a Non-Stick Pan?
Yes, you can cook multiple steaks at once in a non-stick pan. Just make sure they fit comfortably without overcrowding, which can cause uneven cooking.
Place them with space between each so heat can circulate evenly. Keep the heat at medium to prevent sticking or burning.
Turn the steaks as needed, and you’ll get a good sear on each one. Remember, a little patience guarantees evenly cooked, delicious steaks.
How Does Non-Stick Coating Affect Steak Flavor?
The non-stick coating doesn’t really change the flavor of your steak. It mainly stops it from sticking and makes cleanup easier.
Since non-stick pans often don’t get as hot as cast iron, they might not give you that nice caramelized crust that adds flavor.
To get the best taste, preheat your pan well, use a little oil, and avoid overcrowding. This way, your steak can get a good sear.
Conclusion
Cooking steak on a non-stick pan is quick and easy with the right techniques. While some think non-stick pans aren’t great for searing, research shows they can give you a nice crust if you preheat and use them properly.
Just remember to pick the right cut, let it reach room temperature, and keep an eye on your cook time. Rest your steak after cooking, and you’ll get a flavorful, perfectly cooked meal. Using proven methods over myths ensures delicious results every time, especially when cooking steak on a non-stick pan.