7 Simple Steps to Install a Kitchen Faucet
Many homeowners find installing a new kitchen faucet to be more challenging than it looks. You’re not alone—this task can feel overwhelming if you’re unsure where to start.
But don’t worry, with a little guidance, you’ll be able to do it yourself in no time.
Start by gathering tools like wrenches, screwdrivers, plumber’s tape, and your new faucet.
Turn off the water supply and clear your workspace.
Remove the old faucet by disconnecting the supply lines and loosening mounting nuts.
Install the new faucet, securing it from underneath.
Connect the water lines tightly and turn the water back on to check for leaks.
Finally, test your faucet for smooth operation.
If you want detailed guidance, keep going for all the tips.
Key Takeaways
– Turn off the water supply and drain any remaining water from the sink lines.
It’s always a good idea to double-check that the water is completely off to avoid messes.
– Remove the old faucet by loosening the mounting hardware and disconnecting the supply lines.
You might need a wrench for this part.
– Assemble the new faucet components and secure the mounting bracket to the sink.
Take your time to make sure everything lines up properly.
– Insert the faucet into the mounting hole and tighten it from underneath.
Make sure it’s straight before tightening fully.
– Connect the supply lines, turn the water back on, and check for leaks and proper operation.
Run the water to see if everything is working smoothly.
What Tools and Materials Do You Need to Install a Kitchen Faucet

To install a kitchen faucet, you’ll need a few essential tools and materials. First, gather an adjustable wrench, basin wrench, screwdrivers (both flathead and Phillips), and pliers.
Gather essential tools like a wrench, screwdrivers, and pliers for a smooth kitchen faucet installation.
You’ll also need plumber’s tape to help ensure leak-proof connections. Have a bucket or towel ready to catch any residual water that might drip during the process.
For materials, collect the new faucet, flexible supply lines, and mounting hardware that comes with your faucet. It’s helpful to have a flashlight for better visibility and a small cup or container to keep screws and nuts organized.
Make sure to check that all parts are present before you start. Having these tools and materials ready will make the installation smoother and faster, setting you up for success when you move on to the next steps.
How to Turn Off Water and Prepare Your Workspace
Before you start removing the old faucet, it’s essential to turn off the water supply to prevent leaks and water damage. Locate the shut-off valves under your sink—usually two, one for hot and one for cold water. Turn each valve clockwise until fully closed.
If you don’t have shut-off valves, you’ll need to turn off the main water supply to your home. Once the water is off, open the faucet to drain any remaining water in the lines.
Clear the workspace by removing items from under the sink and laying down a towel or bucket to catch any drips. Confirm your tools and new faucet are nearby so you can work efficiently.
This preparation helps prevent messes and makes the installation smoother.
How to Remove Your Old Kitchen Faucet Safely
Carefully loosen and remove the mounting nuts or bolts that secure the faucet to the sink using a wrench or basin wrench. Once loose, lift the faucet straight up to detach it from the sink.
If you encounter resistance, check for any remaining fasteners or clips holding it in place. Be cautious of residual water that might spill when disconnecting supply lines. Use a bucket or towel to catch any drips.
Next, disconnect the hot and cold water supply lines with adjustable pliers, turning them counterclockwise. If the lines are corroded or stuck, apply penetrating oil and wait a few minutes before trying again.
Remove any remaining mounting hardware or gaskets. Carefully lift out the old faucet, keeping the area clean and clear for the new installation.
How to Assemble and Install Your New Kitchen Faucet
With the old faucet removed and the sink area cleared, you’re ready to assemble and install your new kitchen faucet. First, check your faucet’s mounting hardware and make sure all parts are there.
Attach the mounting bracket to the sink or countertop, following the manufacturer’s instructions. Insert the faucet into the mounting hole, making sure it’s aligned properly.
Secure the faucet from underneath with the provided nuts or washers. Tighten them snugly but don’t overdo it to avoid damaging the sink. If your faucet has a deck plate, install it now if needed.
Double-check that the faucet is level and securely fastened. This sets the stage for the final connection to the water lines, which you’ll do in the next step.
How to Connect Water Lines and Look for Leaks
Now that your faucet is in place, you can connect the water supply lines. Make sure you tighten the fittings securely to prevent leaks.
Once everything is connected, turn on the water. Check carefully for any drips or leaks around the connections.
Connecting Water Supply Lines
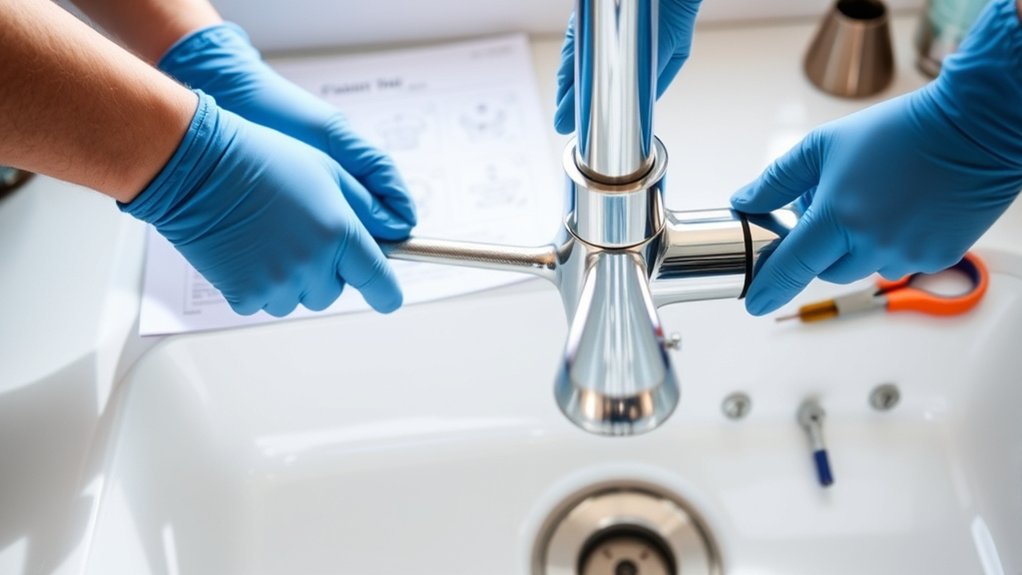
Start by attaching the water supply lines to the faucet’s inlet ports, making sure the connections are snug but not overtightened. Use adjustable wrenches if needed, but be careful not to overtighten, which could damage the fittings.
Connect the hot water line to the hot inlet and the cold water line to the cold inlet, aligning the fittings properly. Once attached, turn on the water supply valves slowly to check for leaks.
Watch for any drips or moisture around the fittings. If you notice leaks, tighten the connections slightly until the dripping stops. Be sure both hot and cold lines are securely connected to prevent water damage or leaks when you turn on the faucet fully.
Inspecting for Drips
Once you’ve tightened the connections, turn on the water supply valves slowly to check for leaks. Carefully watch the fittings and lines for any signs of dripping or moisture. Run both hot and cold water to make sure there are no leaks at the connections.
If you notice any drips, tighten the fittings a bit more. Just don’t overtighten, because that can cause damage. Use a paper towel or cloth around the fittings to help spot leaks more easily. Also, check underneath the sink for any water pooling or drips.
Make sure the faucet operates smoothly without leaks. Once you’re confident no water is escaping, turn off the water supply, and your installation is done. It’s a good idea to check the connections over the next few days to catch any slow leaks early.
How to Test Your Faucet and Make Adjustments
Once you’ve installed your faucet, turn on the water to check the flow and make sure it’s steady.
If the water pressure feels low or uneven, you might need to adjust the supply valves or the aerator.
Quick tweaks like these will help your faucet work smoothly and efficiently.
Checking Water Flow
Before making any adjustments, test your faucet’s water flow to ensure it’s working properly. Turn on both the hot and cold water handles fully and watch the stream.
Is it steady and strong, or weak and sputtering? This initial check helps identify if there’s a problem. Think of the water flow like this:
| Flow Quality | Description |
|---|---|
| Strong | Clear, steady, and powerful |
| Weak | Thin, inconsistent, or dribbling |
| Sputtering | Surges or irregular bursts |
| No flow | No water at all |
| Excessive flow | Too forceful, splashing possible |
Assess your water flow based on these descriptions so you know if adjustments are needed.
Adjusting Water Pressure
If your water flow isn’t as strong as it should be or is sputtering, it’s time to test and adjust the water pressure. First, turn on your faucet and watch the flow. If it’s weak, check the aerator for clogs—unscrew it and clean out any debris.
Next, make sure your shut-off valves are fully open to allow maximum water flow. If the pressure is still low, you might need to adjust the pressure regulator, usually located near the main water supply.
Turn the regulator clockwise to increase pressure or counterclockwise to decrease it. After making adjustments, turn the faucet back on and test the flow again. It should now be steady and strong.
Fine-tuning the pressure helps your faucet work efficiently without sputtering or weak flow.
Final Tips for a Secure, Leak-Free Kitchen Faucet Installation
To guarantee your kitchen faucet works properly and doesn’t leak, double-check all connections after installing. Make sure all nuts and fittings are tight but not overtightened, as that could damage parts.
Turn on the water supply slowly and watch for leaks around the base and underneath the sink. If you see any drips, tighten the connections a bit until the leaks stop.
Use a cloth to wipe away any excess water and inspect all joints closely. Check that the faucet handle moves smoothly and that water flows evenly from both hot and cold sides.
Keep a few extra washers and O-rings nearby just in case you need to replace any. Following these final steps can help prevent future leaks and keep your faucet secure and working well for years to come.
Frequently Asked Questions
Can I Install a Kitchen Faucet Without Professional Help?
Yes, you can install a kitchen faucet without professional help if you’re comfortable with basic plumbing tasks. Just gather the necessary tools, turn off the water supply, and follow the installation instructions carefully.
Make sure to disconnect the old faucet properly before attaching the new one. Take your time and don’t rush the process. If you run into issues or feel unsure, it’s always a good idea to call in a professional for safety and a proper install.
How Long Does a Typical Kitchen Faucet Installation Take?
A typical kitchen faucet installation takes about an hour, kind of like cooking a simple meal. When I installed mine, I was surprised how quickly I finished, especially with the right tools and instructions.
If you’re comfortable working with your hands and follow clear steps, you’ll probably finish within this timeframe. Just be patient, gather your supplies first, and remember that rushing can lead to mistakes.
What Are Common Mistakes to Avoid During Installation?
You should avoid over-tightening connections, as this can damage parts or cause leaks. Skipping the shut-off valves can lead to flooding if something goes wrong.
Not reading the manufacturer’s instructions might result in improper installation. Using the wrong tools can strip fittings or damage finishes.
Remember to turn off the water supply before starting. Double-check all connections for tightness and leaks before finishing to ensure a secure, leak-free installation.
Do I Need Special Tools for Different Faucet Brands?
Like a detective needing the right clues, you might wonder if special tools are needed for different faucet brands. Generally, most faucets share similar connections, so standard tools like wrenches and screwdrivers do the trick.
However, some brands have unique fittings or mounting systems. Having a few specialized tools or a brand-specific installation kit can make the process smoother.
Always check the manufacturer’s instructions first to avoid surprises. That way, you’ll be prepared no matter what faucet you’re working on.
How Often Should I Check for Leaks After Installation?
You should check for leaks right after you install everything and then again regularly, at least once a month.
Turn on the water and look closely at all the connections, especially around the base and underneath the sink.
If you see any drips or moisture, tighten the fittings or replace washers as needed.
Doing regular checks helps prevent water damage, saves you money, and keeps your faucet working smoothly over time.
Conclusion
By following these simple steps, you can ensure a quick, secure, and leak-free kitchen faucet installation. Prepare your workspace carefully before starting.
Assemble all parts with care, making sure everything is ready for connection. Connect the faucet with precision, checking each fitting along the way.
Test the faucet thoroughly for leaks and proper operation. Tighten all connections properly to avoid any future issues.
With patience and attention to detail, you’ll enjoy a functional, reliable faucet that enhances your kitchen’s look and usability. Remember, a well-installed kitchen faucet not only improves daily routines but also offers peace of mind for years to come.