DIY Guide to Unclog Your Kitchen Sink Drain Fast
Dealing with a clogged kitchen sink drain can be so frustrating—many people struggle with slow drains or unpleasant odors. If you’re tired of waiting for water to drain or dealing with backups, you’re not alone.
Luckily, there are simple DIY solutions you can try before calling in a plumber.
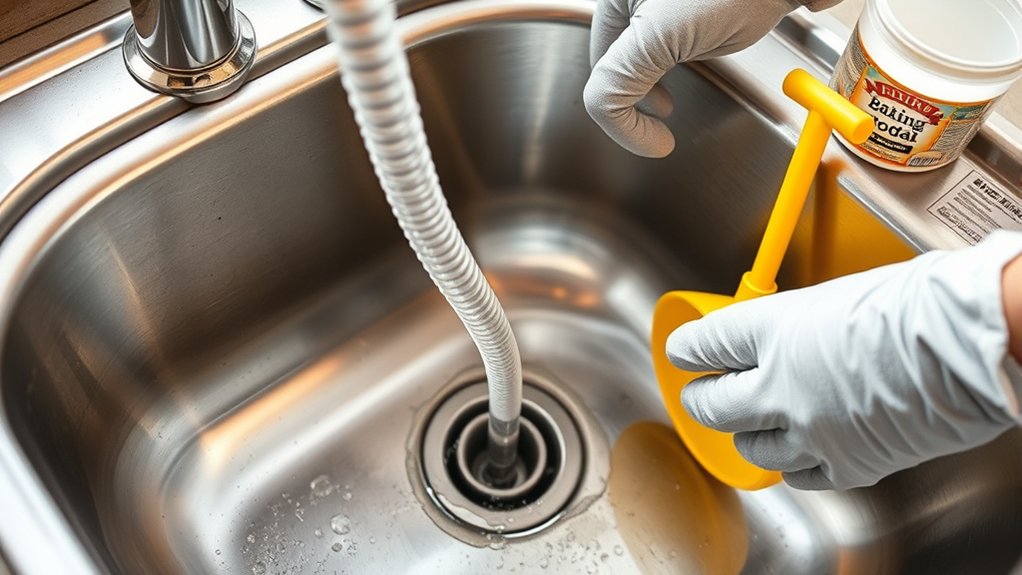
If your kitchen sink is clogged, start by pouring boiling water down the drain to dissolve minor blockages. Use a plunger to apply pressure and loosen the clog, making sure to seal tightly.
For stubborn clogs, try a drain snake or remove the P-trap to clear debris.
Avoid harsh chemicals and remember to maintain your drain regularly with baking soda and vinegar.
Keep going, and you’ll uncover more simple tips to keep your sink flowing freely.
Key Takeaways
– Use hot water, a plunger, or a drain snake to quickly dislodge minor clogs.
These tools are usually enough to clear out simple blockages.
Just pour some hot water down the drain first to loosen things up.
Then, try using a plunger or a drain snake for stubborn spots.
– Regularly pour baking soda and vinegar to dissolve buildup naturally.
It’s a simple, eco-friendly way to keep your pipes clear.
Pour half a cup of baking soda down the drain, then follow with a cup of vinegar.
Let it fizz for about 15 minutes before rinsing with hot water.
– Clean the P-trap periodically to remove trapped debris and prevent future blockages.
This part of your drain can collect gunk over time.
Place a bucket underneath, unscrew the trap, and clear out any debris.
Reassemble it once everything is clean.
– Avoid chemical drain cleaners that can damage pipes; opt for natural solutions instead.
They’re safer for your plumbing and better for the environment.
Stick with baking soda, vinegar, or hot water instead of harsh chemicals.
– Recognize signs of persistent clogging and call a plumber if DIY methods fail.
If your drain remains slow or clogged after trying these tips, it’s time to get professional help.
Don’t hesitate to call a plumber to avoid causing any damage to your pipes.
Why Do Kitchen Sinks Clog and How Can You Prevent It?
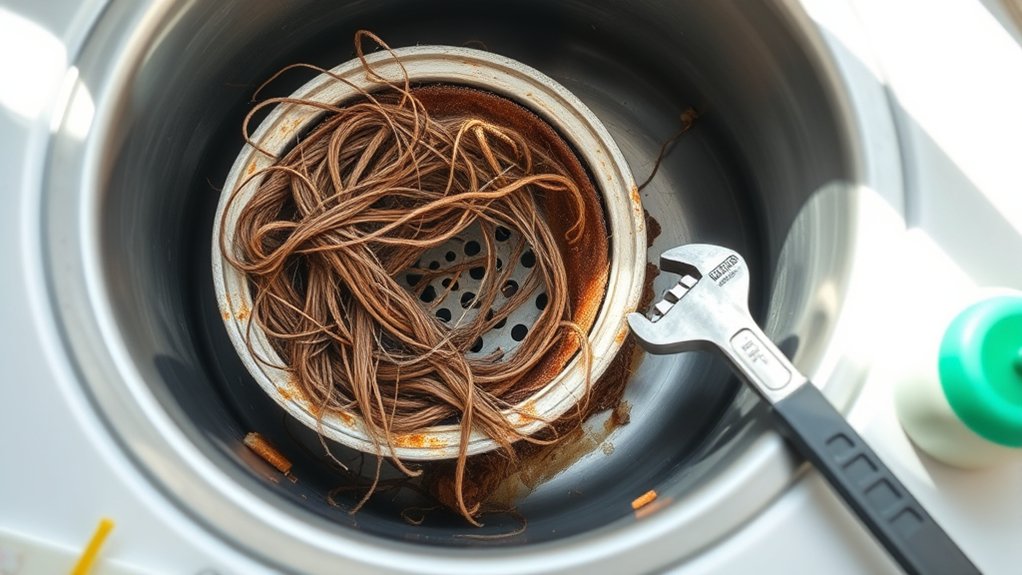
Kitchen sinks clog mainly because food particles, grease, and soap scum build up over time, narrowing the drain. As these materials gather, water flows slower, eventually leading to a complete clog.
To prevent this, avoid pouring grease or oil down the drain since they solidify and stick to the pipe walls. Using a drain strainer helps catch food scraps and stops them from slipping in.
Avoid pouring grease or oil down the drain to prevent buildup and clogs. Use a drain strainer to catch food scraps.
Regularly rinsing the drain with hot water can dissolve grease and soap residue. Pouring a mix of baking soda and vinegar down the drain every now and then helps break down buildup.
Being mindful of what you put in your sink and doing routine maintenance can keep your drain clear longer, saving you time and hassle when it’s time to unclog.
Common Causes of Kitchen Sink Clogs You Can Fix
Grease and fat can cool down and stick inside your pipes, creating stubborn blockages. Usually, you can fix these with hot water or a natural degreaser.
Food particles like bits of vegetables or rice tend to gather and block the drain over time. Recognizing these common causes helps you act quickly before things get worse.
Grease and Fat Buildup
When fats and oils are poured down the drain, they can quickly cool and solidify, sticking to the pipes and creating blockages. Over time, this buildup narrows the passage, making it harder for water to flow freely.
You might notice your sink draining slowly or even backing up. To prevent this, avoid pouring grease directly into the sink. Instead, let it cool and solidify in a container, then toss it in the trash.
If grease has already hardened inside your pipes, hot water combined with dish soap or a mixture of baking soda and vinegar can help break down the fats. Regular cleaning with these methods can prevent future buildup and keep your drain clear.
Acting promptly can save you from more serious clogs later.
Food Particles Accumulation
Food particles often slip past your dishes and utensils, gradually building up in your drain and causing clogs. Over time, these tiny bits stick to the pipe walls and trap other debris, narrowing the flow.
Common culprits include rice, pasta, vegetable peels, and bits of bread. If you don’t rinse your dishes thoroughly or scrape leftovers into the trash, these particles accumulate faster.
As the buildup thickens, water drains slowly or stops altogether. You might also notice a foul smell coming from the drain.
To prevent this, scrape plates into the trash or compost bin, and run hot water down the drain after cooking and cleaning. Regularly flushing with hot water or a baking soda and vinegar mixture helps break down and dislodge trapped food particles, keeping your drain clear.
Essential Tools for DIY Kitchen Sink Unclogging
Equipping yourself with the right tools makes DIY sink unclogging much easier and more effective. Having these essentials on hand guarantees you can tackle blockages promptly and safely.
Having the right tools on hand ensures quick, safe, and effective DIY sink unclogging.
First, a plunger creates pressure to dislodge clogs. Choose one with a rubber cup that fits your drain. Second, a drain snake or auger helps reach deep blockages that a plunger can’t clear.
Third, a pair of rubber gloves protects your hands from grime and debris. Finally, a bucket is useful for catching water and debris when removing pipes or clearing the trap.
With these tools, you’ll be prepared to handle most common clogs efficiently without needing professional help. Remember, having the right tools makes the job quicker, safer, and more successful.
Try Boiling Water First to Clear Your Drain
Start by boiling a large pot of water and carefully pouring it directly into your sink drain. Hot water can help dissolve grease, soap scum, and other buildup that might be causing the clog.
Pour slowly to prevent splashing or damaging your pipes. Wait a few minutes to see if the water clears the blockage. Sometimes, the heat alone is enough to loosen debris and push it through the pipes.
This method works best for minor clogs caused by grease or soap residue. If the water doesn’t drain after a few attempts, it’s time to try other methods.
How to Use a Plunger to Unclog Your Sink
To effectively use a plunger, start by choosing one with a rubber cup that fits your sink size. Then, position the plunger over the drain and use firm, steady pushes to create pressure.
Once you’ve attempted to clear the clog, check if the water flows freely. Clear any remaining debris if needed.
Choose the Right Plunger
Choosing the right plunger is key to unclogging your sink effectively. The type you pick affects how well the pressure works and helps prevent damage.
1. Cup Plunger
Best for sinks and flat surfaces, with a rubber cup that seals tightly over the drain.
2. Flange Plunger
Designed mainly for toilets but also works well in sinks with a smaller, extended rubber flap.
3. Bellows or Accordion Plunger
Creates a strong, steady pressure, making it great for heavy blockages.
4. Sink-Specific Plunger
Usually has a flat, wide rubber head for a better seal in kitchen sinks.
For kitchen drains, choose a cup or sink-specific plunger to get a good seal and maximum pressure.
Proper Plunging Technique
Once you’ve picked the right plunger, position it over the drain so it forms a tight seal. Make sure the rubber cup covers the drain completely with no gaps. If your sink has two drains, block the other side with a wet cloth to keep the pressure.
Keep the handle upright and steady. Push down firmly but steadily using your arm. Instead of forceful jabs, do quick, controlled plunges. After about 15-20 seconds, lift the plunger to see if the water starts to drain.
If it doesn’t, repeat the plunging a few more times, making sure to keep the seal. Gentle, consistent pressure works better than aggressive jabbing. It helps loosen the clog without hurting your pipes.
Clear and Check Drain
After you’ve plunged for about 15-20 seconds, lift the plunger slowly to see if the water starts to drain. If it does, congratulations—you’ve cleared the clog. If not, check for any remaining resistance or standing water.
Make sure the drain opening is free of debris and that the plunger creates a good seal before trying again. Once the water begins to flow, run hot water to flush out any loosened debris.
Here’s a quick checklist:
- Remove excess water if needed.
- Check for visible blockages around the drain.
- Confirm the plunger forms a tight seal.
- Repeat plunging if necessary before testing again.
Clean the P-Trap to Remove Heavy Blockages
When your sink drains slowly or starts backing up, it’s probably time to clean the P-trap. This curved pipe under your sink traps debris and stops clogs from going further into the plumbing.
A slow-draining sink may need the P-trap cleaned to prevent clogs and backups.
To clean it, place a bucket underneath, then unscrew the slip nuts on both ends of the P-trap. Carefully remove the trap and clear out any heavy blockages like hair, grease, or food particles.
Use a brush or cloth to scrub the inside thoroughly. Once it’s clean, reassemble the trap and tighten the slip nuts. Be careful not to over-tighten to avoid leaks.
Cleaning the P-trap regularly helps prevent future backups and keeps your sink flowing smoothly.
Use Baking Soda and Vinegar to Naturally Clear Your Drain
A simple and natural way to clear your drain is by using baking soda and vinegar. This method creates a fizzy chemical reaction that helps break down grease, soap scum, and minor clogs.
To try it, follow these steps: Pour half a cup of baking soda directly into the drain. Then, add half a cup of vinegar and quickly cover the drain to contain the reaction.
Let it sit for 15-30 minutes, allowing the mixture to loosen debris. Finally, flush with hot water to clear away loosened buildup and residue.
This approach is eco-friendly, inexpensive, and effective for minor blockages, making it a great first step before resorting to more invasive tools.
How to Use a Drain Snake to Unclog Your Kitchen Sink
To effectively clear your drain with a snake, you’ll want to pick the right size and type for your pipe. Getting the correct one makes all the difference.
Proper technique involves inserting the snake, rotating it to catch debris, and gently pulling it out. Take your time with each step to avoid pushing the clog further down.
Focus on these steps, and you’ll remove clogs safely and efficiently without making a mess or causing damage.
Choosing the Right Drain Snake
Choosing the right drain snake is key to clearing stubborn clogs effectively without damaging your pipes. The type and size of the snake you pick depend on how severe the clog is and where it’s located.
Here are four important things to consider:
- Cable Diameter – Pick a thinner cable for minor blockages and a thicker one for tougher clogs.
- Length – Use a longer snake for deep pipes. Standard lengths range from 3 to 25 feet.
- Material – Metal snakes are durable, but plastic-coated ones help prevent scratching your pipes.
- Handle Type – A manual crank gives you more control, while motorized versions make clearing tough clogs easier.
Choosing the right snake ensures you can clear the clog quickly and avoid damaging your plumbing.
Proper Technique for Use
Once you’ve picked the right drain snake, it’s important to use it properly to avoid damaging your pipes or making the clog worse. Insert the snake into the drain and turn the handle clockwise as you push forward.
When you feel resistance, gently rotate the snake to break up or latch onto the clog. Don’t force it, as this could damage your pipes. Slowly pull the snake out once the clog clears, keeping the handle turning.
As you remove the snake, continue to turn the handle gently. Afterward, clean the snake to remove any debris. This helps prevent future clogs and keeps your tools in good shape.
Common Mistakes That Worsen Kitchen Clogs
Many people unintentionally make their kitchen sink clogs worse by using harsh chemical drain cleaners, which can damage pipes over time. These chemicals might seem effective at first but often weaken plumbing and cause more blockages. To avoid making things worse, steer clear of these products.
Here are some common mistakes to watch out for:
- Using too much force or tools like a plunger improperly, which can push debris further down.
- Ignoring the early signs of a clog instead of dealing with it right away.
- Pouring grease or oil down the drain, as it hardens and creates stubborn blockages.
- Relying only on chemical cleaners rather than natural or mechanical methods to clear the clog.
Avoid these mistakes to prevent worsening the problem and damaging your plumbing.
When Should You Call a Plumber? Signs You Need Professional Help
While fixing minor clogs yourself can often do the trick, sometimes you need a professional. If your sink stays slow or still drains poorly after trying simple fixes, it’s a good sign to call a plumber.
Persistent odors or gurgling sounds also point to deeper blockages. If multiple drains are affected or water backs up into your sink, don’t wait—it could be a serious clog in your main line.
If you notice leaks around the pipes or have used harsh chemical drain cleaners repeatedly without success, it’s time to get professional help. Trying to force stubborn clogs yourself can cause more damage, so trusting a plumber is the safest choice.
Simple Tips to Prevent Kitchen Sink Clogs in the Future
To keep your kitchen sink running smoothly, simple habits can really help prevent clogs. First, always use a drain strainer to catch food particles and debris.
Use a drain strainer to catch food particles and keep your sink clear.
Second, avoid pouring grease or oil down the drain since these substances solidify and cause blockages. Third, run hot water after washing dishes to flush away grease and residue.
Fourth, periodically pour a mixture of baking soda and vinegar down the drain, then rinse with hot water to clear buildup. These habits reduce the chance of clogs forming over time and keep your pipes clear.
Sticking to these tips not only saves you from messy, costly repairs but also helps extend the lifespan of your plumbing system.
Troubleshooting Recurring or Difficult Clogs
Recurring or stubborn clogs can be really frustrating because they often point to a deeper issue in your plumbing system. If your drain keeps clogging even after using a plunger or chemical cleaner, it’s time to look into it further.
The problem might be a blocked pipe, a buildup of grease, or a damaged pipe segment. To troubleshoot effectively, consider these common causes:
| Cause | Symptoms | Solution |
|---|---|---|
| Grease buildup | Slow draining, bad odors | Hot water flush, enzymatic cleaner |
| Obstructions | Frequent clogs | Remove trap, check the pipe |
| Damaged pipe | Water leaks, persistent clogs | Replace the damaged section |
| Tree roots | Sudden blockages | Call a professional for root removal |
| Venting issues | Gurgling sounds, slow drain | Clear the vent pipe |
Finding out what’s really causing the clog helps you pick the right fix and get a lasting solution.
Frequently Asked Questions
How Often Should I Clean My Kitchen Sink Drain?
You should clean your kitchen sink drain at least once a month to prevent buildup and clogs. Regular maintenance helps remove food particles, grease, and soap scum before they cause problems.
If you notice slow drainage or odors, it’s a good idea to clean it sooner. Use hot water, baking soda, and vinegar or a drain brush to keep it clear and fresh.
Staying consistent with cleaning ensures your sink stays functional and odor-free.
Are Chemical Drain Cleaners Safe for My Pipes?
Thinking back to simpler times, chemical drain cleaners aren’t always safe for your pipes. They can cause corrosion, especially with frequent use, leading to leaks or damage.
While they might seem quick and easy, they often do more harm than good. Instead, consider natural methods like baking soda and vinegar, which are gentler and safer for your plumbing.
This helps keep your pipes healthy and clog-free for longer.
Can Hair Cause Kitchen Sink Clogs?
Yes, hair can definitely cause kitchen sink clogs. When hair washes down the drain, it often mixes with grease, soap scum, and other debris, creating a stubborn blockage.
Over time, this buildup restricts water flow, leading to slow draining or even a complete clog.
To prevent this, use a drain cover to catch hair, clean it regularly, and avoid pouring grease or large food particles down the sink.
What Household Items Can I Use to Maintain a Clear Drain?
Imagine your drain flowing smoothly, like a gentle stream. To keep it clear, use household items like baking soda and vinegar.
Pour baking soda down the drain, then add vinegar and watch the fizz break down grime. It’s a simple, natural way to clear out buildup.
Boiling water flushes away residue and helps keep everything flowing smoothly. Just carefully pour it down the drain for quick results.
A mixture of salt and baking soda can also help scrub stubborn buildup. Use it regularly to prevent clogs before they start.
These natural solutions are great for maintaining a clear drain. They help keep your sink flowing freely and your kitchen smelling fresh.
How Long Does a DIY Unclogging Process Typically Take?
The DIY unclogging process usually takes about 15 to 30 minutes, depending on how bad the clog is.
You’ll want to act quickly, using simple tools like a plunger or a drain snake, along with household items like baking soda and vinegar.
Be patient as you work through the steps, and remember to flush the drain with hot water afterward to make sure it’s fully cleared.
Conclusion
Remember, a clogged sink can feel like a small disaster, but with these simple DIY tips, you’re never truly stuck. Sometimes, a quick fix like boiling water or using a plunger does the trick, saving you time and money.
It’s funny how a little effort can turn frustration into relief, making your kitchen feel fresh and functional again. Keep these tricks in mind—you might just find that the solution was closer than you thought all along.