8 Simple Steps to Remove Kitchen Cabinets
Thinking about updating your kitchen but feeling overwhelmed by the idea of removing old cabinets? You’re not alone—many homeowners find the process daunting, especially if they’re new to DIY projects.
Start by inspecting your kitchen and gathering safety gear and tools like gloves, a screwdriver, and a pry bar. Empty your cabinets and clear the workspace.
Turn off power and water before disconnecting electrical and plumbing connections. Remove hardware, then carefully detach upper and lower cabinets, supporting them as needed.
Disassemble the frames and clean your area. Finally, recycle or dispose of the old cabinets responsibly.
For detailed steps, keep going to guarantee a safe and smooth removal process.
Key Takeaways
- Turn off the electricity and water supplies first. Then, safely disconnect any electrical wiring and plumbing connections.
- Next, remove the cabinet hardware, like handles and hinges, so you’re ready for removal.
- Support the upper cabinets while unscrewing or prying them free from the wall. Make sure they don’t fall.
- For the lower cabinets, carefully detach them by removing the fasteners. Use pry tools if needed to loosen them.
- After the cabinets are out, clear away any debris and clean up the workspace. Be sure to dispose of or recycle the cabinets responsibly.
Assess Your Kitchen and Gather Safety Equipment and Tools

Before removing your kitchen cabinets, it’s important to assess your space and gather the right safety equipment and tools. Start by inspecting your cabinets’ layout and look out for any hazards like sharp edges or loose parts. Make sure your workspace is well-lit and ventilated so you can work safely.
Safety gear is a must. Wear gloves to protect your hands, safety glasses to shield your eyes, and a dust mask if there’s dust or debris. Gather tools like a screwdriver, pry bar, drill, and utility knife, and check that they’re in good condition.
Having everything ready before you start makes the process smoother and helps prevent accidents. Taking these steps now will save you time and effort when it’s time to remove your cabinets.
Empty Cabinets and Clear Your Work Area
Start by removing everything from your cabinets to create a clear workspace.
Next, clear the area around the cabinets so you have enough room to work safely.
Finally, organize the removed items and tools nearby to make the removal process easier.
Empty Cabinets First
Emptying your cabinets is the essential first step to make removal easier and safer. By removing all items, you prevent damage and accidents during the process.
Start by taking out dishes, cookware, and food supplies, sorting them into boxes or bags for easy transport. As you work, check for loose or broken items that could cause injury. Keep small items like utensils or spices separate so they won’t get lost.
Clearing everything out creates a clear workspace, making it simpler to access screws and brackets. Remember, the more you empty now, the less clutter you’ll have to handle later. Staying organized minimizes frustration and speeds up the removal process.
Once the cabinets are empty, you’re ready to focus on their removal without unnecessary obstacles.
Clear Surrounding Space
Clearing the area around your cabinets creates a safe and efficient workspace. Remove any items or appliances nearby so you have plenty of room to work. Empty cabinets beforehand to prevent anything from falling or getting in your way during removal.
Keep your tools handy and organized to avoid delays. A clear space helps minimize accidents and makes the whole process smoother.
Here’s a quick visual guide:
| Area to Clear | Items to Remove | Safety Tips |
|---|---|---|
| Countertop | Small appliances | Keep away from edges |
| Adjacent Cabinets | Decorations | Wear gloves if needed |
| Under Sink | Cleaning supplies | Watch for leaks |
| Nearby Floor | Rugs, mats | Sweep debris first |
| Work Area | Extra furniture | Use protective gear |
Stay organized to work safely and efficiently.
Organize Removal Area
Before removing your cabinets, make sure all contents are taken out and the area is thoroughly organized. Clearing the space helps prevent damage and makes the process go smoothly.
Empty everything from inside the cabinets and set aside tools and hardware. Remove any objects nearby that could get in your way or fall during removal. Sweep or vacuum the floor to avoid tripping hazards.
Label hardware and small parts to make reinstallation easier. Keep a trash bag handy for debris or broken pieces. Organizing your removal area keeps clutter down and makes your workspace safe and efficient.
Clear countertops and surrounding surfaces, and remove all dishes, utensils, and appliances. Gather necessary tools in one spot for easy access. Dispose of or store removed cabinet contents properly.
Make sure you have good lighting so you can see clearly throughout the process. This will help you work more safely and efficiently.
Turn Off Power and Water Before You Remove Cabinets
Turning off the power and water supplies is an essential first step to guarantee safety when removing kitchen cabinets. Before you start, locate your main electrical panel and shut off the circuit breaker controlling your kitchen outlets and appliances. This prevents the risk of electric shock.
Next, turn off the water supply to your sink and any connected appliances, like dishwashers, by closing the shut-off valves under the sink. Confirm the power and water are off by testing outlets or running the faucet.
Doing this upfront avoids accidents and damage. Remember, never skip this step, even if the cabinets seem disconnected or inactive. Taking these precautions keeps you safe and makes the removal process smoother.
Safely Disconnect Electrical and Plumbing Connections
Before disconnecting, make sure to turn off the power supply and shut off the water valves to prevent accidents.
Carefully disconnect the electrical wiring and plumbing connections, making sure to follow safety guidelines.
Taking these steps keeps you safe and prepares your cabinets for removal.
Turn Off Power Supply
To safely disconnect your kitchen cabinets, start by turning off the main power supply to prevent any risk of electrical shock. This step ensures you can work safely around electrical wiring without worry.
Once the power is off, double-check that no devices or outlets are live by testing with a voltage tester.
Here are some key tips:
- Locate your home’s main circuit breaker.
- Flip the switch to cut power to the kitchen.
- Use a voltage tester to confirm power is off.
- Label the circuit breaker for future reference.
- Keep a flashlight handy if lighting is limited.
Taking these precautions minimizes hazards and sets a safe foundation for removing your cabinets.
Shut Off Water Valves
Start by shutting off the water supply to prevent leaks and water damage during cabinet removal. Locate the main water shutoff valve under the sink or near the water heater. Turn the valve clockwise to close it completely.
If your sink has individual shutoff valves for hot and cold water, turn both off. Place a bucket or towels underneath to catch any residual water. Open the faucet to drain remaining water from the lines.
Confirm that water flow has stopped by trying to turn on the tap. Once the water is off, you can safely disconnect the plumbing connections without risking leaks or water damage. This step ensures a clean, safe workspace when removing your kitchen cabinets.
Disconnect Electrical Wiring
Carefully disconnecting electrical wiring is essential to guarantee safety when removing kitchen cabinets. Before starting, turn off the circuit breaker that supplies power to the cabinets to prevent shocks.
Use a voltage tester to make sure no electricity is flowing. Then, carefully remove the electrical covers and disconnect the wires, taking note of how they are connected for reinstallation.
Always use insulated tools to avoid accidental contact. Keep the wires organized and secure them away from your work area to prevent damage.
Remove Hardware and Detach Upper and Lower Cabinets
Begin by removing all hardware from your cabinets, such as knobs and handles, using a screwdriver. Keep the hardware in a safe place for reinstallation later.
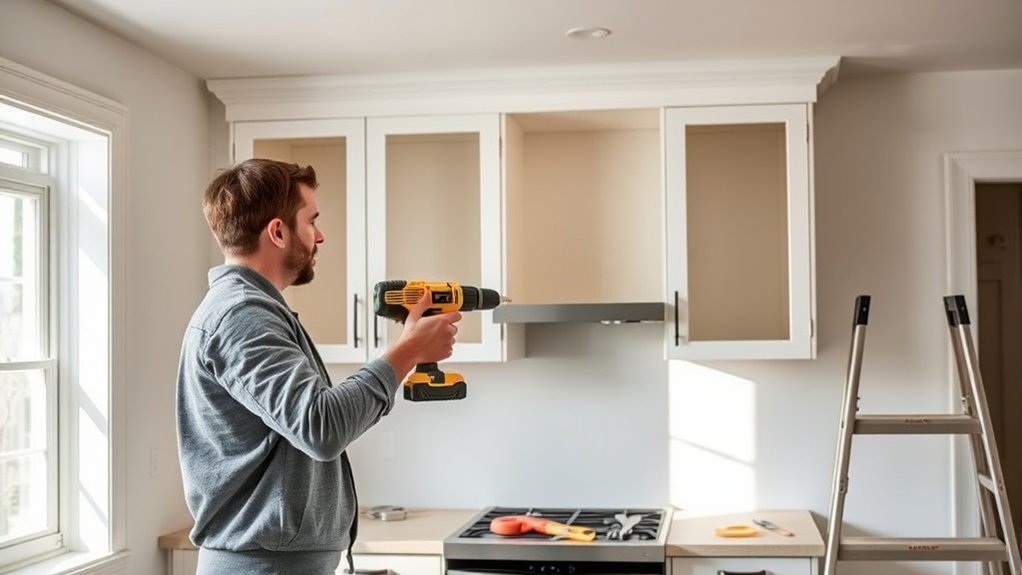
Once the hardware is off, you can focus on detaching the cabinets. For upper cabinets, carefully unscrew the brackets or mounting hardware holding them to the wall.
Support the cabinet as you remove the fasteners to prevent it from falling. For lower cabinets, disconnect any remaining fasteners or braces securing them to the wall or floor.
Be gentle to avoid damaging the surrounding wall or flooring. If cabinets are glued or caulked, gently loosen them with a pry tool.
Removing hardware and detaching the cabinets carefully guarantees a smooth process and minimizes damage to your kitchen.
Disassemble Cabinet Frames and Clear Debris Safely
Disassembling the cabinet frames involves removing any remaining structural components, like side panels or dividers, to fully detach the units. Carefully unscrew or pry apart these parts, making sure you don’t damage nearby walls or flooring. Once the frames are loose, clear away any debris or leftover hardware to keep your workspace safe.
Using a shop vacuum or broom, clean up dust, screws, and small pieces so you won’t run into accidents later. Wear safety gloves and goggles to protect yourself from sharp edges and dust. Take your time during disassembly to avoid damaging walls or cabinets.
Properly dispose of or store hardware so you can reuse it later. This step guarantees a clean, clutter-free area, making your next renovation phase easier and safer.
- Remove remaining screws or nails from frames
- Use a pry bar to loosen stubborn panels
- Wear protective gloves and goggles
- Vacuum or sweep debris thoroughly
- Store hardware for reuse or disposal
Clean Up and Prepare for Your Next Renovation Step
After removing the cabinet frames and debris, it’s important to clean your workspace thoroughly. Sweep or vacuum the area to pick up dust, dirt, and small particles left behind.
Wipe down surfaces with a damp cloth, paying close attention to corners and crevices where grime can hide. Remove any remaining staples, nails, or adhesive residues to create a smooth surface for the next step.
Make sure the floor is free of debris to prevent accidents and make future work easier. Check the lighting and ventilation, opening windows or turning on fans if needed to improve air quality.
Ensure the floor is clear and improve air quality by checking lighting and ventilation before proceeding.
Proper cleanup not only prepares your space but also helps you spot any hidden issues before moving forward.
Recycle or Dispose of Old Cabinets Responsibly
Once you’ve cleared your workspace, it’s time to think about what to do with the old cabinets. Recycling or disposing of them responsibly helps reduce environmental impact and keeps your neighborhood clean.
You might consider donating usable cabinets to charities or community groups. Giving them a second life is a great way to help others and prevent waste.
If the cabinets are damaged or outdated, look for local recycling centers that accept wood and hardware. Avoid dumping them curbside or in landfills, as this can cause pollution.
Some components like glass or metal handles can be recycled separately. Before disposal, carefully disassemble the cabinets to separate recyclable materials.
Lastly, check if your city offers bulk waste pickup or designated drop-off spots for large items. Making eco-friendly choices makes your renovation both effective and responsible.
Frequently Asked Questions
How Long Does It Typically Take to Remove Kitchen Cabinets?
It usually takes around 4 to 8 hours to remove kitchen cabinets, depending on their size, type, and your experience. If you’re careful and have the right tools, you might get it done faster.
Larger or more complex cabinets, like those with multiple sections or custom features, could take longer. Don’t forget to set aside extra time to disconnect utilities or deal with unexpected issues that might come up during removal.
Can I Remove Cabinets Without Damaging the Walls?
Yes, you can remove cabinets without damaging the walls if you do it carefully. First, gently pry away any caulk or paint sealing the cabinets using a putty knife.
When unscrewing, take your time to avoid pulling on the wall material. Support the cabinet as you detach it, and work slowly.
If you feel resistance, stop and adjust your approach. Using proper technique helps minimize wall damage during removal.
What Tools Are Essential for Cabinet Removal?
You’ll need a few essential tools to remove cabinets efficiently: a screwdriver or drill for unscrewing, a pry bar or crowbar to gently loosen the cabinets, a level to guarantee proper removal, a tape measure for measurements, and safety gear like gloves and goggles.
These tools help you work carefully and effectively, minimizing damage and making the process smoother. Always double-check that you have everything before starting to avoid interruptions.
Is Professional Help Necessary for Removing Large Cabinets?
You don’t necessarily need professional help to remove large cabinets, but it’s a good idea if you’re unsure about handling heavy or built-in units. Large cabinets can be bulky and tricky to move safely.
They can pose safety risks if not removed properly. If you’re comfortable with tools and have some experience, you might be able to do it yourself.
Otherwise, hiring a professional guarantees the job gets done efficiently and safely, without risking damage to your walls or cabinetry.
How Do I Handle Stubborn or Glued-In Cabinet Components?
To handle stubborn or glued-in cabinet components, start by applying heat with a heat gun or hairdryer to soften the adhesive.
Carefully insert a putty knife or pry bar between the cabinet and wall, gently prying to loosen the glue. Work slowly to avoid damaging surfaces.
If needed, use a solvent like adhesive remover. Take your time and be patient to prevent breaking or chipping the material.
Conclusion
Removing your kitchen cabinets might seem intimidating, but with these simple steps, you’re on your way to a fresh, new look. Think of it as turning a blank canvas—each cabinet you remove makes room for your next masterpiece.
Stay safe, stay organized, and remember, every ending marks a new beginning. Soon, you’ll enjoy a transformed space that’s truly your own, as beautiful and inspiring as a sunrise after a storm.
By following these steps to remove kitchen cabinets, you’ll be well on your way to creating the kitchen of your dreams.