8 Simple Steps to Install a Kitchen Sink
Are you tired of dealing with leaks or struggling to install your kitchen sink? You’re not alone—many people find this task tricky and frustrating.
But don’t worry, with a little guidance, you can do it yourself and save money.
Start by gathering your tools, including wrenches and sealant, and turn off the water supply.
Remove the old sink carefully, then install the new faucet and drain outside the sink first.
Connect the plumbing, ensuring all fittings are snug, and tighten everything to prevent leaks.
Secure the sink in place, seal the edges, and reconnect the water lines.
Finally, test for leaks and proper flow.
Continue for a detailed step-by-step guide to perfect your installation.
Key Takeaways
- Turn off the water supply and drain lines before you begin. Clear your workspace so you have plenty of room to work.
- Next, disconnect the drain pipes and carefully remove the old sink from the countertop.
- It’s a good idea to assemble the faucet and drain parts outside the sink first. This makes the installation process smoother.
- Once everything is ready, secure the sink with mounting brackets. Apply sealant around the edges to prevent leaks.
- Then, connect the water lines to the faucet. Turn the water back on and check for any leaks.
- Tighten all fittings as needed to ensure everything works properly. And you’re all set!
Gather the Tools and Materials Needed for Installing a Kitchen Sink
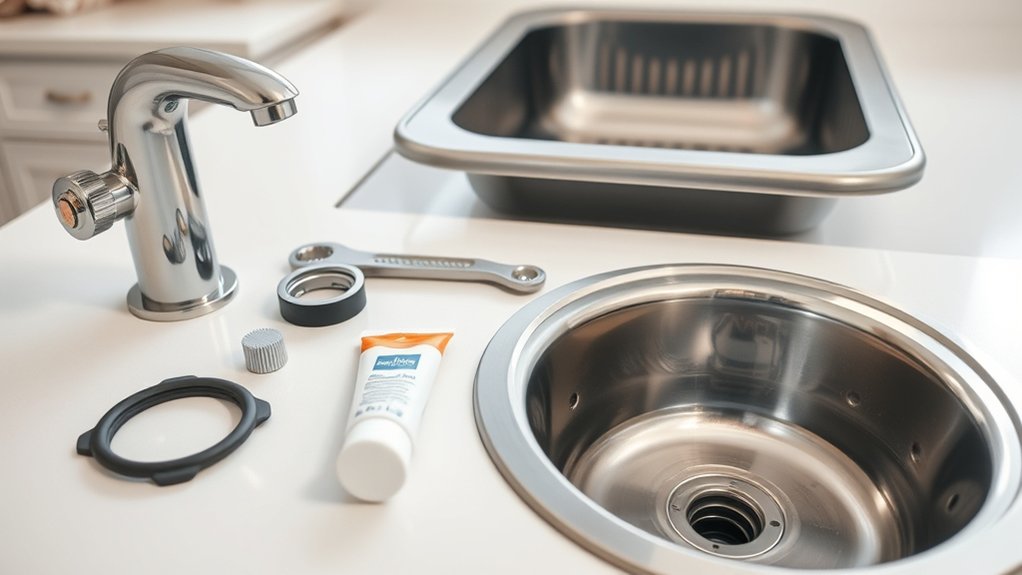
Before you start installing your kitchen sink, it’s important to gather all the tools and materials you’ll need. Start with basic hand tools like an adjustable wrench, screwdriver, and a putty knife.
You’ll also want plumber’s putty or silicone sealant to make watertight seals. Keep a basin wrench handy for tightening those hard-to-reach nuts.
Don’t forget the sink itself, along with the mounting clips and brackets. You’ll also need a drain assembly, including a strainer, tailpiece, and P-trap.
Have a bucket and rags nearby for cleanup. And be sure to have replacement supply lines or flexible hoses ready for connecting the faucet.
Having everything prepared will make the installation smoother and prevent unnecessary trips to the store mid-project.
Turn Off Your Water Supply and Prepare the Workspace
To ensure a safe and smooth installation, start by turning off your water supply before you begin. Find the shutoff valves under your sink or along the water lines. Turn both valves clockwise until they’re fully closed.
Once the water is off, open the faucet to drain any remaining water and make sure the lines are empty. Then, clear your workspace by removing items from the countertop and covering nearby surfaces with a cloth or tarp to protect against spills.
Gather your tools and materials nearby so you’re ready to work efficiently. Taking these steps helps prevent leaks and messes, making the installation safer and easier. Always double-check that the water is fully shut off before moving forward.
Remove the Old Sink and Clear Your Countertop
With the water supply shut off and your workspace cleared, you can now focus on removing the old sink. Start by disconnecting the drain pipes underneath. Use a wrench to loosen the slip nuts and carefully remove the pipes.
Next, check if any clips or brackets are holding the sink in place. Unscrew or unclip them as needed. If your sink is secured with caulk or sealant, gently cut through it with a utility knife to free the sink.
Carefully lift the sink out of the countertop, working slowly to avoid damaging the surrounding surface. Once it’s out, clear away any debris or old sealant from the countertop to create a clean, smooth surface for the new sink. This prepares your workspace for the installation ahead.
Install the Faucet and Drain Components Correctly
Begin by assembling the faucet and drain components outside of the sink to make sure all parts are there and in good shape.
Follow the manufacturer’s instructions to attach the faucet to the sink’s mounting holes, making sure it fits securely.
Attach the water supply lines to the faucet, tightening the connections by hand first, then with a wrench. Be careful not to overtighten.
For the drain assembly, insert the drain flange into the sink’s drain hole from above, using plumber’s putty or a gasket to prevent leaks.
Connect the drain tailpiece to the flange from underneath and tighten the locknut to hold it in place. Ensure all connections are snug but not overtightened.
Double-check the placement of each part before moving on to connect the plumbing.
Connect Plumbing and Check for Leaks
Now that you’ve installed the drain components, it’s time to connect the drain pipes securely. Once everything is in place, turn on the water to check for any leaks around the connections.
Fix any drips immediately to guarantee your sink stays leak-free and functions properly.
Connecting Drain Pipes
To connect the drain pipes properly, start by attaching the sink’s tailpiece to the drain assembly. Tighten the slip nut securely, but don’t overtighten, to avoid leaks.
Next, align the drain pipe with the tailpiece and slide the slip nut onto the pipe. Hand-tighten it first, then use a wrench to snug it up without overtightening.
Connect the P-trap to the drain pipe, making sure the slip nuts are tight to prevent leaks. Finally, attach the trap arm to the wall drainpipe, ensuring all connections are snug.
Check each slip nut for tightness without overdoing it. Make sure the P-trap is properly aligned and secure.
Wipe away any excess plumber’s putty or sealant. Then, run water to test for leaks and adjust the connections as needed.
Inspecting for Leaks
After finishing the drain connections, it’s important to check for leaks by running water through the sink. Turn on the faucet slowly and watch all the connections closely. Look for drips or water escaping from joints, especially around the drain and supply lines.
If you spot any leaks, tighten the fittings carefully but don’t over-tighten, as that can cause damage. To help find the leak points, put a towel or paper towels underneath the connections. Here’s a quick overview:
| Connection Area | Common Issue | Solution |
|---|---|---|
| Faucet connections | Drips after tightening | Tighten securely |
| Drain fittings | Water leakage | Re-seal with plumber’s tape |
| Supply lines | Looseness or leaks | Re-tighten or replace |
| Under sink pipes | Cracks or corrosion | Replace damaged parts |
| Joints and fittings | Visible water or drips | Tighten or re-seal |
Doing this check makes sure your sink is leak-free before you finish up the project.
Secure the Sink in Place and Finish the Installation
Now, you’ll tighten the mounting brackets to secure the sink firmly in place. Next, make sure you seal the edges properly to prevent leaks.
Then, connect the water supply lines. This step finishes your installation and gets your sink ready for use.
Tighten Mounting Brackets
Begin by tightening the mounting brackets to secure the sink firmly in place. As you do this, check that the sink stays aligned with your countertop cutout. Use a screwdriver or wrench to tighten each bracket evenly, but be careful not to over-tighten, as this could crack the sink or damage the countertop.
Make sure the sink doesn’t shift as you tighten. Remember, the brackets are what keep everything steady, so take your time to get a snug fit. Keep these tips in mind:
- Tighten brackets gradually to prevent misalignment
- Confirm the sink is centered before fully tightening
- Apply even pressure on all brackets for balanced support
- Avoid overtightening to prevent cracks or damage
Once everything feels secure, you’re ready to move on to sealing the edges and finishing your installation.
Seal the Edges Properly
To securely seal the edges and finish your sink installation, apply a continuous bead of silicone caulk around the perimeter where the sink meets the countertop. Use a caulking gun to make a smooth, even line.
Once you’ve applied the caulk, press gently with a damp finger or a caulk finishing tool to ensure a good seal and remove any excess. This helps prevent water from seeping underneath and causing damage.
After sealing, wipe away any excess with a damp cloth before the caulk cures. This keeps the surface tidy and neat.
Follow the manufacturer’s instructions for curing time to achieve a waterproof seal. Once cured, do a final check to look for gaps or uneven areas and smooth them out if needed.
Connect Water Supply Lines
Once the caulking has set and the sink is securely in place, you can connect the water supply lines. Start by attaching the hot and cold water hoses to the corresponding faucet valves. Tighten the connections by hand, then give them a quarter turn with a wrench to make sure they’re snug but not over-tightened.
Before turning on the water, double-check that the hoses aren’t twisted or kinked. Here are some tips to keep in mind:
- Use plumber’s tape on threaded connections for a watertight seal
- Verify the hoses aren’t crossed or connected to the wrong valves
- Turn on the water slowly to check for leaks
- Tighten fittings if you notice any drips after testing
Test Your New Kitchen Sink for Proper Functionality
Before you start testing your new kitchen sink, make sure all connections are secure and tight. Turn on the water supply valves slowly, checking for leaks around the supply lines and faucet connections.
Run both hot and cold water, and watch the flow rate to make sure it’s steady. Check that the faucet operates smoothly without wobbling or leaks.
Run hot and cold water to ensure a steady flow and smooth faucet operation without wobbling or leaks.
Next, inspect the drain by filling the sink with water and then releasing it. It should drain quickly and completely. Look under the sink for any signs of water leaks from the supply lines, drain connections, or the faucet base.
If everything looks dry and works properly, you’ve successfully tested your sink’s performance. If you notice leaks or issues, fix them before moving on.
Maintain Your Kitchen Sink and Troubleshoot Common Issues
Regular maintenance keeps your kitchen sink in good shape and working properly over time. Make sure to clean the drain regularly, remove debris, and avoid pouring grease down the drain.
If you notice slow drainage or odors, try using a mixture of baking soda and vinegar to clear minor clogs. Keep an eye out for leaks around the faucet or underneath the sink—tighten fittings or replace faulty parts as needed.
For persistent issues, check the P-trap for blockages or corrosion. Also, avoid harsh chemicals that can damage seals and pipes. Regular inspections help catch problems early, saving you time and money.
A little upkeep now prevents bigger repairs later, ensuring your sink stays reliable and efficient.
Frequently Asked Questions
Can I Install a Kitchen Sink Without Professional Help?
Yes, you can install a kitchen sink without professional help if you have basic plumbing skills and tools.
Start by shutting off the water supply, disconnecting the old sink, and preparing the countertop.
Follow the manufacturer’s instructions carefully for connecting the drain and water supply lines.
Take your time to make sure all connections are tight and leak-free.
If you’re comfortable with small plumbing tasks, DIY installation is doable and saves you money.
What Is the Average Cost of Installing a New Kitchen Sink?
Think of installing a kitchen sink like planting a garden. You’ll need the right tools and a bit of patience.
On average, expect to spend between $200 and $500, including parts and labor. If you hire a professional, the costs will be higher.
Doing it yourself can save money but requires some plumbing know-how. Budget accordingly, and remember, a well-installed sink is like a thriving garden—worth the effort.
How Long Does a Typical Kitchen Sink Installation Take?
A typical kitchen sink installation usually takes about 2 to 4 hours, depending on your experience and the complexity of your setup.
If you’re doing it yourself, it might take longer, especially if you run into issues with plumbing or fittings.
Hiring a professional can often speed things up, and they might finish the job in around 2 hours.
Be sure to allocate enough time for preparation and cleanup as well.
Are There Different Types of Kitchen Sinks Suited for Specific Countertops?
Yes, there are different types of kitchen sinks suited for specific countertops.
For example, stainless steel sinks work well with laminate or tile countertops. Granite or quartz countertops often pair better with composite or undermount sinks.
Think about the material and thickness of your countertop, as well as how you plan to install the sink.
Matching the sink type to your countertop’s durability and style helps create a seamless, functional kitchen look.
What Safety Precautions Should I Follow During Installation?
You should wear safety goggles and gloves to protect your eyes and skin from debris and sharp edges.
Turn off the water supply before starting to prevent leaks or flooding.
Use a sturdy ladder or step stool if needed, and make sure your workspace is clear of clutter to avoid accidents.
Handle tools carefully, especially sharp or heavy ones, and work in a well-lit area so you can see clearly.
Always follow the manufacturer’s instructions to ensure safe and proper installation.
Conclusion
With your sink now installed, you’ve woven a sturdy new thread into your kitchen’s tapestry. Like a skilled artist, you’ve turned a blank canvas into a functional masterpiece, ready to handle everyday chores.
Remember, regular care keeps this masterpiece shining bright, preventing leaks and clogs from sneaking in like shadows. A little maintenance goes a long way in preserving its beauty and functionality.
So, stand back and admire your work. Your kitchen’s new heart beats strong, ready to serve and sustain your culinary adventures with confidence and grace. Your kitchen sink is now a reliable hub, making daily tasks easier and more enjoyable.