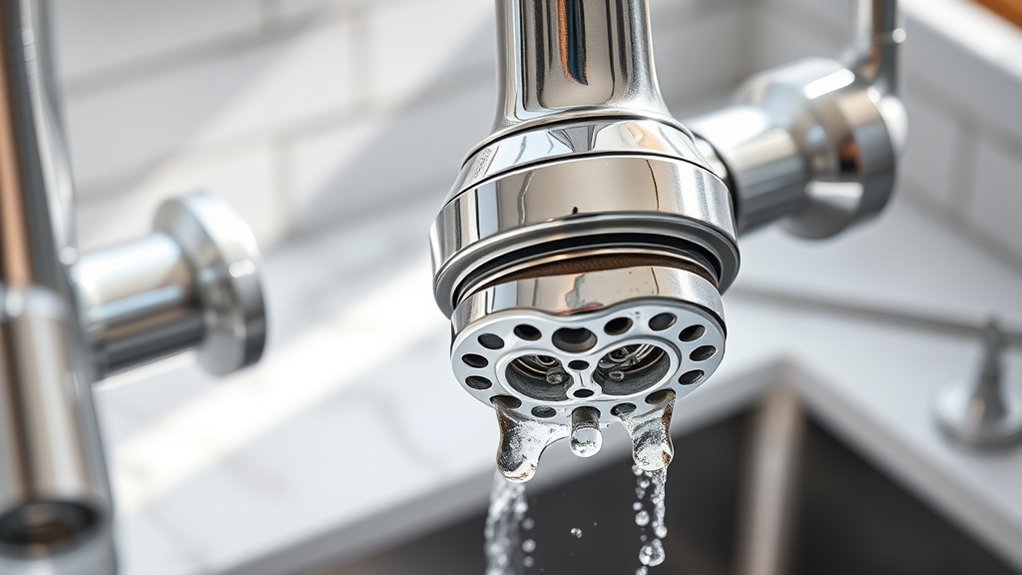
10 Easy Steps to Clean Kitchen Faucet Heads
Many homeowners know the frustration of a clogged or dripping kitchen faucet head. It’s a common issue that can make everyday tasks like washing dishes or hands feel annoying and inefficient.
You’re not alone—keeping your faucet in top shape is easier than you think.
To clean your kitchen faucet head, start by turning off the water supply and detaching the nozzle. Soak it in equal parts vinegar and water for 15-30 minutes to dissolve mineral buildup.
Use a toothbrush to scrub away grime, rinse thoroughly, then dry and reattach the faucet head. Tighten connections without overdoing it, turn on the water, and check the flow.
For more tips on keeping your faucet in top shape, keep going!
Key Takeaways
- Turn off the water supply and carefully detach the faucet head.
- Soak it in a vinegar-water solution for about 15 to 30 minutes. This helps loosen any mineral buildup.
- Use an old toothbrush or small brush to scrub away any grime or deposits.
- Rinse the faucet head thoroughly with water and dry it off before reattaching.
- Once everything’s back in place, check the water flow and pressure.
- Make adjustments if needed to ensure everything is working smoothly.
Why Mineral Deposits Clog Your Faucet Nozzles and How It Affects Water Pressure

Mineral deposits, often caused by hard water, build up inside your faucet nozzles over time. These deposits are mainly calcium and lime, which settle and form a crust that blocks water flow.
When this buildup occurs, your faucet no longer sprays water evenly or at full pressure. This makes everyday tasks frustrating because the water flow isn’t consistent.
The clogging reduces water pressure, forcing you to turn the handle harder or longer to get the flow you want. Over time, it can also cause the nozzle to leak or drip, wasting water and raising your utility bills.
The more mineral deposits accumulate, the more restricted the water flow becomes. That’s why regular cleaning is essential to keep your faucet working smoothly and maintain good water pressure.
Gather Your Supplies and Get Ready to Clean the Faucet
Before you start cleaning your faucet, gather all the supplies you’ll need to make the process smooth and efficient. You’ll want white vinegar, a soft cloth or sponge, an old toothbrush, a small bowl, and possibly a plastic bag or rubber band.
If you plan to remove the aerator, have gloves ready to protect your hands. Grab a clean towel for drying and extra supplies like toothpicks or a small brush if needed.
Make sure your workspace is clear and well-lit. Having everything on hand prevents interruptions and helps you stay organized. Check that your cleaning solution is ready and that you have enough space to work comfortably.
Ensure your workspace is tidy and well-lit for a smooth, efficient faucet cleaning experience.
Preparing your supplies beforehand makes the entire cleaning process quicker and more effective.
How to Remove Your Kitchen Faucet Head Step-by-Step
To remove your kitchen faucet head, start by turning off the water supply to prevent leaks.
Then, carefully loosen and detach the faucet head from the spout. Once it’s free, you’ll be ready to clean it thoroughly before reassembling everything.
Turn Off Water Supply
Start by finding the shut-off valves under your sink. These are usually small handles or knobs connected to the pipes leading to your faucet. Turn them clockwise to shut off the water supply.
Make sure both the hot and cold water valves are fully closed. This stops water from flowing while you remove or clean the faucet head, helping avoid messes and water damage.
If you can’t find the valves under the sink, check behind your appliance or in a nearby utility area. Once closed, turn on the faucet briefly to relieve any remaining water pressure.
Check that no water drips from the spout. Only then are you ready to proceed with removing or cleaning your faucet head safely.
Remove Faucet Head
With the water supply shut off and any remaining pressure released, it’s time to remove the faucet head. First, check how it’s attached—most are held by a twisting or screwing mechanism.
If it’s a twist-on style, grip the faucet head firmly and turn counterclockwise. You might want to use a cloth or rubber gloves for a better grip.
If it’s screwed in tightly, use an adjustable wrench or pliers. Wrap the head with a cloth to prevent scratches, and turn slowly to avoid damaging the fittings.
Once loosened, gently pull the faucet head straight off. Keep a towel handy to catch any residual water or debris that might drip out.
Now you’re ready to clean or inspect the faucet head.
Clean and Reassemble
Once the faucet head is removed, it’s time to clean it thoroughly. Start by soaking it in a mixture of equal parts vinegar and water for about 15-30 minutes to loosen mineral deposits.
Use a small brush or an old toothbrush to scrub away any buildup inside and outside the head. Rinse it with water to remove loosened debris.
Dry the faucet head completely with a clean cloth. Once dry, reattach it to the faucet, tightening it securely by hand or with a wrench if needed.
Make sure the connections are snug but avoid over-tightening, which can cause damage. Turn the water back on and check for leaks.
Your faucet should now flow smoothly and look sparkling clean.
Descale Your Faucet Nozzles With Vinegar
Start by gathering some vinegar and the tools you’ll need, like a plastic bag or a small container.
Next, soak your faucet nozzles in vinegar to loosen mineral buildup. This simple step can make a big difference in restoring your faucet’s flow.
Collect Vinegar and Tools
Gather a cup of white vinegar and the necessary tools, such as a small bowl, a plastic bag, and rubber bands, to start the descaling process. You’ll need the vinegar to break down mineral buildup, so make sure it’s plain, undiluted vinegar.
The small bowl will help you measure and hold the vinegar if you want to soak parts separately. The plastic bag is essential for wrapping the faucet head securely, and rubber bands will keep the bag in place.
Make sure all your tools are clean and ready to use. Having everything prepared ahead of time makes the process smoother and more efficient. Once you have your supplies, you can move forward with soaking and cleaning your faucet nozzles.
Proper preparation guarantees a quick, effective descaling.
Soak Faucet Nozzles
To effectively descale your faucet nozzles, immerse the affected parts in a bowl filled with plain white vinegar. Make sure the nozzles are fully submerged, especially if they have built-up mineral deposits. Let them soak for at least 30 minutes, or longer if the buildup is stubborn.
The acidity of the vinegar breaks down limescale and mineral deposits, loosening stubborn grime. During soaking, you can gently scrub with an old toothbrush to dislodge remaining deposits.
After soaking, remove the nozzles and rinse thoroughly under warm water. This simple step helps restore water flow and improves faucet performance.
Be sure to check the manufacturer’s recommendations to avoid any damage, and repeat the process if necessary for heavily scaled nozzles.
Scrub Away Grime and Rinse for a Sparkling Finish
Once you’ve removed the faucet head from the sink, it’s time to scrub away built-up grime and mineral deposits. Grab a soft-bristled brush or an old toothbrush and start scrubbing the nozzles and exterior surfaces.
Focus on areas where mineral buildup is thick, applying gentle pressure to loosen deposits. After scrubbing, rinse the faucet head under running water to wash away loosened grime.
Apply gentle pressure to loosen mineral buildup, then rinse thoroughly for a sparkling clean faucet.
Imagine the water washing away the dull film, revealing shiny metal underneath. To guarantee a thorough clean, visualize:
- Scrubbing away stubborn mineral deposits with a toothbrush
- Rinsing the faucet head under a stream of warm water
- Wiping off excess moisture with a clean cloth
- Admiring the sparkling, grime-free finish you’ve achieved
This method leaves your faucet looking refreshed and spotless.
How to Check If Your Faucet Is Clear and Flowing Properly
After cleaning your faucet head, it’s important to make sure the water flows smoothly and freely. Turn on the faucet and watch the water stream. It should come out steadily without sputtering or dripping.
Check for any uneven spray or reduced pressure. These could mean there’s a clog or build-up inside the aerator. If the flow seems weak or uneven, try removing and inspecting the aerator for debris.
Clean out any mineral deposits or dirt that might be blocking the water flow. Also, listen for any unusual noises when the water runs, as these can signal blockages or valve issues.
Making sure your faucet flows properly helps prevent future plumbing problems and shows your cleaning efforts worked.
Reinstall the Faucet Head and Test Water Pressure
To reinstall the faucet head, make sure you tighten it securely but not too much, as over-tightening can cause damage. Once it’s in place, turn on the water and check the flow rate to see if it’s steady and strong.
If needed, make small adjustments to get the right water pressure for efficient use. This helps ensure your faucet works properly without any leaks or poor flow.
Proper Reinstallation Technique
Carefully reattach the faucet head by lining it up with the mounting hardware and tightening it securely. Make sure the threads are properly engaged so there are no leaks. Once it’s tight, check that the head sits flush and doesn’t wobble.
Next, turn on the water supply slowly to avoid sudden pressure spikes. Keep an eye out for any leaks around the base or connection points.
Test the water flow by activating the faucet handle, making sure it’s steady. If you notice leaks or weak flow, try adjusting the angle or tightening the connections.
This process helps ensure a secure fit and proper function. If everything looks good, you’ve successfully reinstalled your faucet head and restored ideal water pressure.
Check Water Flow Rate
Wondering if your faucet is working properly after reinstallation? Turn on the water slowly and observe the flow. You want a steady, even stream without sputtering or uneven pressure.
Check both hot and cold settings to guarantee consistent flow. If the water dribbles or stops altogether, there might still be a blockage or an installation issue.
Listen for unusual noises like sputtering or banging, which can indicate pressure problems. Make sure no leaks are present around the base or the spray head.
This simple step confirms whether the faucet head is functioning correctly and if water flows smoothly. If the flow isn’t right, you’ll need to troubleshoot further before adjusting pressure or rechecking the connections.
Adjust for Optimal Pressure
Once you’ve confirmed the water flows properly from your faucet, it’s time to adjust for ideal pressure by reinstalling the faucet head and testing the water flow. Carefully screw the faucet head back onto the spout, making sure it’s tight but not overtightened.
Turn the water supply back on slowly, watching for leaks. Then, test the water pressure by turning on the faucet fully. You want a steady, strong flow without splashing or sputtering.
If the pressure feels off, adjust the aerator or tighten the connection slightly. Picture these steps:
- Twisting the faucet head securely onto the spout
- Slowly turning on the water supply, watching for leaks
- Fully opening the faucet to test the flow
- Making small adjustments for a smooth, even spray
What to Do If Clogs Persist or Water Still Won’t Flow
If your faucet head still won’t drain properly after cleaning, the blockage might be more stubborn or deeper in the plumbing. First, try removing the aerator again and inspecting it closely for any remaining debris or mineral buildup. Use a toothpick or small brush to clear out tiny particles.
If water still won’t flow, consider soaking the aerator in vinegar overnight to dissolve mineral deposits. For persistent clogs, you might need to disassemble the faucet head if possible, checking for obstructions in the internal passages.
If all else fails, it could mean there’s a clog further down the line or in the plumbing itself. In that case, contacting a professional plumber is your best bet to avoid damaging your pipes.
Tips to Keep Your Faucet Clean and Prevent Buildup
Regular cleaning and maintenance are key to keeping your faucet free of buildup and working smoothly.
To prevent issues, try these simple tips:
- Wipe down the faucet daily with a soft cloth to remove water spots and soap residue.
- Check and clean the aerators regularly to stop mineral deposits from building up.
- Occasionally use a vinegar solution to dissolve any mineral buildup on the faucet surface.
- Keep the area around the faucet dry to prevent mold and mildew from growing.
Simple Maintenance Tips to Extend Your Faucet’s Lifespan
To keep your faucet working smoothly for years, simple maintenance is key. Check for leaks regularly and tighten loose connections to prevent water waste and damage.
Clean the aerator once a month to avoid buildup that can slow water flow. Soak it in vinegar to dissolve mineral deposits and improve performance.
Avoid harsh chemicals that could damage or corrode parts. Instead, use gentle cleaning solutions to keep your faucet in good shape.
If you notice worn-out washers or cartridges, replace them promptly to prevent leaks and maintain proper pressure.
After using the faucet, keep it dry, especially in humid environments, to prevent rust and corrosion.
Lastly, schedule routine inspections so you can catch any issues early on.
These small steps will help extend your faucet’s lifespan, save you money, and keep everything running smoothly over time.
Frequently Asked Questions
How Often Should I Clean My Kitchen Faucet Head?
You should clean your kitchen faucet head at least once a month to prevent buildup of mineral deposits and grime. If you notice reduced water flow or visible stains, clean it more often.
Regular cleaning keeps your faucet functioning smoothly and looking shiny. Simple things like soaking the aerator or wiping it down can make a big difference.
Doing this maintenance helps maintain your faucet’s performance and can even extend its lifespan.
Can I Use Commercial Descaling Products Instead of Vinegar?
Yes, you can use commercial descaling products instead of vinegar, but be cautious. These products are often more potent than vinegar and can quickly dissolve mineral buildup.
They almost work like a magic wand, transforming your faucet with ease. Just make sure to follow the manufacturer’s instructions carefully, wear gloves, and rinse thoroughly afterward.
Vinegar is gentler and safer for regular use. But if you’re in a hurry or dealing with stubborn deposits, a commercial descaler can be a powerful alternative.
Is It Safe to Remove the Faucet Head Myself?
Yes, it’s generally safe to remove the faucet head yourself if you follow the right steps.
Start by turning off the water supply first. Then, carefully unscrew the aerator or faucet head with pliers, using a cloth to protect the finish.
Be gentle to avoid damaging any parts. If you’re unsure or parts are stuck, check the manufacturer’s instructions or consider calling a professional to prevent any issues.
What Tools Are Necessary for Cleaning the Faucet Nozzle?
You’ll need basic tools like a wrench or pliers, a small brush or old toothbrush, and a vinegar solution.
Think of your faucet nozzle like a stubborn puzzle—you want the right tools to gently loosen and clear away buildup.
I once used a toothbrush to scrub mine, and it worked wonders. These simple tools make cleaning easier, ensuring your faucet flows smoothly without damage.
How Do I Prevent Mineral Deposits From Forming Again?
To prevent mineral deposits from forming again, make sure to wipe down your faucet with a soft cloth after each use, especially if you have hard water.
Installing a water softener or a filter can really cut down on mineral buildup.
You should also soak the aerator in vinegar from time to time to dissolve any deposits that might be starting to form.
These simple steps will help keep your faucet clean and ensure water flows smoothly, reducing future buildup.
Conclusion
Regularly cleaning your faucet head not only keeps water flowing smoothly but also extends its lifespan. Don’t let stubborn buildup ruin your daily routine—just follow a few simple steps to keep it looking and working great.
A sparkling, hassle-free kitchen is worth a little effort, right? With these easy tips, you’ll enjoy fresh, clean water every day and avoid costly repairs later on.
Why settle for less when a little maintenance can make all the difference? Keeping your faucet head clean is the key to a more efficient and enjoyable kitchen experience.