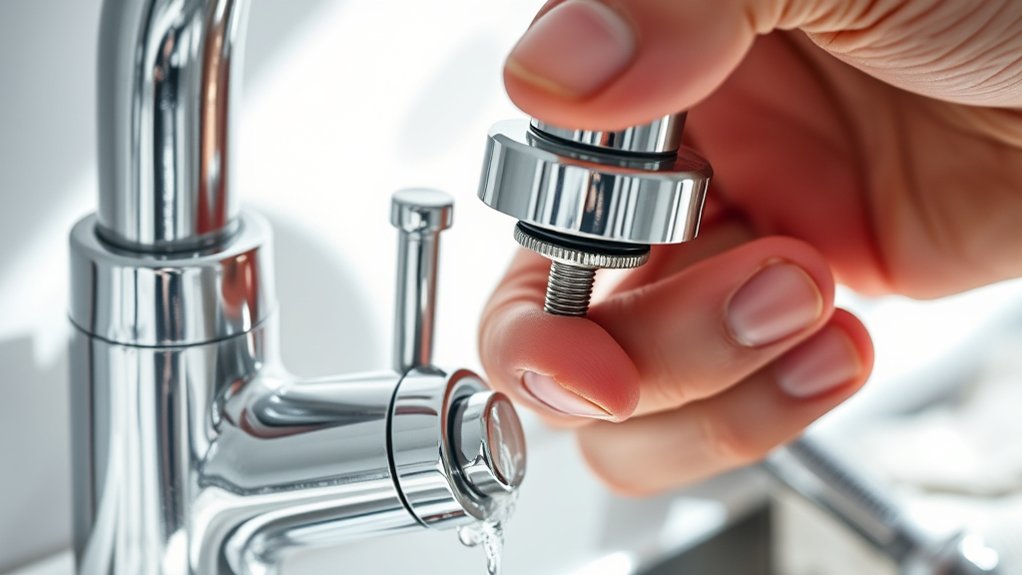
7 Simple Steps to Tighten Your Kitchen Faucet
Dealing with a wobbly or leaking kitchen faucet can be really frustrating, and you’re not alone—many people struggle with keeping their faucets in top shape.
Luckily, tightening your kitchen faucet is a simple fix that can save you time and money.
To tighten your kitchen faucet, first identify any wobbling handles or leaks. Gather the right tools like wrenches, screwdrivers, and safety gear.
Before starting, turn off the water supply. Remove the handle and loose components carefully, then tighten bolts and connections without overtightening.
Reassemble the faucet, turn the water back on, and check for leaks. Following these steps helps prevent future problems, and you’ll find even more tips to keep your faucet in top shape.
Key Takeaways
- Turn off the water supply before starting any repairs. This is important to prevent leaks while you’re working on the faucet.
- Next, remove the faucet handle. Loosen any hidden screws using the right tool for the job.
- Be careful when tightening loose parts. You don’t want to overtighten and risk damaging something.
- During reassembly, check all connections carefully. Make sure O-rings and gaskets are secure.
- Once everything is back in place, turn the water supply back on. Test the faucet for leaks and make sure it’s working properly.
How to Identify if Your Kitchen Faucet Is Loose or Leaking

Wondering if your kitchen faucet needs attention? Check for signs of looseness or leaks.
First, see if the handle feels wobbly or moves more than usual when you turn it. A loose handle can cause water to drip or spray unexpectedly.
Next, look for water around the base of the faucet. That usually means a leak or worn-out seals. Listen closely; if you hear dripping sounds even when the faucet is off, it’s a clear sign of a leak.
Also, keep an eye on your water bill. An unexpectedly high bill often points to hidden leaks.
Gather the Tools and Supplies You Need for Faucet Repair
Before you start the repair, gather the essential tools like a wrench, screwdriver, and pliers. Also, have any replacement parts you might need ready to go.
Make sure you have safety gear such as gloves and eye protection to stay safe while working. Having everything prepared beforehand makes the repair smoother and more efficient.
Essential Repair Tools
Gathering the right tools is crucial for a smooth faucet repair. You’ll need a set of adjustable wrenches to loosen nuts without damaging them, and an Allen wrench if your faucet has hex screws.
A pair of slip joint pliers makes gripping and turning easier, especially in tight spaces. Don’t forget a flat-head screwdriver and Phillips screwdriver for removing screws or covers.
A small bucket or towel helps catch any water drips, keeping your workspace clean. You might also want a flashlight to illuminate hard-to-see areas.
Finally, having some plumber’s grease on hand guarantees you can lubricate parts if needed. With these tools, you’re well-equipped to tighten your faucet efficiently and avoid unnecessary delays or damage.
Necessary Replacement Parts
Having the right replacement parts on hand is essential for a smooth and successful faucet repair. Before you start, identify the components you might need to replace, like washers, O-rings, or cartridge valves.
Having these ready prevents delays during repair. Check your faucet model to make sure the parts will fit. Here’s a quick list of common parts:
| Part Type | Purpose |
|---|---|
| Washers | Seal connections to prevent leaks |
| O-rings | Provide watertight seals |
| Cartridge | Controls water flow and temperature |
Having these parts prepared means you can quickly swap out worn or damaged components. This saves you time and avoids unnecessary trips to the store.
Using the proper replacement parts is key to a durable, leak-free repair.
Safety Equipment Needed
To guarantee your faucet repair goes smoothly and safely, assemble the necessary safety equipment before starting. Wear gloves to protect your hands from sharp edges and hot water, and use safety goggles to shield your eyes from debris or splashes.
Keep a pair of slip-resistant gloves handy if you’ll be working on wet surfaces. It’s also wise to have a small flashlight or work light nearby to improve visibility in tight spaces.
Moreover, have a towel or rag ready to catch drips and prevent slipping. If you’re using any tools that may produce sparks or require power, make sure they are properly grounded and in good condition.
Being prepared with the right safety gear helps prevent accidents and makes the repair process safer and more efficient.
How to Turn Off Your Water Supply Safely?
Before starting any repairs on your kitchen faucet, it’s important to turn off the water supply to avoid leaks or water damage.
Find the shut-off valves under your sink—these are usually small handles or knobs connected to the water lines. Turn each handle clockwise until it stops; this cuts off the water flow to your faucet.
If your home has a main water shut-off valve, you can turn that off instead for extra security.
After shutting the valves, open the faucet to drain any remaining water and make sure the supply is fully off.
Check that no water drips from the faucet before you start working.
Turning off the water safely helps prevent messes and makes your repairs go smoothly.
How to Remove the Faucet Handle and Components
With the water supply turned off and the faucet drained, you can now start removing the handle and other parts.
First, look for a screw or bolt holding the handle in place, often hidden under a decorative cap. Use a flat-head screwdriver or Allen wrench to carefully pry off the cap if needed.
Look for a hidden screw or bolt under a decorative cap, and carefully pry it off with a screwdriver or Allen wrench.
Loosen and remove the screw, then gently lift the handle away from the faucet body. Next, check for any retaining clips or nuts holding other parts in place—use pliers or a wrench to loosen these.
Be sure to keep track of all small parts because you’ll need them when putting everything back together. If the handle doesn’t come off easily, gently wiggle it to loosen any stubborn connections.
Once you’ve removed the handle, you’ll have clear access to the internal components for inspection or repair.
How to Tighten Loose Parts and Bolts Properly
Start by inspecting all the loose parts and bolts around your faucet. Tighten them carefully with an appropriate wrench or screwdriver, but don’t overtighten as this can cause damage.
Use the table below to identify common loose components and how to tighten them:
| Part | How to Tighten |
|---|---|
| Faucet mounting nut | Use a basin wrench to tighten clockwise |
| Handles | Tighten screws securely with a screwdriver |
| Supply line fittings | Use adjustable pliers to tighten fittings |
| Aerator | Unscrew, clean debris, then tighten snugly |
Check each part after tightening to verify stability. Properly secured parts prevent leaks and extend your faucet’s lifespan.
How to Reassemble and Test Your Faucet After Repair
Once you’ve tightened all the loose parts and bolts, it’s time to reassemble your faucet carefully. Make sure each component fits securely in place. Start by replacing the handle and any remaining panels, ensuring they align properly with the faucet body.
Tighten any screws or nuts you removed earlier, but be careful not to over-tighten, as that could damage parts. Once everything is reassembled, slowly turn on the water supply. Check for leaks or drips as the water flows.
Operate the faucet several times to make sure it moves smoothly. Listen for any unusual sounds and watch for leaks around the base or spout. If you notice leaks, tighten connections slightly or recheck the placement of parts.
Thorough testing helps ensure your repair was successful and that your faucet is working properly.
Tips to Prevent Future Faucet Leaks and Loose Parts
Regularly checking your faucet for leaks and loose parts can help catch issues early before they get worse.
Make sure you follow proper installation techniques when assembling or repairing to keep everything secure.
Staying on top of maintenance and doing careful setups can save you time and prevent costly repairs down the line.
Regular Maintenance Checks
Performing routine maintenance checks is essential to catch potential issues before they turn into costly repairs. Regularly inspect your faucet for signs of wear, corrosion, or loose parts.
Check underneath the sink for leaks or water stains, which can indicate hidden problems. Tighten any loose nuts or fittings to prevent future drips.
Clean aerators and spray heads to ensure proper water flow and remove mineral buildup. Listen for unusual noises when using the faucet, as they can signal internal issues.
Don’t forget to test hot and cold controls to make sure they operate smoothly. These small, consistent checks help you spot minor problems early, saving you money and preventing major repairs.
Staying proactive keeps your faucet functioning properly and extends its lifespan.
Proper Installation Techniques
Proper installation is essential to prevent future leaks and loose parts in your faucet. First, make sure all components are clean and free of debris before you start.
Follow the manufacturer’s instructions carefully, tightening connections snugly but not too tight. Over-tightening can damage parts, so be cautious.
Use the correct tools, like a basin wrench or adjustable wrench, to avoid stripping fittings. Applying plumber’s tape on threaded connections helps create a watertight seal.
Check that O-rings and gaskets are properly seated and replace any damaged ones. When installing the faucet, ensure it’s aligned correctly and securely fastened to the sink or countertop.
After installation, turn on the water slowly to check for leaks. Tighten connections as needed. Proper technique now will prevent costly repairs and keep your faucet tight and leak-free.
Frequently Asked Questions
How Often Should I Inspect My Kitchen Faucet for Issues?
You should check your kitchen faucet at least once every few months to catch problems early.
Regular inspections help you spot leaks, loose handles, or drips before they turn into bigger issues.
If you notice less water flow or strange noises, take a look right away.
Routine checks save you money and prevent water damage, keeping your faucet in good shape.
Staying on top of maintenance keeps your kitchen running smoothly.
Can I Fix a Faucet Leak Without Professional Help?
Did you know that a leaking faucet can waste up to 3,000 gallons of water a year?
You can fix a faucet leak yourself if you’re comfortable with basic tools.
Start by turning off the water supply, then disassemble the faucet to replace worn washers or O-rings.
With patience, a few simple tools, and online tutorials, you can often fix leaks without calling a professional.
This way, you’ll save both water and money in the long run.
What Are Common Signs My Faucet Needs Repair?
You’ll know your faucet needs repair if you notice persistent dripping, which wastes water and raises your bill.
If the water flow is weak or inconsistent, that’s another sign to watch for.
Look for water stains or corrosion around the base, as these can indicate leaks or damage.
Unusual noises when turning the handle or a handle that wobbles also suggest repairs are needed.
Addressing these issues early can prevent further damage and save you money on costly repairs.
Are There Different Types of Faucet Repairs I Should Know?
Yes, there are different types of faucet repairs you should know. You might need to replace washers or O-rings if there’s leaking or dripping.
Sometimes, the cartridge or valve needs fixing if the handle’s tough to turn. Sediment buildup can cause low water pressure, which might require cleaning or replacement.
Recognizing these issues helps you figure out whether you can fix the problem yourself or if it’s time to call a professional.
How Long Does a Typical Faucet Tightening Repair Take?
A typical faucet tightening repair usually takes about 15 to 30 minutes. You’ll need to gather your tools, turn off the water supply, and then access the faucet to tighten the nuts or fittings.
If you’re familiar with plumbing, you might finish faster. But if you run into rust or hard-to-reach spots, it could take a bit longer.
Just keep patient, and you’ll have your faucet secure in no time.
Conclusion
Now that you’ve tightened your faucet’s grip, it’s ready to stand tall like a sturdy oak in your kitchen. With just a few simple steps, you’ve turned a leaky, wobbly nuisance into a steady stream of confidence.
Think of your repaired faucet as a reliable partner that won’t let you down, keeping your kitchen flowing smoothly.
Keep these tips in your toolbox, and your faucet will stay a steadfast guardian of your daily chores. Properly tightened, it’s ready to serve you well for years to come.