7 Simple Steps to Replace Kitchen Cabinets
Feeling overwhelmed by the idea of replacing your kitchen cabinets? You’re not alone—many homeowners find the process daunting and tricky to navigate.
But don’t worry, tackling this project can be straightforward with a clear plan and some handy tips.
Start by clearing your kitchen and turning off water and power. Remove the old cabinets carefully, securing your workspace.
Measure and choose new cabinets that match your style and space.
Use the right tools like a drill, level, and screwdriver to install the new units securely, ensuring they’re straight.
Adjust hinges and hardware for smooth operation, then clean and finish the detail work.
For a smooth, successful upgrade, all these steps will guide you through the process seamlessly.
Key Takeaways
- Remove the existing cabinets carefully. Disconnect the plumbing and make sure to secure your tools for safety.
- Measure your space and choose new cabinets that fit your kitchen layout and style.
- Mark where the wall studs are and use a ledger board. This helps you install the upper cabinets precisely and level.
- Secure the cabinets to the wall. Check that they are straight, level, and properly aligned.
- Finally, adjust the doors, hardware, and hinges. This will ensure everything operates smoothly and looks polished.
How to Prepare Your Kitchen for Cabinet Replacement
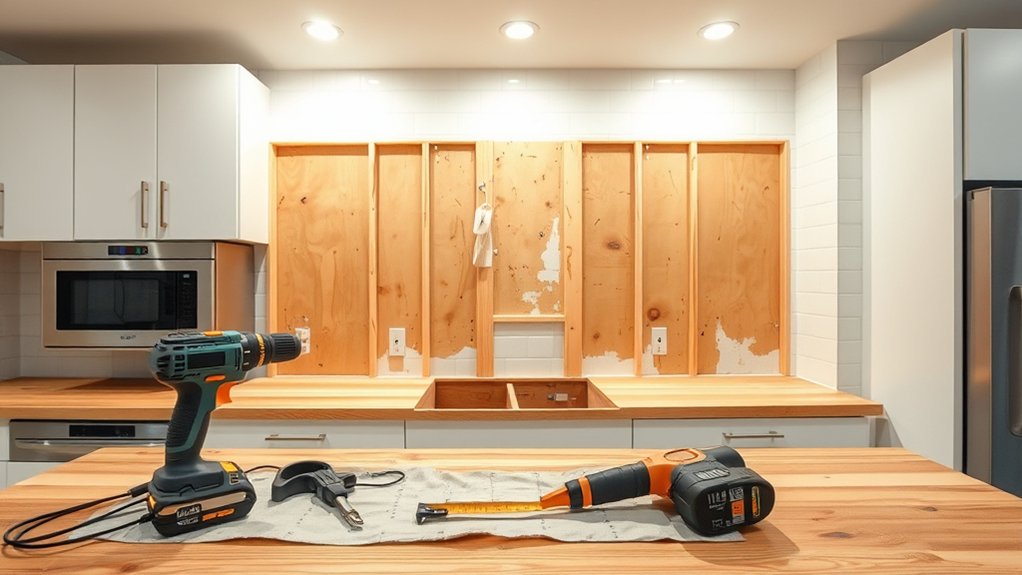
Before you start replacing your kitchen cabinets, it’s important to prepare the space to make the process easier. Clear out everything from your cabinets, countertops, and nearby areas to keep things clutter-free.
Turn off the water supply if you’re removing any plumbing fixtures, and disconnect appliances to prevent damage. Cover nearby surfaces with drop cloths or plastic sheets to protect them from dust and debris.
If your cabinets are heavy or bulky, consider removing doors and drawers first to make handling them easier. Remove electrical outlets or switches that might get in the way of the new cabinets.
Finally, gather all the tools and supplies you’ll need, like screwdrivers, a level, and a drill. Proper preparation helps prevent surprises and keeps your installation running smoothly.
How to Choose Cabinets That Fit Your Space and Style
Choosing cabinets that match your space and style starts with understanding your kitchen’s layout and design aesthetic. Measure your kitchen carefully to see how much room you have and to make sure the cabinets won’t make the space feel crowded or leave awkward gaps.
Think about your overall style—do you like modern, traditional, or farmhouse looks? Pick cabinet styles, colors, and finishes that go well with your current décor. Consider how much storage you really need and whether you want features like glass-front doors or soft-close drawers.
Keep in mind the height and depth of your cabinets so they fit well with your appliances and countertops. Visiting showrooms or browsing online can help you picture what different options look like. In the end, choose cabinets that reflect your personality and fit comfortably within your kitchen’s proportions.
Tools and Materials Needed for DIY Cabinet Installation
To install your new cabinets, you’ll need some essential hand tools like a level, tape measure, and screwdriver. These will help you ensure everything is aligned and secure.
You’ll also require power tools such as a drill and saw to make accurate cuts and attach the cabinets properly. Having the right tools makes the job much easier.
Make sure you have all the necessary materials and supplies, including screws, brackets, and filler strips. This will help you complete the project smoothly without any last-minute trips to the store.
Essential Hand Tools
When tackling DIY cabinet installation, having the right hand tools is key to making the process smooth and accurate. These tools help you measure, cut, and assemble efficiently.
First, a hammer is essential for securing nails and making adjustments. Second, a screwdriver—preferably both Phillips and flat-head—makes fastening and removing screws easy.
Third, a level ensures your cabinets are perfectly aligned, helping you avoid issues later on. Keep a measuring tape handy to check dimensions and a pencil for marking.
These basic hand tools give you a solid foundation for the project, making installation safer and more precise. With these essentials, you’ll be ready to handle most tasks confidently when replacing your kitchen cabinets.
Required Power Equipment
Equipping yourself with the right power tools is essential for a smooth and efficient cabinet installation. You’ll need a cordless drill to make quick work of drilling holes and driving screws.
A circular saw helps you cut cabinets and panels to size accurately. An impact driver adds extra torque for stubborn screws or heavy-duty tasks.
A jigsaw can be useful for making curved or intricate cuts. Moreover, a stud finder guarantees you locate the wall studs securely for mounting.
A level ensures your cabinets are perfectly aligned. Don’t forget safety gear like goggles and ear protection.
These tools streamline the process, reduce manual effort, and improve precision, making your DIY project more manageable and professional-looking.
Necessary Materials and Supplies
Gathering all the necessary tools and supplies is essential for a successful DIY cabinet installation. You’ll need a few key items to get the job done efficiently.
First, a power drill and screwdriver bits are crucial for assembling and securing the cabinets. A measuring tape and a level will help you ensure precise placement and alignment.
Don’t forget a stud finder to locate wall studs, making sure your cabinets are mounted securely. Keep these supplies on hand: screws and brackets for stability, painter’s tape to protect surfaces, and a pencil for marking measurements.
Having everything ready beforehand prevents delays and keeps your work organized. Make sure your tools are in good condition for smooth operation. With these materials, you’ll be prepared to install your cabinets confidently and accurately.
Step-by-Step Guide to Removing Old Cabinets Safely
Before you start removing your cabinets, clear your workspace and protect your floors. It’s a good idea to lay down some drop cloths or old towels to catch debris.
Make sure to turn off the power and disconnect plumbing to avoid accidents. Safety first, right? Double-check that everything’s shut off before you begin.
With safety precautions in place, you’re ready to remove the cabinets carefully and efficiently. Take your time and work methodically to avoid damaging your walls or new cabinets.
Prepare Your Workspace
To safely remove your old cabinets, start by clearing the area and protecting your surfaces. This helps prevent damage and keeps your workspace organized.
Next, gather essential tools and materials like drop cloths, painter’s tape, and a sturdy ladder. Having everything ready makes the job easier and safer.
Finally, disconnect utilities such as water and electricity if needed. This step is important to avoid any hazards during the removal process.
Here’s a quick checklist:
- Clear the countertop and surrounding area.
- Cover nearby surfaces with drop cloths and tape edges for protection.
- Turn off water and power to avoid accidents.
Safely Remove Cabinets
Once you’re ready to remove your cabinets, start by carefully loosening the screws or nails securing the cabinets to the wall. Use a screwdriver or pry bar to gently remove these fasteners, taking care not to damage the wall or surrounding surfaces. Support the cabinet with one hand as you loosen the hardware to prevent it from falling unexpectedly.
If the cabinets are heavy, ask a helper to assist with lifting and lowering. Remove the cabinets slowly, inspecting for any hidden fasteners or electrical wiring. Keep the hardware organized for reinstallation.
Wear safety goggles and gloves to protect yourself from splinters or sharp edges. Taking your time guarantees safe removal and minimizes damage to your walls or cabinets.
How to Install Your New Kitchen Cabinets
Installing your new kitchen cabinets starts with good preparation. First, check if your wall is level using a spirit level; uneven walls can cause alignment problems.
Next, mark where the wall studs are so you know where to secure your cabinets. This helps ensure they stay stable over time.
Gather all your tools—like a drill, level, screws—and if possible, get a helper to make things easier.
Begin by attaching a ledger board at the right height to hold your upper cabinets temporarily. Then, secure the cabinets to the wall, making sure they’re straight and level.
Use shims if needed to get everything just right. Keep checking with the level and tighten all the screws firmly.
With proper prep and a little patience, your installation will look professional and be securely done.
Final Touches: Hardware, Adjustments, and Cleanup
After you’ve installed your cabinets, the final steps involve adding hardware, making any necessary adjustments, and cleaning up the workspace. Start by attaching knobs and pulls to each door and drawer for both functionality and style.
Check cabinet doors for proper alignment and tighten or loosen hinges as needed to ensure smooth opening and closing. Then, wipe down all surfaces to remove dust, fingerprints, and debris.
Use the table below to guide your finishing touches:
| Hardware Type | Adjustment Needed | Cleaning Tip |
|---|---|---|
| Knobs and pulls | Tighten or replace | Use a soft cloth with mild cleaner |
| Hinges | Adjust for alignment | Lubricate if squeaky |
| Shelves | Level and stabilize | Wipe with damp cloth |
Complete these steps to make sure your cabinets look great and function perfectly.
Troubleshooting Common Issues During Cabinet Replacement
Even with careful planning, you might run into some common issues during cabinet replacement. First, misaligned doors or drawers can be frustrating. Check the hinges and adjust the screws as needed. Second, cabinets might not sit level, creating gaps or uneven spacing. Use a level to spot these areas, then shim or re-secure the cabinets. Third, if the hardware doesn’t fit or looks off, measure the existing holes before drilling new ones. Double-check your hardware dimensions to avoid surprises. These problems are usually easy to fix with patience and the right tools. Taking your time during adjustments can save you headaches later. Being proactive with measurements and tweaks will help you achieve a polished, professional look.
Frequently Asked Questions
How Long Does a Typical Kitchen Cabinet Replacement Take?
A typical kitchen cabinet replacement takes about one to three weeks, depending on how complex your project is. You’ll start by removing the old cabinets, which usually takes a day or two.
Then, your contractor measures, orders, and installs the new cabinets. This process often takes about a week. Finishing touches like painting, hardware installation, and cleanup might add a few extra days.
Your schedule really depends on the size of your kitchen and the availability of your chosen materials.
Can I Replace Cabinets Without Professional Help?
Replacing cabinets without professionals is like putting together a tricky puzzle—you can do it if you’re patient and organized.
You’ll need some basic tools, DIY experience, and plenty of time. Carefully measure, follow instructions, and take your time.
If you’re unsure about electrical or plumbing work, it’s safer to hire a pro. Proper planning makes the process smoother and the results more satisfying.
What Are the Best Materials for Durable Kitchen Cabinets?
The best materials for durable kitchen cabinets are hardwoods like oak, maple, and cherry. These woods resist wear and damage over time, making them a great choice.
Plywood is also a strong, affordable option, especially for cabinet boxes. It’s less likely to warp, which helps keep your cabinets in good shape.
Avoid softwoods like pine for high-traffic areas because they can dent easily.
You might also want to consider waterproof veneers or laminate surfaces. They add extra protection against moisture and spills, helping your cabinets last longer.
How Do I Dispose of or Recycle Old Cabinets?
Think of your old cabinets as a treasure chest ready for a new journey. You can donate them to charities, giving them a second life.
If they’re too worn, recycle the wood at your local facility or repurpose the materials for DIY projects. Avoid tossing them in the trash, as they clutter landfills and miss a chance to be reborn.
Your mindful disposal transforms trash into treasure, helping the environment.
What Safety Precautions Should I Follow During Installation?
You should wear safety goggles and gloves to protect your eyes and hands during installation. Make sure your workspace is clear of debris and obstacles to prevent trips and falls.
Use proper tools and follow manufacturer instructions carefully to avoid accidents. If working at heights, wear a harness or use a stable ladder.
Keep a first aid kit nearby, and never rush the process to maintain a safe environment.
Conclusion
As you finish installing your new cabinets, it’s surprising how a small change can transform your entire kitchen—almost like a coincidence.
With your newfound skills, you might feel inspired to tackle other home projects. Remember, patience and attention to detail make all the difference.
Now, with your space refreshed, you’ll enjoy a beautiful, functional kitchen. You might even wonder if this project was meant to be, especially after replacing your kitchen cabinets.