10 Steps to Clean Greasy Kitchen Cabinets Effortlessly
Many people struggle with greasy kitchen cabinets that just won’t stay clean no matter how much they scrub. If you’re tired of stubborn grease buildup and want an easier way to keep your kitchen looking fresh, you’re not alone.
To clean greasy kitchen cabinets effortlessly, start by clearing and ventilating the area. Use a soft cloth or vacuum to remove loose dust and debris, then inspect and tighten any hardware.
Make a gentle homemade degreaser with vinegar, water, baking soda, and dish soap. Wipe surfaces with a microfiber cloth, focusing on handles and hinges.
Regular maintenance and avoiding harsh chemicals will keep your cabinets looking their best. Keep going for more expert tips on long-term cleanliness.
Key Takeaways
- Remove cabinet handles and hardware for a thorough clean and inspection.
- Mix up a gentle homemade degreaser using vinegar, water, baking soda, and a bit of dish soap.
- Wipe down the cabinets with a microfiber cloth in circular motions. This helps lift the grease without spreading it around.
- Don’t forget to clean hinges, handles, and corners with small brushes or an old toothbrush. Those spots tend to hide grime.
- After cleaning, dry the cabinets completely. This helps prevent streaks and moisture damage.
Prepare Your Kitchen Cabinets for Deep Cleaning
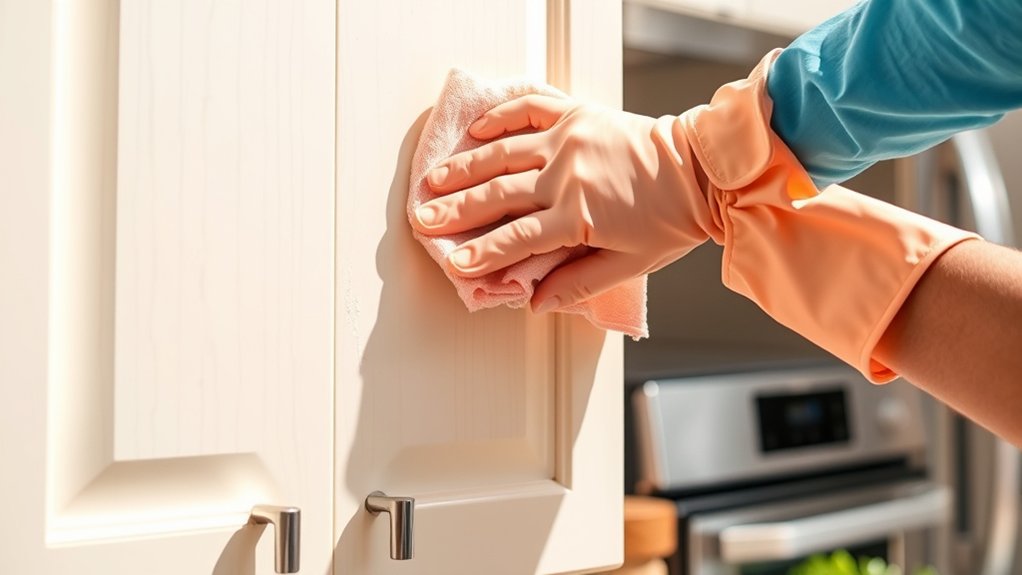
Before you start deep cleaning your kitchen cabinets, make sure to prepare them properly. Clear off everything from inside and on top of the cabinets so you can access everything easily.
Remove any loose debris or dust using a soft cloth or a vacuum with a brush attachment. Check the cabinets for loose or damaged hardware, and tighten or replace it if needed.
If your cabinets have handles or knobs, take them off to clean around and behind them thoroughly. Protect your countertops by laying down a towel or plastic sheet.
Ventilate the area by opening windows or turning on the exhaust fan. This helps reduce fumes from cleaning products.
Proper prep makes the cleaning process smoother and more effective, leaving your cabinets spotless.
Choose the Best Supplies for Cleaning Greasy Cabinets
Choosing the right cleaning supplies is key to tackling greasy kitchen cabinets effectively. You want products that cut through grease without damaging your cabinet finish. A mild dish soap mixed with warm water is a great starting point because it’s gentle yet effective.
Choose gentle, effective cleaners like mild dish soap and warm water for greasy kitchen cabinets.
For tougher grease, consider a degreasing cleaner or a mixture of vinegar and water. These are eco-friendly and powerful options. Avoid harsh abrasives or bleach, as they can harm the surface.
Microfiber cloths are best for applying cleaning solutions and wiping away grime since they trap grease without scratching. Keep a soft sponge handy for stubborn spots.
Having the right supplies ready guarantees your cleaning process is efficient and safe, leaving your cabinets spotless and well-maintained.
Remove Surface Dirt and Loose Grease First
Start by wiping down your cabinets with a dry microfiber cloth or a soft brush to remove surface dirt and loose grease. This initial step clears away debris that could interfere with deeper cleaning and helps prevent scratching during the process.
As you work, consider these tips: focus on corners and edges where dust and grease tend to build up, use gentle, circular motions to lift dirt without spreading it around, and pay attention to handles and knobs, which often trap grime.
Be sure to regularly replace or shake out your cloth or brush for maximum effectiveness. Removing surface dirt and loose grease creates a clean base, making the next cleaning steps easier and more effective. It also helps prevent scratches and damage to your cabinets’ finish.
Make Your Own Degreaser at Home
To make your own degreaser at home, gather simple ingredients like dish soap, vinegar, and baking soda. Mix them in the right proportions following clear instructions.
Then, carefully apply the solution to your cabinets. With these tips, you’ll have an effective, budget-friendly cleaner ready in no time.
Ingredients Needed
Creating your own degreaser at home is easy and budget-friendly. You only need a few simple ingredients that are both effective and safe.
You don’t need harsh chemicals to cut through grease; natural ingredients work just as well. To make your degreaser, gather:
- White vinegar, known for its grease-cutting power
- Baking soda for gentle scrubbing and deodorizing
- Dish soap to break down oils and grime
- Water to dilute and mix everything smoothly
These ingredients are common, inexpensive, and safe to use around your kitchen. With just these, you’ll be ready to tackle greasy cabinet surfaces without harsh fumes or costly store-bought cleaners. Keep them handy for quick, effective cleaning sessions.
Mixing Instructions
Mixing your homemade degreaser is simple and quick. Start by gathering your ingredients: water, white vinegar, baking soda, and a few drops of dish soap.
Fill a spray bottle with one cup of water, then add half a cup of white vinegar. Next, sprinkle in one tablespoon of baking soda—expect some fizzing!
Finally, add a few drops of dish soap for extra grease-cutting power. Secure the spray top and shake gently until everything is well combined.
The vinegar and baking soda will react initially but will settle into a uniform solution. This mixture creates an effective degreaser that’s safe for your cabinets and easy to make at home.
Use it immediately or store it for later cleaning sessions.
Application Tips
Once your homemade degreaser is ready, it’s time to put it to work effectively. First, spray or apply the solution directly onto the greasy cabinets, focusing on heavily stained areas. Let it sit for a few minutes to loosen the grease.
Then, wipe with a microfiber cloth or sponge, applying gentle pressure. For stubborn spots, reapply and scrub lightly. Keep these tips in mind:
- Use a soft cloth to avoid scratching the surface
- Test on a small, hidden area first
- Avoid oversaturating the wood or laminate
- Rinse your cloth frequently for best results
Following these tips guarantees thorough cleaning without damage, making your kitchen cabinets look fresh and spotless with minimal effort.
Scrub Your Cabinets Without Damaging the Finish
To effectively scrub your cabinets without damaging the finish, start by choosing the right cleaning tools and gentle solutions. Use a soft microfiber cloth or a non-abrasive sponge to prevent scratches. Avoid steel wool or harsh scrub brushes that can harm the surface.
Prepare a mild cleaning solution by mixing a few drops of dish soap with warm water or use a commercial cleaner designed for cabinetry. Always test the solution on a small, hidden area first to make sure it won’t discolor or damage the finish.
Gently scrub in the direction of the grain, applying light pressure. This method removes grease effectively while helping to preserve the cabinet’s appearance and protective coating. Keeping this in mind will help your cabinets stay looking fresh and well-maintained.
Rinse and Dry for a Spotless Shine
After you’ve scrubbed your cabinets, it’s important to rinse away any remaining soap residue thoroughly. This helps prevent streaks and buildup that can attract more grease over time. Use a clean, damp cloth or sponge to wipe down the surfaces, making sure to remove all traces of the cleaning solution.
Once rinsed, drying is vital for a glossy, streak-free finish. Use a soft, dry microfiber cloth to gently buff the cabinets, absorbing excess water and leaving a polished look. To guarantee a spotless shine, keep in mind:
Dry thoroughly with a soft microfiber cloth for a shiny, streak-free finish.
- Use a lint-free cloth to avoid fibers sticking
- Work in gentle, circular motions
- Pay attention to edges and corners
- Avoid leaving water spots by drying promptly
This process leaves your cabinets looking refreshed and gleaming.
Clean Hinges, Handles, and Hidden Spots Effectively
Start by removing and inspecting hinges, handles, and other components to spot dirt and grime.
Use the right cleaning tools, like a soft brush or cloth, to reach every spot effectively.
Be careful when tackling hidden dirt to make sure your cabinets look spotless from every angle.
Remove and Inspect Components
Begin by removing all hinges, handles, and other hardware from your cabinets to give yourself easy access for cleaning. Carefully inspect each component for grease buildup, rust, or damage. This helps you identify areas that need extra attention and guarantees thorough cleaning.
As you remove hardware, check for loose screws or worn parts that might need tightening or replacing. Pay close attention to hidden spots behind handles or inside hinges, where grime often accumulates.
Look for rust or corrosion on metal parts and check screws and fasteners for tightness. Examine hinges and handles for wear or damage, and note any components that require replacement or extra scrubbing.
This inspection keeps your cabinets in top shape and prepares you for effective cleaning.
Use Appropriate Cleaning Tools
Using the right cleaning tools makes all the difference when tackling hinges, handles, and hidden spots. You want tools that can reach tight corners and remove grime without damaging surfaces.
Soft-bristled brushes or toothbrushes are great for hinges and crevices, while microfiber cloths work well for handles and surfaces. Cotton swabs are perfect for getting into tiny spots.
Synthetic sponges can scrub stubborn grease, and toothpicks help dislodge dirt from tight gaps. Choosing the right tools makes cleaning easier and more effective.
Tackle Hidden Dirt Effectively
Once you’ve gathered the right tools, it’s time to focus on those tricky, hidden spots that often collect dirt and grime. These areas, like hinges, handles, and corners, can be overlooked but make a big difference in overall cleanliness.
To tackle them effectively, use a small brush or toothbrush to reach tight spaces. Dampen a cloth with a gentle cleaner or a mixture of water and vinegar for stubborn spots.
Don’t forget to clean behind handles and hinges, removing dust and grease buildup. Use a cotton swab for tight corners and apply a degreasing solution for stubborn grime.
Taking these steps guarantees hidden dirt doesn’t compromise your cabinets’ shine and hygiene.
Prevent Future Grease Buildup With Simple Maintenance
Grease buildup is a common challenge in kitchens, but with simple maintenance, you can keep it at bay. Regularly wiping down your cabinets prevents grease from accumulating. Use a microfiber cloth and a mild cleaning solution weekly to maintain cleanliness. Keep a schedule to avoid neglect.
Moreover, guarantee proper ventilation to reduce airborne grease. Installing range hoods or exhaust fans helps filter out grease particles. These small steps can make a big difference in keeping your kitchen clean and grease-free.
| Maintenance Tip | Frequency | Benefits |
|---|---|---|
| Wipe with microfiber cloth | Weekly | Prevents buildup |
| Use mild cleaning solution | Monthly | Keeps surfaces fresh |
| Improve ventilation | Continuous | Reduces airborne grease |
Common Mistakes to Avoid When Cleaning Cabinets
Avoid using harsh chemicals that can damage your cabinet finishes. Steer clear of over-soaking surfaces, which can cause warping or swelling.
These mistakes can ruin your effort and lead to costly repairs later. Make sure to follow proper cleaning techniques to keep your cabinets looking their best.
Using Harsh Chemicals
Using harsh chemicals is a common mistake that can damage your kitchen cabinets. These strong cleaners may strip paint, warp wood, or cause discoloration. Instead of quick fixes, choose gentler solutions that protect your cabinetry’s finish.
Be cautious with bleach-based cleaners, as they can weaken wood fibers. Avoid ammonia or other strong solvents that cause surface damage. Steer clear of abrasive scrubbers that scratch delicate surfaces. Also, don’t use industrial degreasers not meant for kitchen use.
Using these harsh substances might seem effective at first, but they often cause long-term harm. Always read labels carefully and test a small area first. Gentle, natural cleaners are safer and keep your cabinets looking fresh without risking damage.
Over-Soaking Surfaces
While gentle cleaners help protect your cabinets from damage, over-soaking surfaces can undo that effort. Excess moisture can seep into seams, warp wood, or damage paint. It also delays drying, which can lead to mold and mildew.
To prevent this, use a damp cloth instead of soaking your sponge or rag. Be mindful of how much liquid you apply, especially near edges and joints.
Here’s a quick guide to help you avoid over-soaking:
| Mistake | Solution |
|---|---|
| Drenching surfaces | Use a lightly damp cloth instead of soaking |
| Ignoring drying time | Wipe dry immediately after cleaning |
| Applying excess liquid | Squeeze out excess cleaner before use |
| Letting water sit on surfaces | Wipe away moisture promptly |
| Using too much cleaner | Use minimal product for effective cleaning |
How to Maintain Clean and Fresh Cabinets Long-Term
Maintaining clean and fresh kitchen cabinets over time requires consistent habits and proactive care. To keep them looking their best, incorporate simple routines into your schedule.
Regularly wipe down surfaces with a gentle cleaner to prevent buildup. Use a soft cloth to avoid scratches and dullness. Avoid harsh chemicals that can damage finishes.
Wipe surfaces regularly with a gentle cleaner and soft cloth to prevent damage and maintain their shine.
Keep moisture away by promptly drying cabinets after cleaning or spills. Organize items inside to reduce clutter and unnecessary handling.
Consider applying a protective finish or polish every few months for added shine and protection. Wipe down surfaces weekly and address spills immediately.
Use gentle cleaning products and keep humidity levels steady to help your cabinets stay fresh and beautiful for the long term.
Frequently Asked Questions
How Often Should I Clean Greasy Kitchen Cabinets?
You should clean your greasy kitchen cabinets at least once a month to prevent buildup. If you cook often or notice grease piling up quickly, think about cleaning them more frequently, like every two weeks.
Regular cleaning keeps your cabinets looking fresh and helps avoid stubborn stains. Use a gentle cleaner and a soft cloth to wipe down the surfaces.
This way, your kitchen stays hygienic and inviting with minimal effort.
Can Vinegar Damage My Cabinet Finish?
Vinegar generally doesn’t damage your cabinet finish if diluted properly. You should mix equal parts vinegar and water to create a gentle cleaning solution.
Test it on a small, hidden area first to confirm there’s no adverse reaction. Avoid using full-strength vinegar or harsh scrubbing tools, as these can wear down the finish over time.
Properly diluted vinegar is safe and effective for cleaning greasy cabinets without harming their surface.
Are There Eco-Friendly Degreasers I Can Use?
Yes, there are eco-friendly degreasers you can use. Look for products labeled biodegradable, non-toxic, and plant-based, which are gentle on your cabinets and the environment.
You can also make your own using natural ingredients like baking soda, lemon juice, or castile soap mixed with water. These options effectively cut grease without harsh chemicals, keeping your kitchen safe and eco-conscious.
What Signs Indicate My Cabinets Need Deep Cleaning?
You’ll notice your cabinets need deep cleaning when greasy spots become stubborn or dark streaks show up on the surfaces.
If grime, sticky residue, or lingering odors build up, it’s time for a thorough clean.
Also, if fingerprints or splatters don’t wipe away easily, it means surface grime has accumulated.
Regular inspections help you catch these signs early, keeping your cabinets looking fresh and well-maintained.
How Do I Prevent Streaks After Cleaning?
To prevent streaks after cleaning, dry your cabinets thoroughly with a microfiber cloth right after wiping.
Avoid using too much cleaning solution because excess moisture can leave streaks behind.
Work in small sections, rinsing your cloth often, and wipe in a consistent direction for the best results.
Finish up with a dry, lint-free cloth to buff the surface and give it a shiny, streak-free look.
Conclusion
So there you have it—your foolproof guide to banishing grease from your cabinets without turning your kitchen into a chemical lab. Follow these steps, avoid common pitfalls, and you’ll have sparkling, fresh cabinets that even your in-laws will envy.
Just remember, a little maintenance goes a long way. Nothing says “I’ve got my life together” like squeaky-clean, grease-free cabinets.
Now go forth and conquer that kitchen mess, chef! Keep those grease stains at bay and enjoy your spotless cabinets.