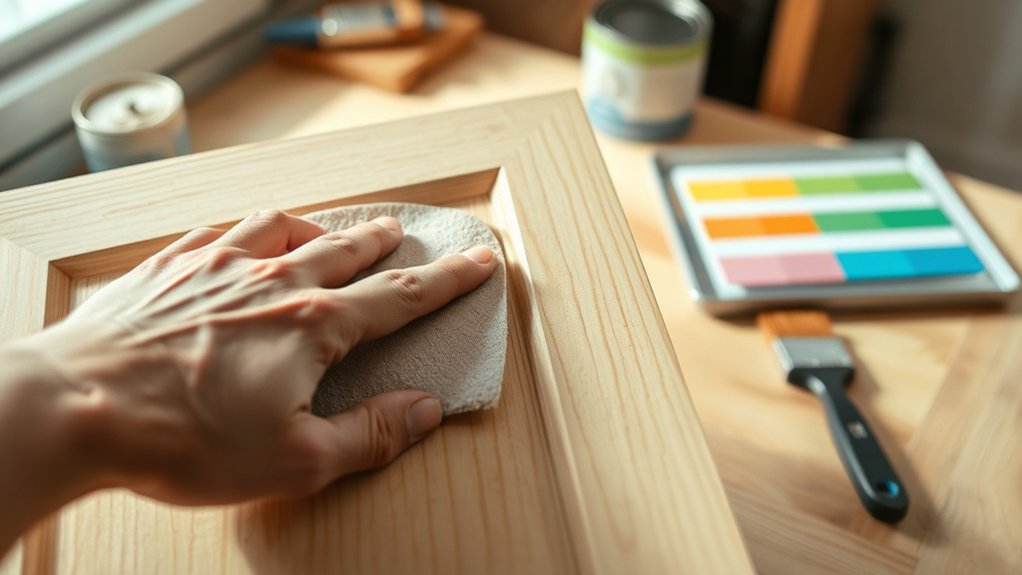
10 Essential Steps to Refinish Kitchen Cabinets
Refinishing your kitchen cabinets can be a game-changer for your space, but let’s be honest—you’re not alone if the thought feels overwhelming. Many people struggle with knowing where to start or worry about ending up with a less-than-professional look.
Don’t worry, though—revamping your cabinets is totally doable with a step-by-step approach.
To refinish your kitchen cabinets, start by gathering supplies like primer, paint or stain, brushes, sandpaper, and safety gear.
Clear your workspace, remove hardware, and thoroughly clean and sand the cabinets. Repair any damage, then apply primer for better adhesion.
Follow with your chosen finish, applying multiple thin coats, and let each dry properly. Finally, reinstall hardware and finish with maintenance tips.
If you keep going, you’ll uncover more detailed steps for a professional result.
Key Takeaways
- Prepare your workspace and gather quality supplies like primer, paint, brushes, and safety gear before starting.
- Remove the hardware from your cabinets and give them a thorough cleaning. Lightly sanding the surfaces will help the primer and paint stick better.
- If there are any damages, fill them in with wood filler and sand smooth once it’s dry. This makes for a nice, even surface before you start priming.
- Choose the right finish for your cabinets—glossy, matte, or satin—and apply thin, even coats. Make sure to follow the manufacturer’s instructions for best results.
- Let each coat dry completely before adding another. Once everything is dry, reinstall the hardware.
- To keep your cabinets looking good, do regular maintenance and cleaning. This way, they’ll stay fresh and beautiful for years to come.
What Supplies Do You Need to Refinish Kitchen Cabinets?

Before you start refinishing your kitchen cabinets, make sure you have all the supplies you need. You’ll want a good-quality primer and paint or stain, depending on the look you’re going for.
Get a variety of brushes and foam rollers for smooth application, along with paint trays and drop cloths to protect your countertops and floors.
Use diverse brushes, foam rollers, paint trays, and drop cloths for a smooth, protected finish during your cabinet refinishing.
Sandpaper or a sanding block is essential for smoothing surfaces before painting, and a tack cloth helps remove dust afterward.
Don’t forget painter’s tape to protect edges and hardware. You’ll also need a putty knife and wood filler to fix any dents or holes.
Finally, gather safety gear like gloves, masks, and goggles to keep yourself protected during the project.
Having these supplies ready will make your refinishing project go more smoothly and efficiently.
How to Prepare Your Workspace and Remove Hardware
Start by clearing your countertops and protecting nearby surfaces with drop cloths or painter’s tape.
Then, carefully remove all hardware from your cabinets and label each piece. This will help you remember where everything goes later.
This preparation makes the refinishing process smoother and helps prevent losing any hardware along the way.
Clear the Countertops
Clearing your countertops sets the stage for a smooth refinishing process, so remove all items to create a clean workspace. This prevents debris from settling on surfaces and helps reduce accidents.
Take everything off, including small appliances, dishes, and decor. Use a tray or box to gather loose items for easy relocation. Label hardware and small parts to stay organized.
Here’s a quick overview:
| Item | Action | Tips |
|---|---|---|
| Small appliances | Move to a safe spot | Keep accessible later |
| Dishes | Clear and store | Use temporary containers |
| Decor | Remove and set aside | Protect with cloth |
| Hardware | Collect and label | Use sealable bags |
| Counter surfaces | Wipe down and inspect | Ensure a clean base |
A tidy workspace makes refinishing easier and more efficient.
Protect Surrounding Areas
To protect surrounding areas from dust, paint splatters, and debris, carefully cover nearby countertops, appliances, and flooring with drop cloths or plastic sheeting. Secure the coverings with painter’s tape to prevent shifting during work.
Clear the space around your cabinets to avoid accidental damage and to give yourself room to work efficiently. Move small appliances and decorative items away from the work area, and cover larger items that can’t be moved.
This step keeps your kitchen clean and minimizes cleanup time later. Wearing protective gear like gloves and masks helps safeguard you from dust particles and fumes.
Taking these precautions guarantees your workspace stays tidy and your surrounding areas remain undamaged throughout your refinishing project.
Remove and Label Hardware
Begin by removing all hardware from your cabinets, like handles, knobs, and pulls. Keep a small container or labeled bags nearby to store each piece.
Label each bag or container with the cabinet location it belongs to, such as “Top Left” or “Lower Right.” This helps prevent confusion later and makes reinstallation easier.
Take your time to carefully remove all hardware without scratching the cabinetry. Once done, set the hardware aside in a safe spot where it won’t get lost or damaged.
Labeling keeps you organized and makes reassembling smoother. Remember, tracking every piece now will save you time and frustration when putting everything back together.
How to Clean and Sand Cabinets for the Best Finish
Start by thoroughly cleaning your cabinets to remove grease, dust, and grime that can interfere with the finish. Use a mild degreaser or warm soapy water and a sponge or cloth to wipe down all surfaces.
Rinse with clean water and dry completely. Once clean, lightly sand the cabinets with fine-grit sandpaper (around 220 grit) to create a smooth surface and help the new finish adhere better.
Be sure to sand in the direction of the wood grain and remove any dust with a tack cloth or damp cloth afterward. Proper cleaning and sanding are vital steps that guarantee your finish will look smooth, even, and long-lasting.
Taking your time here will make a noticeable difference in your final results.
How to Repair Damaged Cabinets Before Refinishing
Before refinishing, take a good look at how badly your cabinets are damaged. This will help you figure out what repairs you need to do first.
Gather the right supplies like wood filler, sandpaper, and putty to fix any imperfections. Having everything ready makes the process smoother.
Next, carefully carry out the repairs to make sure the surface is smooth and even. A good repair job will give you a better finish in the end.
Assess Damage Extent
To properly assess the damage on your cabinets, carefully examine each surface for scratches, dents, water stains, or peeling finish. Look closely at cabinet doors, drawers, and frames to identify areas needing repair.
Note deep gouges or cracks that might require filling or replacement. Check for water damage, such as swelling or discoloration, which could weaken the wood.
Determine if the finish is chipped or peeling, revealing bare wood underneath. Assess whether hardware is loose or corroded.
Understanding the extent of damage helps you decide if repairs are minor or more extensive. This step guarantees you don’t overlook any issues before moving forward with refinishing, saving you time and effort later.
Proper assessment creates a solid foundation for successful cabinet restoration.
Gather Repair Materials
Gathering the right repair materials is essential for fixing damaged cabinets effectively. First, identify the specific issues, like scratches, dents, or loose hinges.
For scratches and gouges, you’ll need wood filler or putty that matches your cabinet color. Use sandpaper to smooth the repaired areas afterward.
If parts are loose or broken, gather wood glue, clamps, or replacement hardware. For larger damages, you might need replacement panels or veneer patches.
Keep a clean cloth, painter’s tape, and primer on hand to prepare surfaces for refinishing. Make sure all tools and materials suit your cabinet type—whether wood or laminate.
Having these supplies ready helps you work efficiently and achieve a seamless repair before moving on to refinishing.
Execute Proper Repairs
Start by evaluating the damage and prioritizing repairs to guarantee a smooth refinishing process. Identify cracks, chips, or water damage, and decide which need immediate attention.
For minor scratches or dents, use wood filler or putty to fill in the imperfections. Sand smooth once it dries to create an even surface.
If you find loose or broken cabinet parts, reattach or replace them with appropriate hardware. For water stains or discoloration, consider lightly sanding or using a stain remover to even out the surface.
Always verify repairs are solid and smooth before moving on to sanding and finishing. Properly executing repairs prevents issues during painting or staining, resulting in a professional-looking finish.
Take your time to get repairs right for the best results.
How to Prime Your Cabinets for Better Paint or Stain Adhesion
Applying a high-quality primer is essential to ensure your paint or stain adheres smoothly and lasts longer. First, clean your cabinets thoroughly to remove grease, dust, and grime.
Lightly sand the surfaces to create a rough texture, helping the primer stick better. Choose a primer suitable for your cabinet material, whether oil-based or latex, depending on your finish.
Use a high-quality brush or roller to apply an even coat, covering all surfaces including corners and edges. Allow the primer to dry completely, following the manufacturer’s recommended time.
If needed, lightly sand again to smooth out any imperfections before moving on to painting or staining. Proper priming secures better adhesion, a more uniform finish, and increased durability of your final coat.
How to Choose and Apply the Best Finish for Your Cabinets
Choosing the right finish for your cabinets can really change how they look and how long they last. First, think about the style you want—glossy, matte, or satin.
For a modern, sleek vibe, go with a high-gloss or semi-gloss finish. If you prefer a softer, more natural look, matte or satin finishes are the way to go.
Consider the cabinet material too. Water-based polyurethanes are durable and dry quickly, while oil-based finishes add richness and depth.
When applying the finish, you can use a brush, roller, or spray for a smooth coat. Just be sure to follow the manufacturer’s instructions for the best results.
Always pay attention to drying times and application tips to make sure your cabinets look gorgeous and handle daily wear well.
How to Ensure Proper Drying Between Coats
To guarantee proper drying between coats, you need to create an ideal environment by controlling temperature and humidity.
Applying thin, even coats allows the finish to dry faster and more evenly. Make sure to give each coat enough time to dry completely before adding the next.
Optimal Drying Environment
Ensuring proper drying between coats is key to getting a smooth, durable finish on your kitchen cabinets. To do this, focus on controlling temperature, humidity, and airflow.
Keep the temperature steady around 70°F (21°C) to help the paint dry evenly. Low humidity levels, ideally between 40-50%, prevent long drying times or smudges.
Use a fan or ventilation to boost airflow, but avoid direct blasts that could settle dust on the wet surface.
Thin, Even Coats
Applying thin, even coats of paint or stain is key to getting a smooth, professional finish on your cabinets. Thick layers can cause drips, uneven drying, and an ugly look.
To make sure each coat dries properly, use a good-quality brush or roller and apply the paint in long, smooth strokes. Don’t overload your tool, as that can lead to uneven coverage.
After each coat, let it dry completely—usually a few hours, but check the product’s instructions and consider your environment. Proper drying helps prevent streaks or brush marks and ensures the next coat sticks well.
Patience and attention to detail during this step really pay off. Taking your time helps you achieve a flawless, durable finish that looks great and lasts.
When and How to Reinstall Hardware and Final Touch-Ups
Once you’ve finished sanding, painting, or staining your cabinets, it’s time to reinstall the hardware and add those final touches. Make sure the paint or stain is completely dry first to avoid smudges or damage.
When putting the hardware back on, start by lining up knobs and pulls to ensure they’re straight and evenly spaced. Then, tighten the screws firmly but don’t overdo it, as overtightening can cause damage.
Next, open and close the doors and drawers to make sure everything works smoothly. For final touches, wipe down the surface with a soft cloth to remove dust or fingerprints. If you notice any spots or scratches, touch them up with matching paint or stain for a perfect finish.
Tips for Getting a Smooth, Professional-Looking Finish
To achieve a smooth, professional-looking finish on your cabinets, focus on your painting or staining techniques. Start by applying thin, even coats instead of thick layers, which can cause drips and uneven coverage.
Use high-quality brushes or foam rollers to minimize brush strokes and create a sleek surface. Sand lightly between coats to smooth out imperfections and improve adhesion.
Keep your workspace dust-free to prevent debris from settling on the finish. For staining, wipe off excess stain promptly and evenly to avoid blotches.
When spraying, maintain a consistent distance and steady hand for a uniform coat. Patience is key—allow each layer to dry thoroughly before applying the next.
These tips will help you achieve a flawless, professional finish that makes your cabinets look amazing.
How to Maintain and Care for Your Refinished Cabinets
Maintaining your refinished cabinets is key to keeping them looking their best for years to come. Proper care helps prevent scratches, stains, and peeling, protecting your investment.
Here are three simple tips:
- Clean regularly with a soft cloth and gentle soap to remove dust and grease.
- Avoid harsh chemicals or abrasive scrubbers that can damage the finish.
- Use protective pads on cookware and utensils to prevent scratches.
Also, wipe up spills immediately to avoid stains. Keep humidity levels steady to prevent warping or peeling.
A little regular dusting and gentle cleaning will help your cabinets stay fresh and polished. Consistent maintenance ensures they remain a beautiful feature in your kitchen for years.
Frequently Asked Questions
How Long Does the Entire Cabinet Refinishing Process Typically Take?
Refinishing your cabinets usually takes about 3 to 7 days, depending on their size and condition. You’ll spend the first day cleaning and prepping.
Then, it’ll take several days for sanding, applying primer, and painting or staining. If you’re doing it yourself, expect some extra time for drying between coats.
Hiring professionals can speed things up, but it still generally takes around a week to finish the whole process thoroughly.
Can I Refinish Kitchen Cabinets Without Sanding?
About 70% of homeowners prefer sanding before refinishing for a smooth, long-lasting finish. You can technically refinish kitchen cabinets without sanding, but it’s not recommended. Skipping this step can cause poor adhesion, uneven surfaces, and chipping.
Instead, consider thorough cleaning or using a deglosser. These methods can prepare your cabinets pretty well, but sanding is still the most reliable way to ensure a professional, durable finish.
What Are Common Mistakes to Avoid During Cabinet Refinishing?
You should avoid rushing the prep work, as skipping sanding or cleaning can cause paint to peel or chip later.
Don’t use too much paint or primer at once, which can lead to drips and uneven finishes.
Also, neglecting proper ventilation can result in fumes and poor drying.
Be patient with drying times and follow manufacturer instructions closely to guarantee a smooth, durable finish.
How Can I Ensure Even Color and Finish Application?
Like a savvy 1920s flapper, you want your cabinets to shine evenly. To do this, apply your stain or paint in thin, consistent coats using a high-quality brush or roller. Work in the direction of the wood grain and keep a wet edge to avoid lap marks.
Sand lightly between coats for a smooth finish. Don’t rush—patience is key for an even, flawless look that’ll wow your guests.
Is It Necessary to Remove All Cabinet Doors During Refinishing?
No, it’s not strictly necessary to remove all cabinet doors during refinishing. However, taking them off makes the job much easier and helps you get a more even, professional look.
When you remove the doors, you can access all surfaces easily, avoid drips on nearby areas, and apply paint or stain more precisely.
If you decide to leave the doors on, just be sure to mask the hinges and surrounding areas carefully to prevent unwanted paint or stain.
Conclusion
With patience, preparation, and precision, you can transform tired cabinets into a stunning statement.
By following these simple steps, you’ll ensure a smooth, satisfying finish that lasts over time.
Remember, consistent care and commitment help create cabinetry that truly enchants and endures.
So stay steadfast, and soon your space will shine with the success of your refinishing efforts.
Your kitchen’s new look is just a few steps away!